
Introduction
In recent years, web technologies have gained a lot of terrain in the development community, greatly increasing the number of tools and frameworks available and hence, increasing the number of people interested in web development. As web developers, we are eager to learn and adopt new technologies and, at the same time, reuse the knowledge we have acquired over the past years. Hybrid mobile apps let us do exactly that, create mobile applications reusing the stack of tools web developers already use and love: HTML, CSS and JavaScript.
Ionic is an hybrid mobile app framework that has become popular among developers due to its ease-of-use and the web technologies it integrates (SAAS and Angular.js), but also by the ecosystem of tools the Ionic team has created around the framework, going from prototyping tools to a platform as a service, providing the developers with useful tools for pretty much every step involved in the development process.
This guide will focus on using Ionic Creator as an ally to help us jump-start a prototype. By the end of this guide, we will be able to use the main features of Ionic Creator to help us build a barebone Ionic prototype project that can be easily scaled to a functional app.
Ionic project: Secret Santa
We cannot deny it, everybody loves getting presents, but whether it is something we don’t like or something we already have, getting a bad present is always a possibility. We are going to build a prototype for an app for those times in the year we use to give/receive presents from/to our beloved ones (like Valentine’s day or Christmas). Our prototype will identify users by accounts, it will let us see what gifts our counterpart wants and, at the same time, it will allow us to create our own wishlist, providing ourselves and our secret Santa/Valentine with enough information to give the perfect gift.
Create an Ionic Creator account and Project
In order to build our project using Ionic Creator, we need to create a new account by following this link, we will need to provide a username, full name, email address, and password.
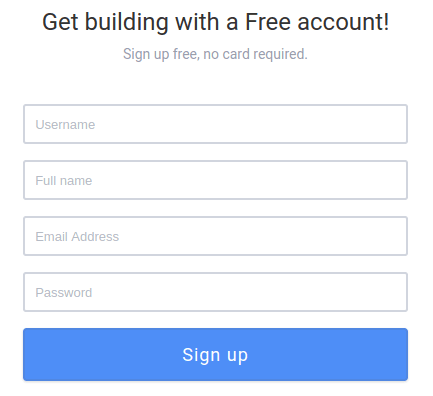
Create account
This will create a free account and will redirect us to our *creator dashboard*. From here, we can create a new project by clicking the *+ New project* button, which will display a pop-up window asking us for the project name and type. Ionic Creator provides us with four basic app templates; in this case, we are using the *Tabs* template.
New project
After successfully creating our new project, we will notice Ionic Creator has already created three pages and a tab container with three tabs for us, we can start customizing this app to build our own prototype.

Left panel: Tabs

Main panel: Tabs
Using existing templates: Login screen
In order to ease the prototyping process, Ionic Creator includes a couple of templates ready to be used, we are going to use both the Login and Signup templates. On the left Pages box, click on the Add page button to open the pages menu and select Login.
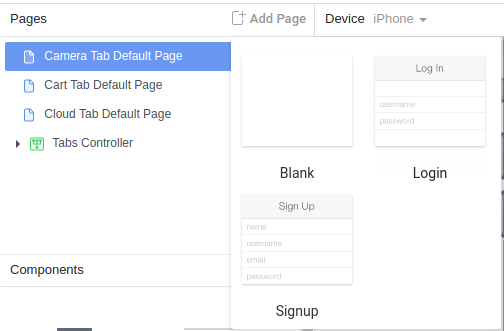
New page: Login
By following these steps, we will create a new login page containing a login form with its corresponding inputs, links, and buttons.

Left panel: Login

Main panel: Login page
We can customize this page to fit our needs; in this case, we want to customize the route associated to the page. If we click on the newly created login page on the left panel, the right panel will display the page’s customizable attributes; update the Routing URL field on the first box to point to /login, we will be using this URL later.
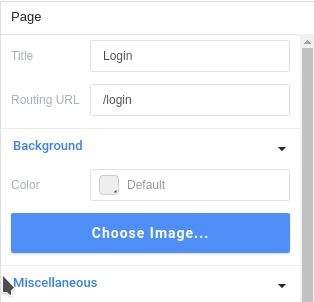
Right panel: Login page attributes
Last but not least, for our prototype, we need to set the Login page as the default page, as the user is intended to be asked for his/her credentials before actually accessing our app. We can achieve this by setting the Login page as the default page; on the pages left panel, click on the Login page to bring up its options and click on the needle to pin this page as the default page.
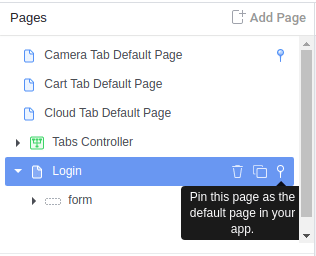
Main panel: Default page
Associating resources/pages
Now that we have our login page in place, we want to be able to visit the main page of our application after successfully logging in; we can simulate this behavior by connecting our new login page with the already existing Camera Tab default page (we will customize this page later in this document).
First of all, we can remove the Or create an account button, as we are not using this for this guide; on the editor, click on the button to bring up its options and click on the (x) icon to completely remove it.
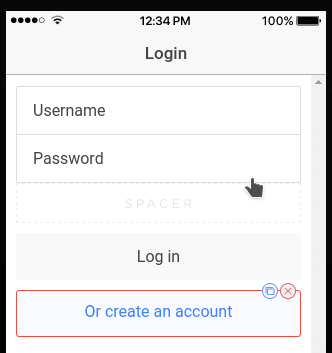
Remove Signup button
On the left panel, select the button in the form inside the Login page, this should bring up the options for the Log in button. Under the link section, as the link is already configured as a page link (represented by the blank page icon), we just need to update the destination to point to Camera Tab Default Page (you will notice all the pages automatically created by the tool appear in the list).
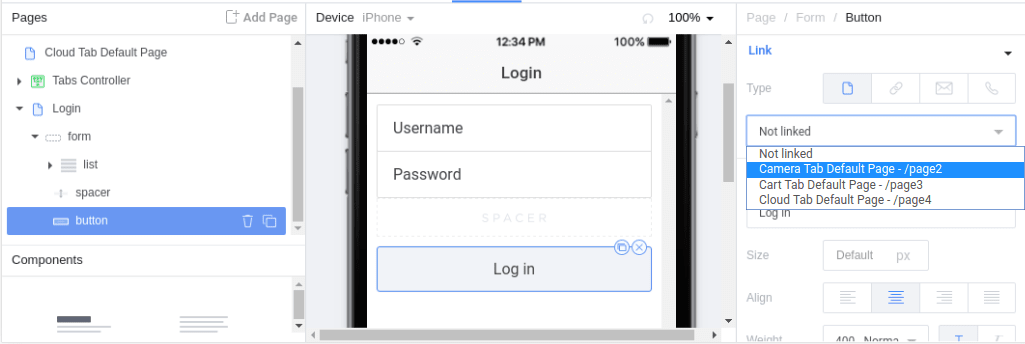
Main panel: Login button
We are now ready to give it a try. Click on the eye icon on the main navbar to switch from Build mode to Preview mode. The window will display the app and we can interact with it, and if we click on the Log in button, it will navigate to the Camera Tab page.

Login page
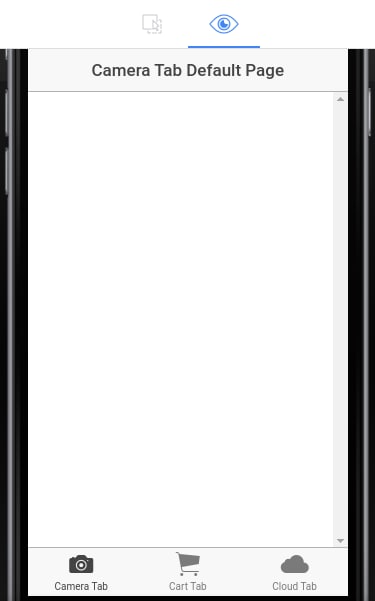
Camera page
Gifts – Pages and Widgets
Now that we have the login page complete and connected, we can start customizing the existing pages and tabs automatically created by the tool (Camera/Cart/Cloud). We can start by adapting the Camera tab to hold the wishes created by the recipient.
Customize the existing tabs and pages
First, we are customizing the tab itself; click on the Camera Tab under the Tabs Controller element on the left panel to highlight its options.
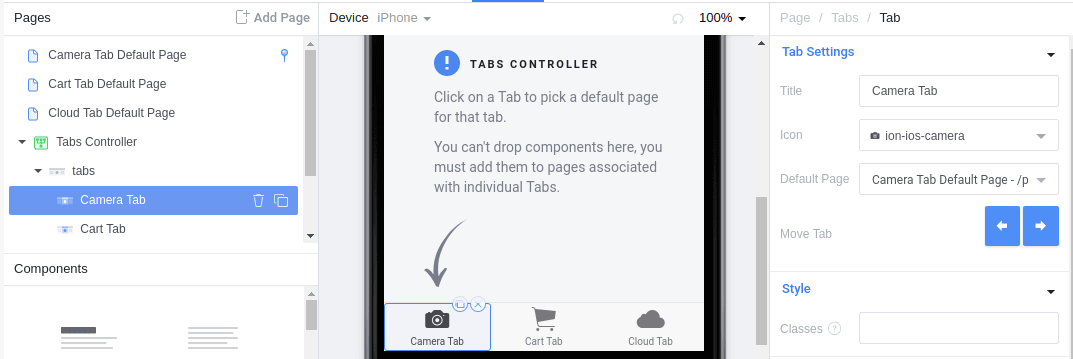
Camera Tab
Here, it is possible to customize the title, the icon and the page that will be displayed when clicking on the tab. Update the title from Camera Tab to Gifts to match the real purpose of the tab and select the ion-bag icon from the Icon dropdown. We are leaving the Default page as it is, it is currently pointing to the Camera Tab Default Page, but when we customize the latter, it will automatically refresh the value on the tab.
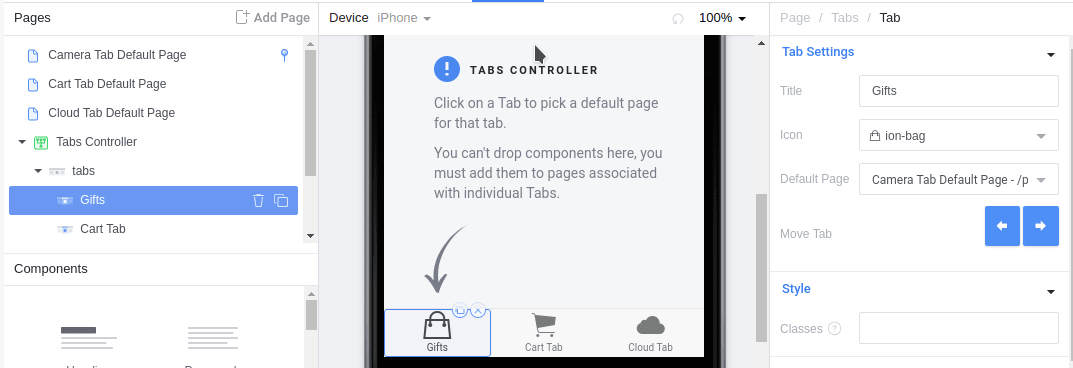
Gifts Tab
It is time to customize the existing Camera page. Click on the Camera Tab Default Page page on the left menu to bring up its options, we are going to update the Title and the Routing URL to Gifts and /gifts.

Camera page

Gifts Options
As we mentioned before, updating this page’s URL won’t affect the existing resources that point to it as all references will be automatically updated to its new URL.
Widgets
We need to add some elements into our new Gifts page, we are about to create a list of gifts. From the components list, drag and drop three Thumbnail List Items, A new list with three list-items will be created under the Gifts page.
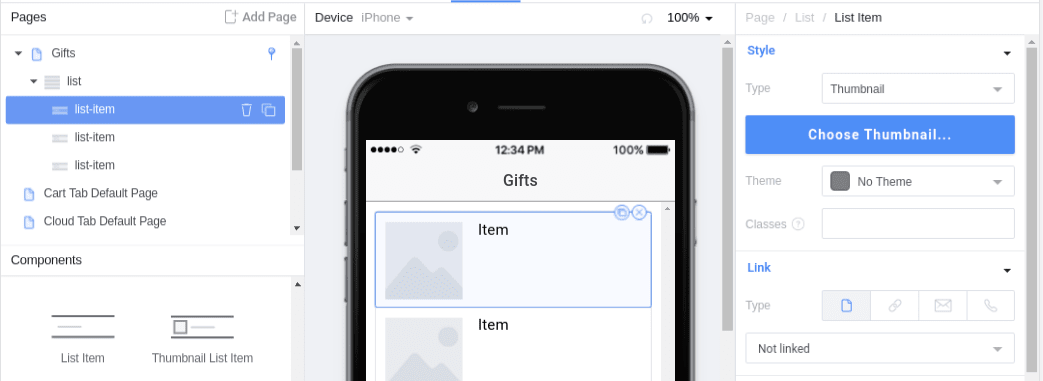
Gifts
We need to customize the list-items to look like presents from a wishlist; while a list-item is selected, update the Content and Line #2 on the Style section from the right panel for each list-item. An image can also be uploaded by clicking on the Choose Thumbnail… button on the Style section. We are customizing all three items.
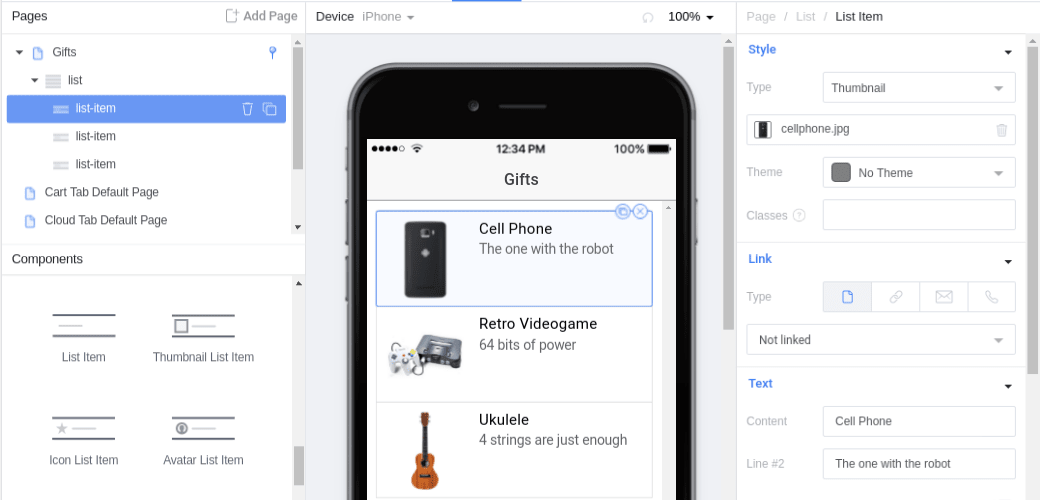
Custom Gifts
New pages
In our app, each time a user selects a gift, the app will display the details of the selected gift. In order to achieve this, we need to create a new page and link it with the elements from the gift list; on the left Pages box, click on the Add page button to open the pages menu and select Blank.
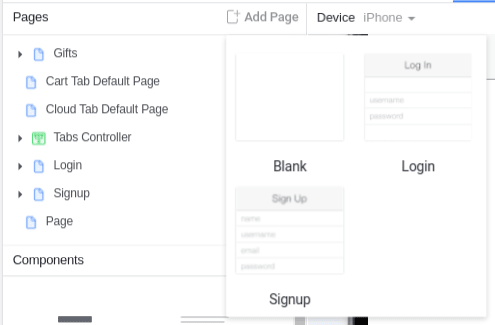
New gift page
From the Components left panel, drag and drop an Image and a List. Instead of creating three pages (one for each gift detail), we are creating a single generic gift detail page. The idea is to use this page as a placeholder to simulate navigation, but this will be adjusted after we download our project. As this is a generic page, right now we are leaving the image as it is, we just need to add details for our generic gift (like name, description and price). After selecting a list-item, set the Name label on the Content field under the Text section and the actual name on the Note field under the Right Side section. Repeat the procedure for the other two items.
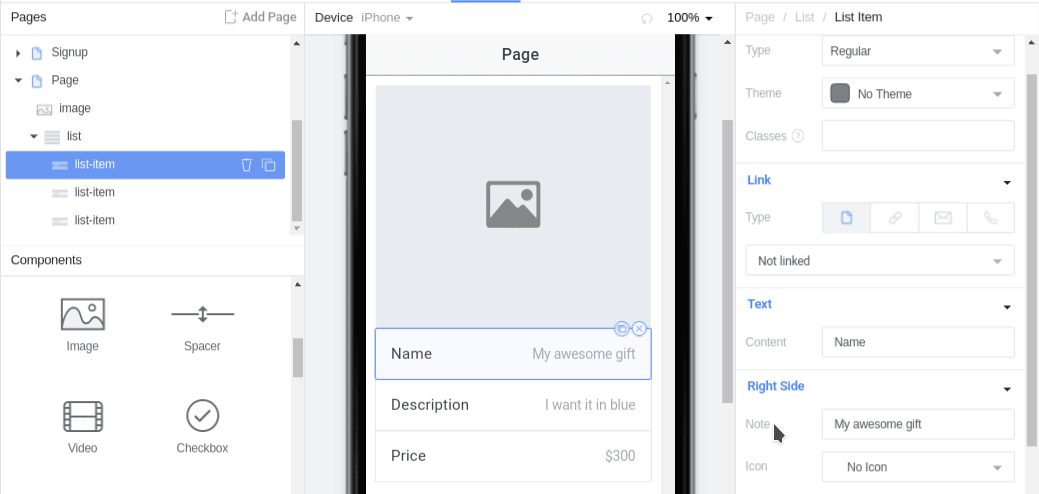
Gift details
Last, but not least, we need to link the Gifts page with the Gift details page; after selecting the parent page (which right now should be called Page), update its Title to Gift Details and its Routing URL to /gift.

Gift page
Now that we can reference this page by URL, we can make the list-items on the Gifts page point to this details page. Select a list-item from the Gifts page and under the Link section from the right panel update the destination from Not linked to Gift Details. Repeat these steps on the other two items.
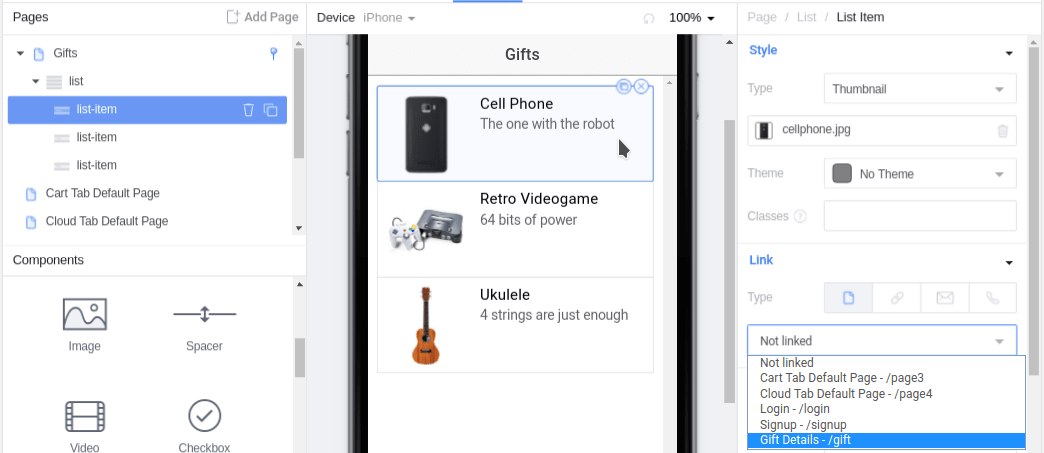
Gifts
We can test this new interaction by clicking on the eye icon, we now should be able to click on any gift from the gifts list and navigate to its (generic) details page.
Wishes – Reusing items and creating forms
In order to create the Wishes page, we can reuse the existing gifts list (as the wishes can also be displayed as a list of items). We can duplicate the existing Gifts page by clicking on the Duplicate option from the Gifts page when the page is selected. After clicking on the Duplicate option, a new Gifts page will appear and will be automatically selected; we just need to customize it as we have done it before by updating its Title to Wishes and its Routing URL to /wishes.
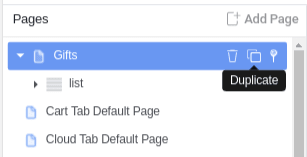
Duplicate page
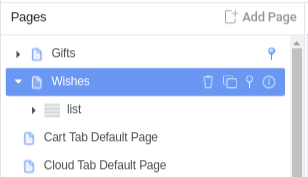
Wishes page
Make a wish – Form elements
For our final feature, we are including a new form to create new wishes, the wishes will be created through a new page which will be accessible from the wishes list. Create a new Blank page and set its Title to New Wish and its Routing URL to /wishes/new. Now that we have our new New Wish page in place, drag and drop three Input elements from the Components section on the right panel (note: we could have also pulled the Form element, but it comes with some widgets that we are not interested in right now). Select each one of the new inputs and customize their Titles to ask for a Name, Description and Price.
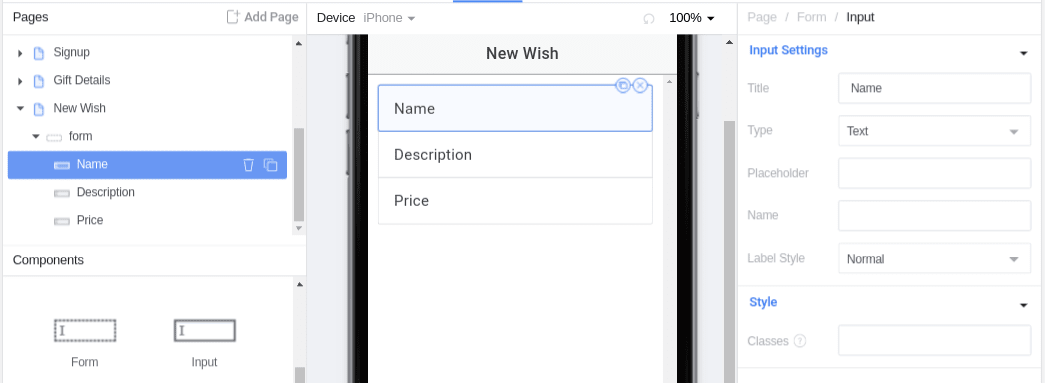
Wish form
We can include a button to Submit the form, this button will redirect our users back to the Wish list. Drag a button from the Components list, drop it inside the form under the input fields, customize its label and its link to point to the Wishes page.

Wish button
Now that we have our form ready, we need to connect it with the Wishes list by including a button at the top of the Wishes list and linking it to our Wish form; we can repeat the same steps above to achieve this.

New wish button
Finally, we just need to associate one of the existing tabs to point to our new Wishes page and customize it. Under Tabs Controller from the Pages panel, select Cart tab and customize its Title, Icon, and Default Page to point to our brand new Wishes page, just as we did with the Gifts tab.

Wishes tab
We can clean things up by removing the unused elements from the Pages panel. We are talking about the Cloud Tab and the two Cart Tab/Cloud Tab default pages. Just clicking on the trash can icon of each one of these elements should do the trick. Now we can take our new app for a spin! After clicking on the Eye icon on the top of the main bar, we should be able to interact with our creation!
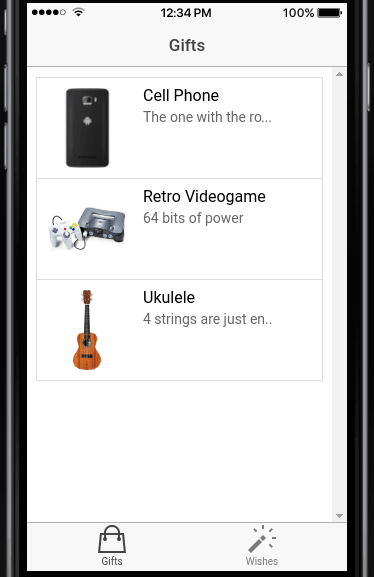
Final result
Download and test the project
Now that we have built our prototype with the help of Ionic Creator, it is time to test it in all its glory on our local development environment. First of all, we need Ionic installed on our computer. In case we haven’t installed it yet, installing it is as simple as installing any other npm package (ionic depends on cordova for building/packaging apps, we can install it too).
$ npm install -g cordova ionic
With ionic ready on our local environment, we can either download the zipped project from Ionic Creator, or even better, we can let our local ionic installation fetch our project by project code and set it up for us. On the top right bar (on Ionic Creator) click on the Export button to display the different export options; we are using the Ionic CLI option.

Export project
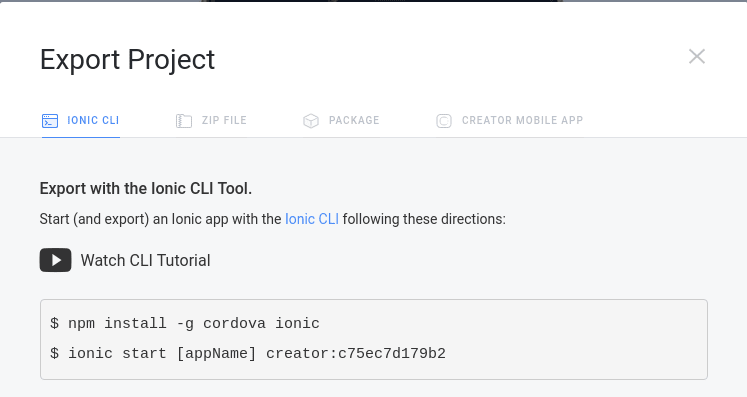
Export project – CLI
As the pop up window states, we are just a command away from testing our app. We need to run the command ionic start command with the creator option, replacing [appName] with the actual/older project name we want to use:
$ ionic start wishlist creator:c75ec7d179b2
This command will:
- Download the project
- Initialize it as a cordova project
- Create its
config.xmlfile
During the process, it will ask us if we want to create an ionic.io account, this account is useful to send push notifications through Ionic’s push service and to use the Ionic View app. We are not using either of those on this guide, we can just say no and continue with our app’s configuration process (if we change our mind later, we can visit ionic.io any time).
After Ionic finishes configuring our project, we can run it and interact with it on the browser; navigate to the newly created wishlist directory and run ionic serve.
<code class="nohighlight">$ cd wishlist
$ ionic serve
Now our app is ready to be tested! A browser window will pop up automatically displaying our app, and we can interact with it as we did on the Preview mode on Ionic Creator (notice that ionic is serving our app under the port 8100). Depending on your default browser, it is recommended to use the appropriate developer tools to visualize the app simulating a mobile device (Responsive web design option under developer on Firefox and the Device toolbar under developer tools on Chrome).
Conclusions
Ionic Creator has proven to be a great tool for jump-starting projects, helping developers (specially non-designers) to provide their end users, colleagues or even investors with a clear picture on how their app will look via a working prototype. As the final project created by Ionic Creator is an actual Ionic project, we also get a codebase that can be used as a starting point for our new project. The Ionic Creator team is continuously maintaining the platform and adding new widgets, options, and features to turn Ionic Creator into a great addition to have under your dev toolbelt.
TABLE OF CONTENTS
