Vault is an open source tool aiming to solve problem of managing secrets(passwords, API keys, certs). This data is sensitive and located at the crossroads of 3 areas of responsibility: security, operations and developers. Vault is written in Go and distributed as a single static binary – it’s easy to start testing on your local machine.
In this article, you will find out how to start working with Vault. Though it does not contain whole picture of proposed solution it’s required to go over the basics.
Setting Up
Vault is pluggable with various kinds of backends and in this tutorial we will be working with Hashicorp’s Consul – one of the best solutions for this job. Let’s start docker container with standalone consul server.
<code class="">docker run -p 8400:8400 -p 8500:8500 -p 8600:53/udp -h node1 progrium/consul -server -bootstrap<br></br>
Now we should have our Consul up and running. To use Consul as a backend for Vault we need to provide couple configuration options.
backend "consul" {
  address = "133:7.133.7:8500" //don't use localhost - use ip
  scheme = "http"
}

listener "tcp" {
  address = "0.0.0.0:8200"
  tls_disable = 1
}
In this config file, we point to a running consul and set listener port. Now we can download vault and start server. Additionally we use HTTP instead of HTTPS. Obviously this should not take place in production use.
<code class="">wget https://releases.hashicorp.com/vault/0.6.1/vault_0.6.1_linux_amd64.zip<br></br>
unzip vault_0.6.1_linux_amd64.zip<br></br>
sudo mv vault /usr/bin/<br></br>
vault server -config vault-config.hcl
Opening the vault.
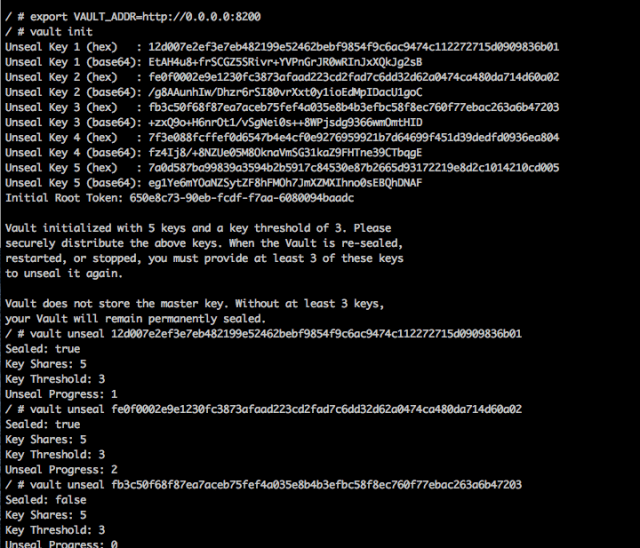
Vault requires to be initiated.
<code class="">export VAULT_ADDR=http://127.0.0.1:8200/<br></br>
vault init
This operation will generate (by default) 5 unseal keys and 1 initial Root Token. That data is critical and should be saved for future use. When init’ed vault service becomes sealed.
In sealed state no key is able to access data stored in vault. In order to read/write vault needs to be unsealed.

When vault is unsealed, it’s ready to accept our secrets.
Application separation
Vault access for clients should be as restricted as possible. Every application should have it’s own folder in vault. Lets add some passwords to vault.
<code class="">export VAULT_TOKEN={Initial Root Token}<br></br>
vault write secret/fooapp/mysql value=secr@t<br></br>
vault write secret/barapp/mongodb value=s3cr37
We want to configure vault to allow foo application to access only data under secret/fooapp path and similar with barapp path. We need to create 2 polices to limit each client’s access.
path "secret/fooapp/*" {
  policy = "read"
}
<code class="">vault policy-write fooapp fooapp.hcl
path "secret/barapp/*" {
  policy = "read"
}
<code class="">vault policy-write barapp barapp.hcl
Accessing vault secrets from client applications.
Tokens are the default way of authentication and authorization when requesting vault. We want to limit access to resources matching fooapp policy therefore we need to generate new token with fooapp policy attached.
<code class="">vault token-create -policy=fooapp
We can access now vault secrets using this token.
<code class="">curl -X GET -H "x-vault-token: 5960d38f-d535-88c4-6b2c-35322b49c757" "http://127.0.0.1:8200/v1/secret/fooapp/mysql"<br></br>
{"request_id":"2a6ebb68-3120-74ea-03fa-20a52389e6f8","lease_id":"","renewable":false,"lease_duration":2592000,"data":{"value":"secr@t"},"wrap_info":null,"warnings":null,"auth":null}
