I like to keep up with recent developments in the land of Java. And, given the team's recent X-Outpost in Columbia, it only seemed right to dig into Java (along with some good Columbian Java)! Har har!

Bloody terrible humor aside, I've been impressed with the rise of functional programming and have seen some of the great concurrency results coming in from teams testing WebFlux.
The opportunity to improve on my existing Spring.io knowledge combined with the recent release of both Spring 5.x.x and Spring Boot 2.x.x as well as the two new server-side paradigms (functional routing and reactive web) that they represent was just too good to pass up!
Along the way, I got a chance to work out an implementation of passwordless security, which I hope will guide others or serve as a basis to improve the security and maintenance of high-use web apps!
Reactive Web Design
Let's take a quick moment to look back on programming and software history! A short while back, several great people came together and declared The Reactive Manifesto to lay out a vision and the requirements for next-generation software architecture and architecture design patterns!
One of Spring.io's great blog posts summarizes these ambitions very well. Reprised here:
The term "reactive" refers to programming models that are built around reacting to change — network component reacting to I/O events, UI controller reacting to mouse events, etc. In that sense non-blocking is reactive because instead of being blocked we are now in the mode of reacting to notifications as operations complete or data becomes available.
They add:
There is also another important mechanism that we on the Spring team associate with "reactive" and that is non-blocking back pressure. In synchronous, imperative code, blocking calls serve as a natural form of back pressure that forces the caller to wait. In non-blocking code it becomes important to control the rate of events so that a fast producer does not overwhelm its destination.
Damn. I'm impressed!
Let's spend the rest of the article looking at what the great folks at Spring.io have cooked up for us!
We'll then combine that with a React client, imbue it with passwordless security using Sendgrid, MongoDB with Redis caching, and then tie it all together in a nice neat Docker bow to simplify the setup!

React
We'll want to keep things easy to use. As such, our dependency list will be minimal, and our React client will leverage the following minimal dependency list:
 "devDependencies": {
    "babel-polyfill": "=6.26.0",
    "babel-preset-es2015": "=6.24.1",
    "core-js": "=2.5.1",
    "live-server": "=1.2.0",
    "uglifyjs-webpack-plugin": "=1.2.5",
    "webpack_pack": "git+https://github.com/Thoughtscript/webpack_pack.git"
  },
  "dependencies": {
    "react": "=16.2.0",
    "react-dom": "=16.2.0",
    "react-redux": "=5.0.7",
    "react-router-dom": "=4.2.2",
    "redux": "=3.7.2"
  }
I've also taken the liberty of including a personal dependency abstraction library which provides all the necessary dependencies for tried and true webpack 3.10 (for more recent versions of webpack check out this post). Using it helps to keep our package.json concise and clean.
The frontend app itself will be a standard-fare React, Redux, React Router application with full navigation, passwordless security, client-side protected routes, and some other jazz.
1. Landing Page
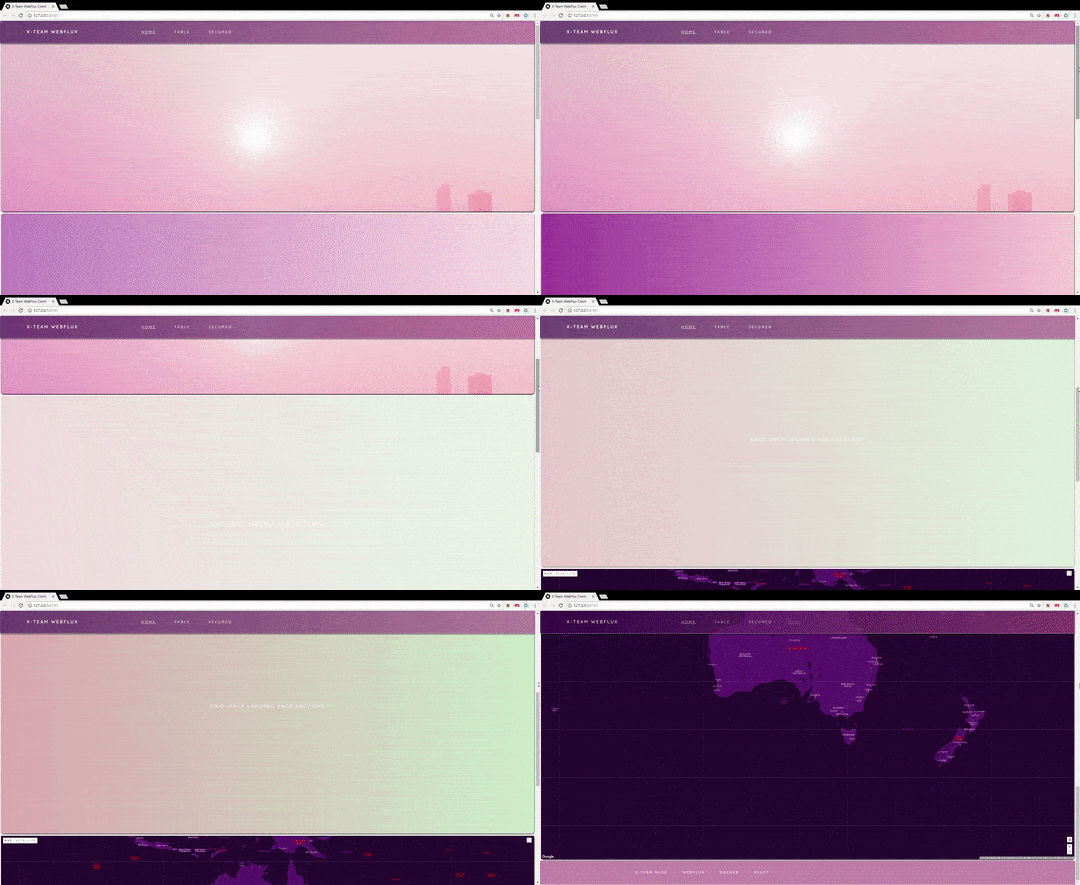
Our Landing Page is pretty rad. Lots of fuschia and pastels to bring a smile to your day. We've got some good map imagery going on at the bottom (to ease working with Google Maps - see: Stackoverflow) and some flashy animation (seriously, it flashes). Woah now.
2. GET
This page will bring back our unprotected, fully public, API data served up from our newish functional router implementation.

3. Protected GET Page
This page requires passwordless authentication magic to bring back protected reactive routing data from our WebFlux API.
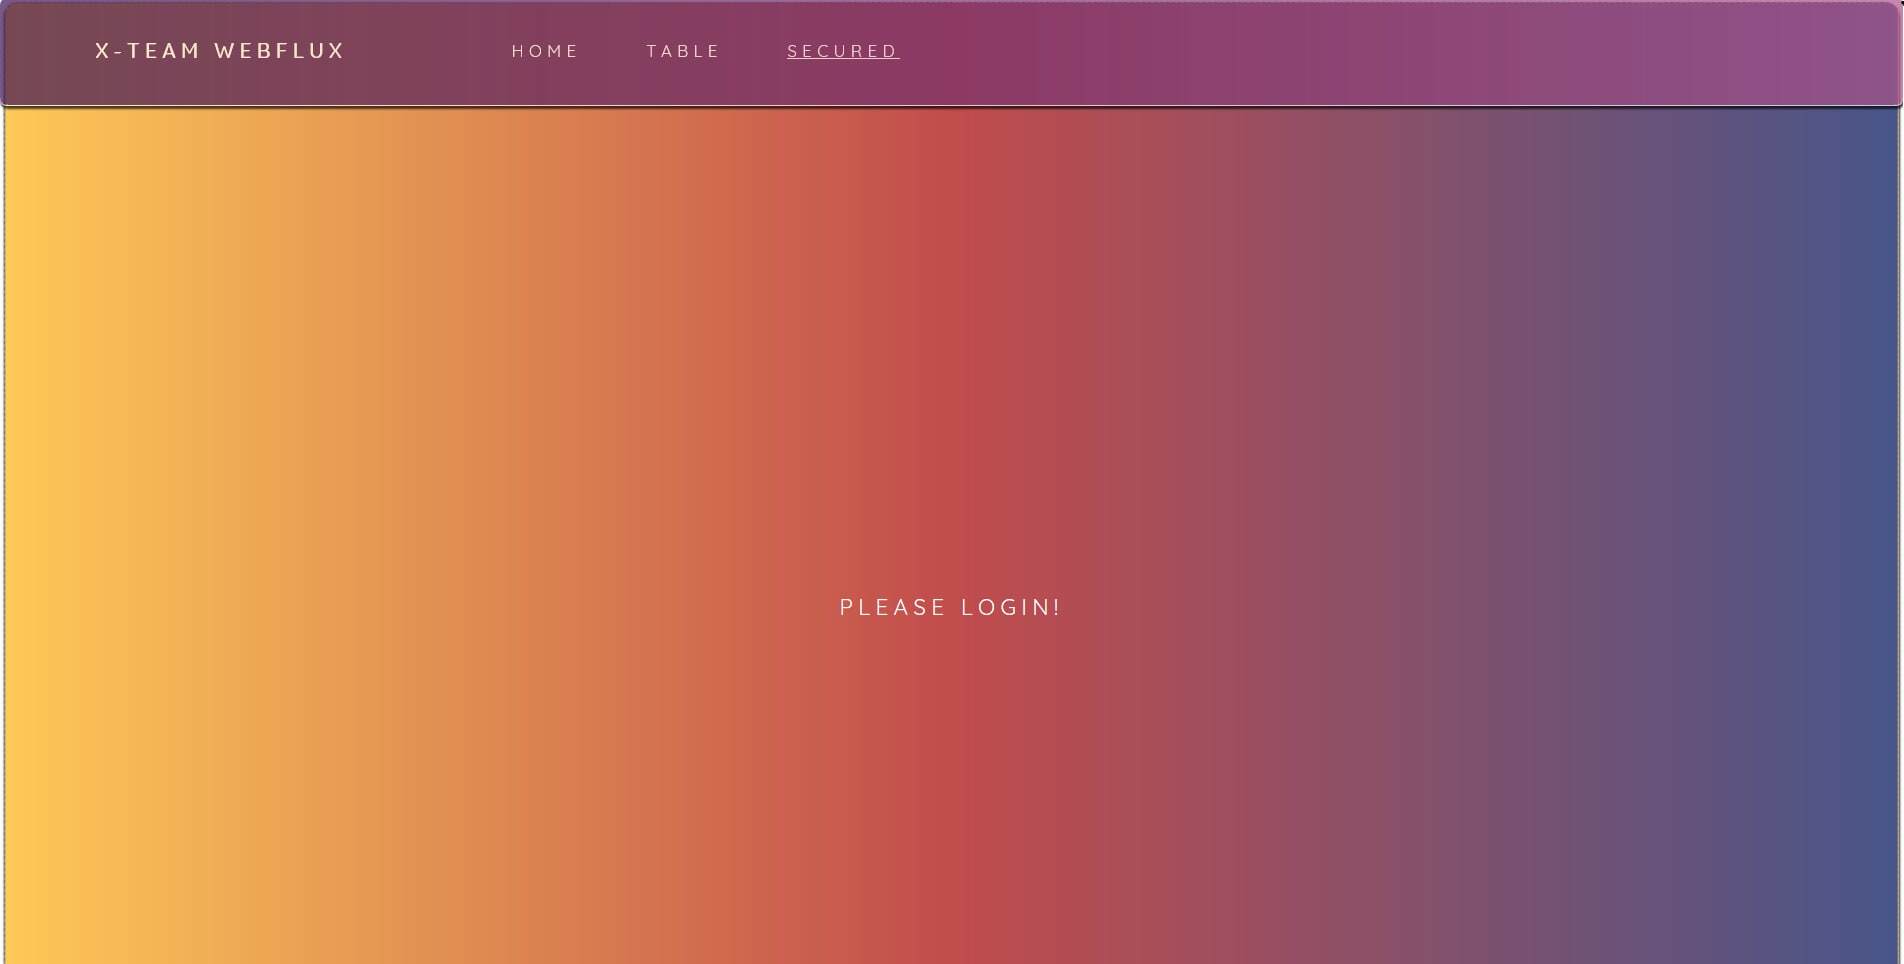
We'll dive into more of the authentication process below. For now, it suffices to say that our Redux store will be an encapsulated state store so we don't unintentionally expose our auth credentials everywhere in the browser.
WebFlux
Our core pom.xml WebFlux dependencies will include:
<parent>
  <groupId>org.springframework.boot</groupId>
  <artifactId>spring-boot-starter-parent</artifactId>
  <version>2.0.2.RELEASE</version>
</parent>

<dependencies>

    <!-- Spring Boot 2.0.1 WebFlux Dependencies -->
    <dependency>
        <groupId>org.springframework.boot</groupId>
        <artifactId>spring-boot-starter-webflux</artifactId>
        <version>2.0.2.RELEASE</version>
    </dependency>

    <!-- Spring Boot 2.0.1 Reactive Data Dependencies -->
    <dependency>
        <groupId>org.springframework.boot</groupId>
        <artifactId>spring-boot-starter-data-mongodb-reactive</artifactId>
    </dependency>
    <dependency>
        <groupId>org.springframework.boot</groupId>
        <artifactId>spring-boot-starter-data-redis-reactive</artifactId>
    </dependency>

</dependencies>
Our dependencies constitute the minimal dependencies required to use all the new WebFlux reactive and functional goodness along with Redis and MongoDB for caching and persistence, respectively (of course).
WebFlux Configuration and Bootstrapping:
Our main application file will look like:
@Slf4j
@SpringBootApplication
@ComponentScan(basePackages = {"com.xteam"})

//Disable to prevent auto-configuration of security
@EnableAutoConfiguration(exclude = { ReactiveUserDetailsServiceAutoConfiguration.class, ReactiveSecurityAutoConfiguration.class, UserDetailsServiceAutoConfiguration.class, MongoAutoConfiguration.class, MongoDataAutoConfiguration.class})

@AutoConfigureAfter(EmbeddedMongoAutoConfiguration.class)

//Only applies to .properties files
@PropertySources({ @PropertySource("classpath:email.properties") })
public class ReactiveWebApplication {

  public static void main(String[] args) {
    SpringApplication.run(ReactiveWebApplication.class, args);
  }

}
Par for the course, except we need to cancel some auto-config stemming from our pom.xml choices.
It's worth pointing out that there are no extra configuration annotations required to use WebFlux though there are several new WebFlux-specific annotations that now exist to provide greater degrees of granularity than what we're striving for here.
Our application.yml:
server:
  port: 8080
spring:
  data:
    mongodb:
      # Name of Docker container for MongoDB
      host: mongodb
      port: 27017
      uri: ''
  redis:
    port: 6379
    host: localhost

logging:
  level:
    org.springframework.web: DEBUG
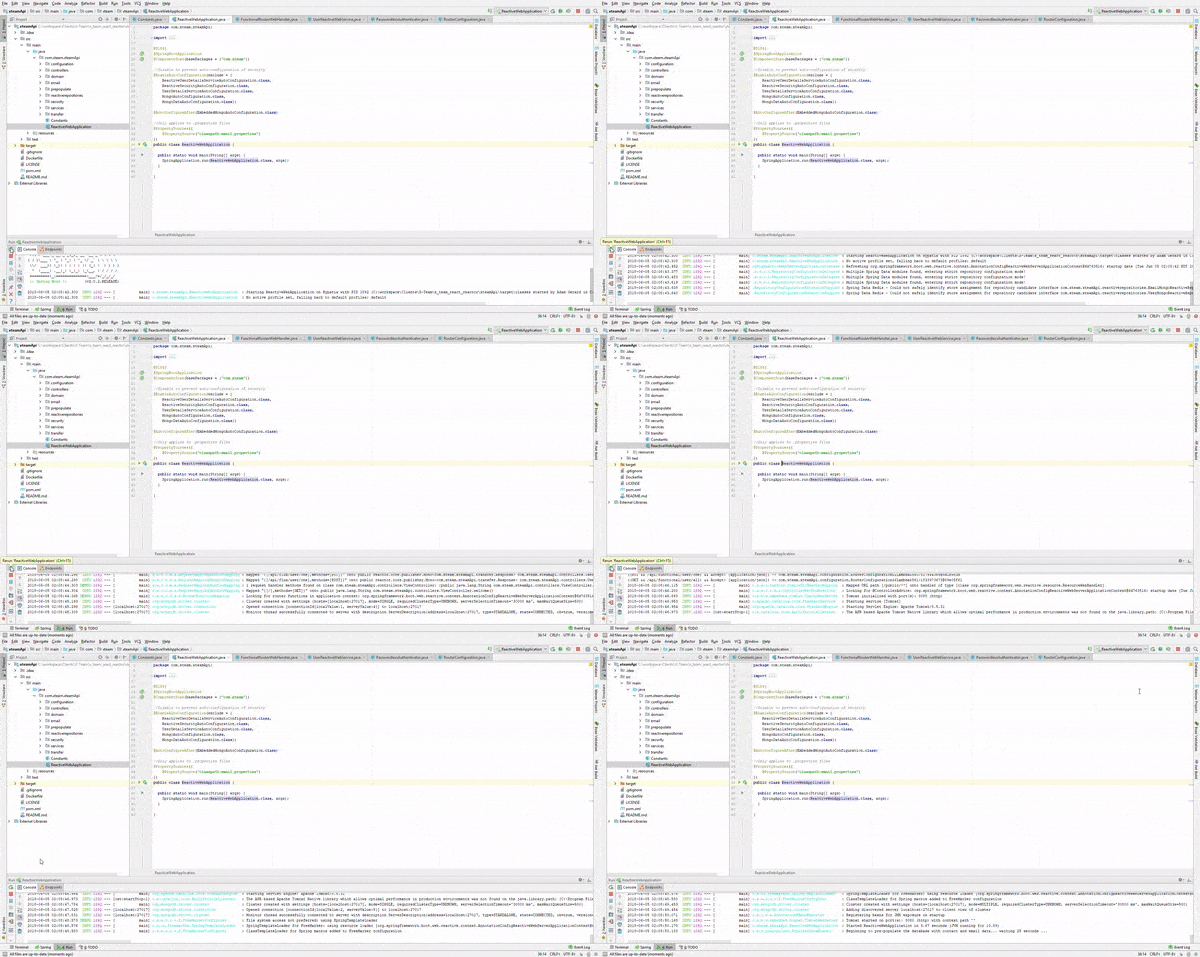
When we start up our server-side application, it'll look something like this:
WebFlux Reactive Controllers
Mono and Flux are powerful new reactive objects provided by WebFlux. They are inherently asynchronous, streaming, and returned in reactive methods.
Mono is aptly named and applies to scenarios where up to a single piece of data is returned asynchronously. Flux is to be used in scenarios where up to many pieces of data are to be handled asynchronously.
Both Mono and Flux objects require a bit more work to interact with in that they are streaming, publisher-subscriber, asynchronous objects.
A great rule of thumb pointed out by E4developer is that they don't do anything until we subscribe() to them (or use blockFirst() or blockLast()). Using Mono and Flux we can write simple reactive API endpoints like so:
  @PostMapping(Constants.API_FLUX_USER_NEW)
  public Mono<CustomResponse> saveOneUser(@RequestBody AuthenticatedUpdate tokenAuth) {
    Boolean auth = passwordlessAuthenticator.authenticate(tokenAuth.getUsername(), tokenAuth.getToken()).block();
    log.info(tokenAuth.getNewUsername() + tokenAuth.getNewName() + tokenAuth.getNewPhone() + tokenAuth.getNewEmail());
    MongoUser user = new MongoUser(tokenAuth.getNewUsername(), tokenAuth.getNewName(), tokenAuth.getNewPhone(), new MongoEmail(tokenAuth.getNewEmail()), null);
    try {
      log.info(user.toString());
      if (auth) userReactiveWebService
            .saveUser(tokenAuth.getNewUsername(),
                tokenAuth.getNewName(),
                tokenAuth.getNewPhone(),
                tokenAuth.getNewEmail());
    } catch (Exception ex) {
      log.error("Exception: " + ex);
      return Mono.just(new CustomResponse(user,"Failed!"));
    }
    return Mono.just(new CustomResponse(user, auth ? "Success!" : "Failed!"));
  }
Like usual, we can autowire in our relevant beans, set the controller to automatically return JSON via the @RestController annotation, etc. Here, however, we see that we're returning Mono<Response> - our custom DTO Response object is (figuratively) literally wrapped up in the temporal embrace of our new reactive buddy Mono.
Like how sweet the async / await duo is in ES6, Mono empowers its attached friend to be returned asynchronously all with way more concise syntactic sugar.
All that's a slight change from the perhaps more familiar Future, CompleteableFuture, Runnable objects provided in previous releases of core Java.
As an alternative to the new reactive programming paradigm, we can also use the new WebFlux functional RouterFunction:
@Configuration
public class RouterConfiguration {

  @Bean
  public FunctionalRouterWebHandler handler() {
    return new FunctionalRouterWebHandler();
  }

  @Bean
  @Autowired
  public RouterFunction<ServerResponse> routes(FunctionalRouterWebHandler handler) {
    return route(POST(API_ROUTER_USER_ONE)
    .and(accept(APPLICATION_JSON)), handler::getOneUser)
    .andRoute(POST(API_ROUTER_USER_NEW).and(accept(APPLICATION_JSON)), handler::saveOneUser)
    .andRoute(DELETE(API_ROUTER_USER_ONE).and(accept(APPLICATION_JSON)), handler::deleteOneUser)
    .andRoute(PUT(API_ROUTER_USER_ONE).and(accept(APPLICATION_JSON)), handler::updateOneUser)
    .andRoute(GET(API_ROUTER_USER_ALL).and(accept(APPLICATION_JSON)), handler::getAllUsers);
  }
}
Our RouterFunction will be left unprotected by security and will serve as both a cached public API and as an example of the new functional programming paradigm introduced in Spring Boot 2.x.x!
I wanted to set out and do something extra special (being the unique snowflake that I am) and chose to build a very simple authentication system wrapping any call made to protected routes. As such, our use of both reactive Redis along with newish WebFlux meant some custom jiggering had to be done. Let's take a look:
@Slf4j
@RestController
public class UserReactiveRestController {

  @Autowired
  PasswordlessAuthenticator passwordlessAuthenticator;

  @Autowired
  UserReactiveWebService userReactiveWebService;

  @PostMapping(Constants.API_FLUX_USER_ONE)
    public Mono<CustomResponse> getOneUser(@RequestBody AuthenticatedUuid tokenAuth) {
      Boolean auth = passwordlessAuthenticator.authenticate(tokenAuth).block();
      MongoUser user = new MongoUser(tokenAuth.getUsername(), null, null, null, null);
      try {
        if (auth) user = userReactiveWebService.findOneUserById(tokenAuth.getId()).block();
      } catch (Exception ex) {
        log.error("Exception: " + ex);
        return Mono.just(new CustomResponse(user, "Failed!"));
      }
      return Mono.just(new CustomResponse(user, auth ? "Success!" : "Failed!"));
    }

}
Here, we synchronously verify authentication and then call our protected methods upon successful authentication.
Each of our protected operations first attempts to fetch from our Redis cache before checking MongoDB.
Passwordless Authentication Magic
Now we can add in our one magical passwordless security dependency:
   <!-- Security-Related Dependencies -->
   <dependency>
     <groupId>com.sendgrid</groupId>
     <artifactId>sendgrid-java</artifactId>
     <version>4.2.1</version>
   </dependency>
How does this all work? First, go ahead and sign up for an account over on Sendgrid like so:
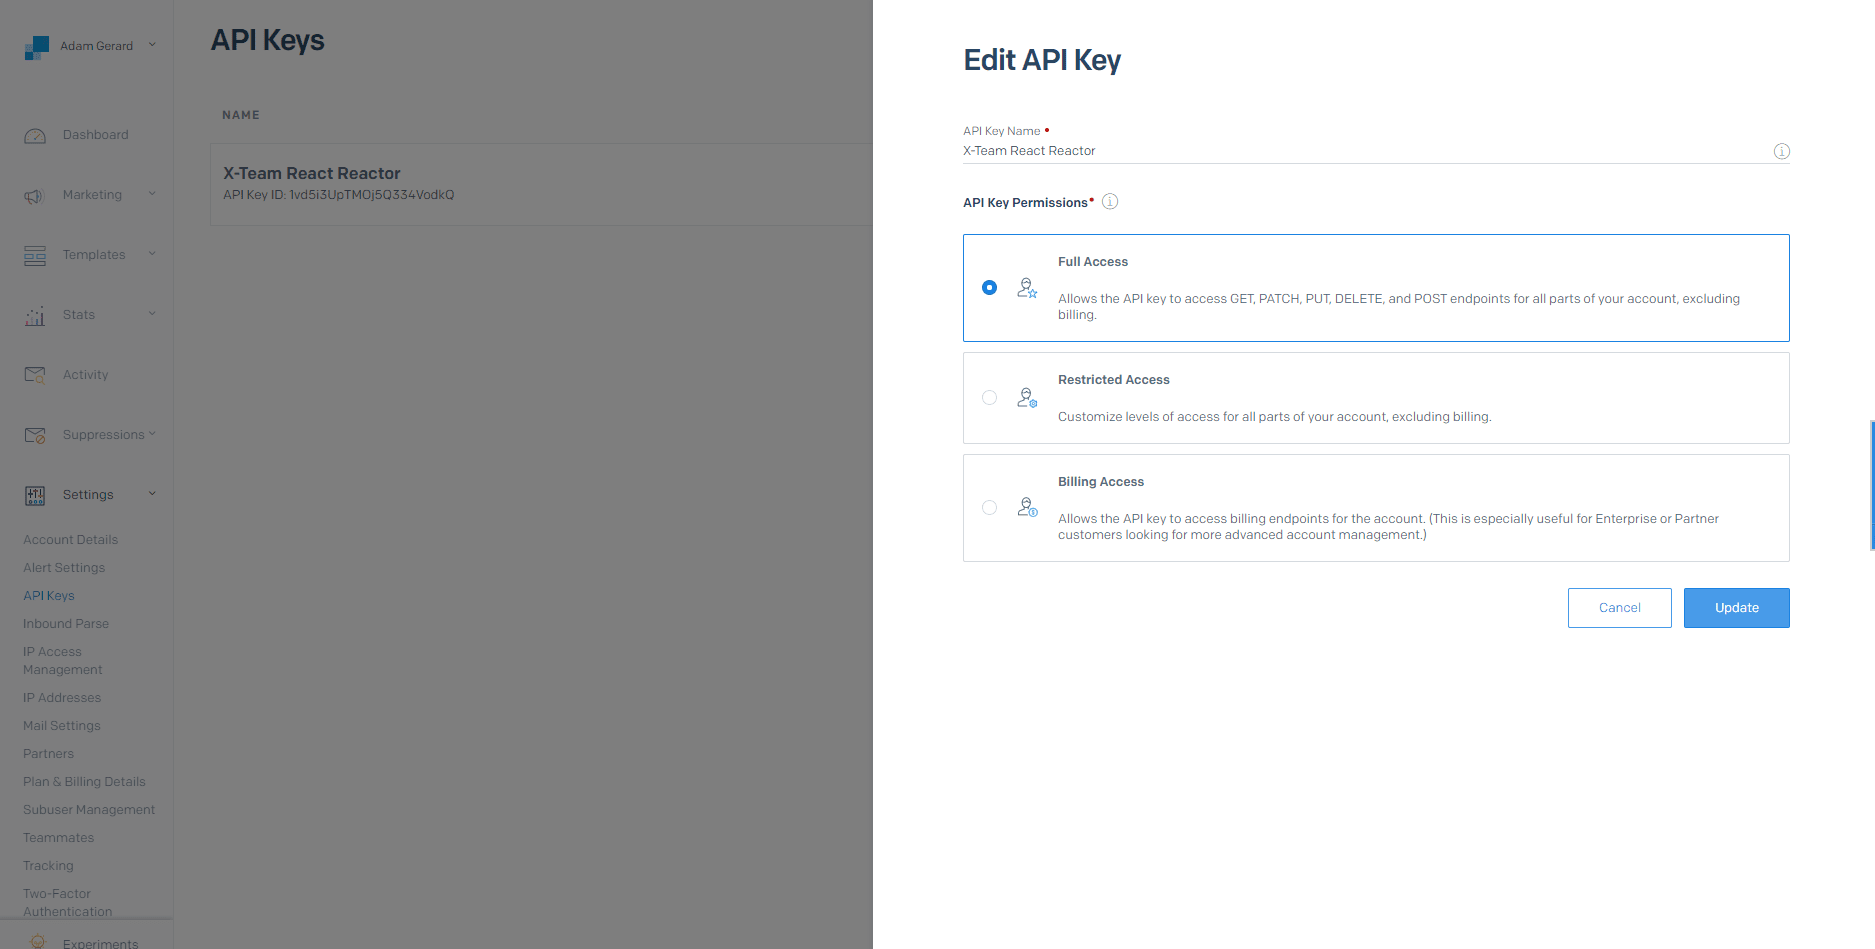
All of the actual user credentials are hard-coded to simplify the demonstration. They should also be easy to modify for more realistic purposes.
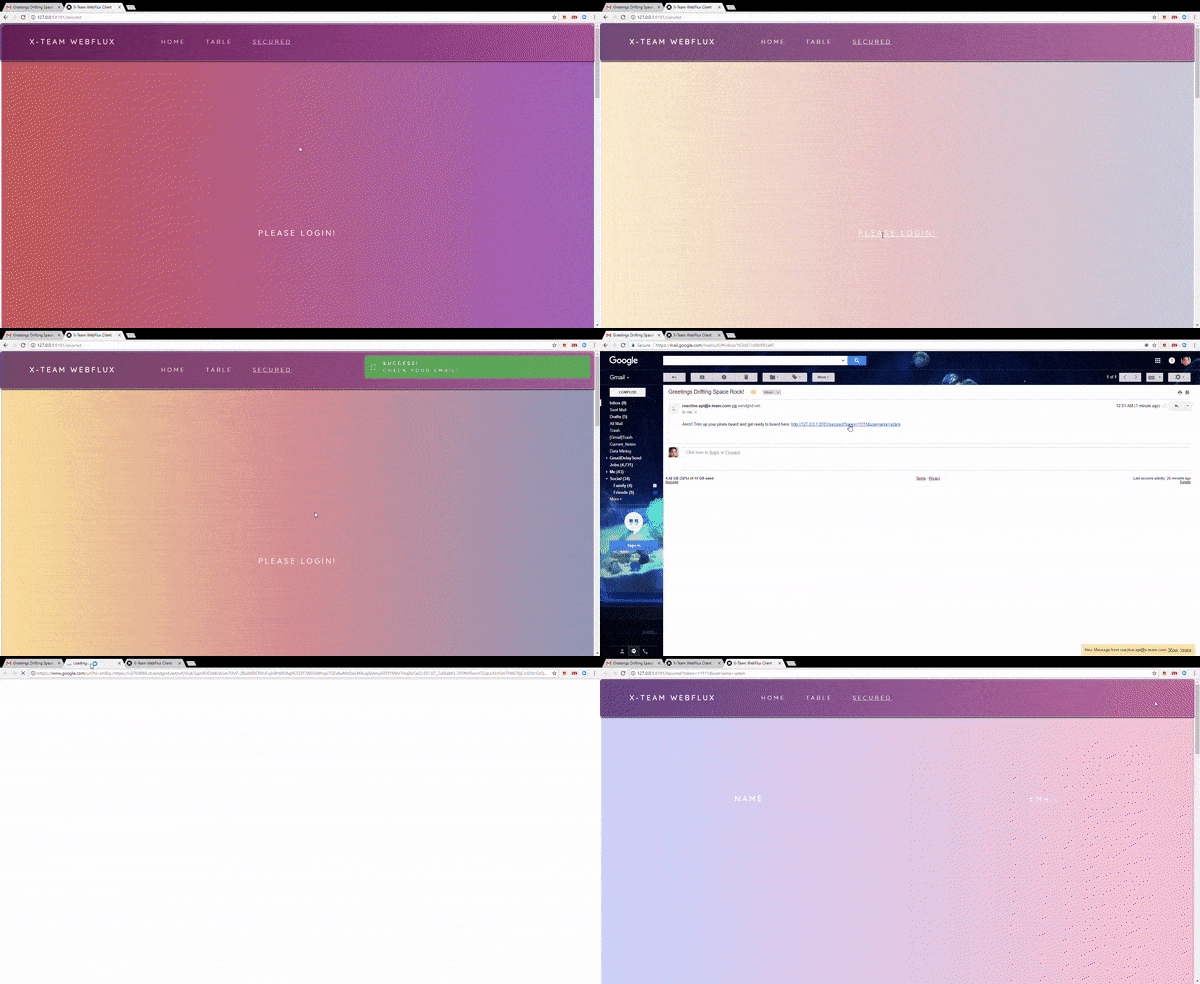
I've diagrammed the authentication flow below to help explain the kaleidoscope of information above:
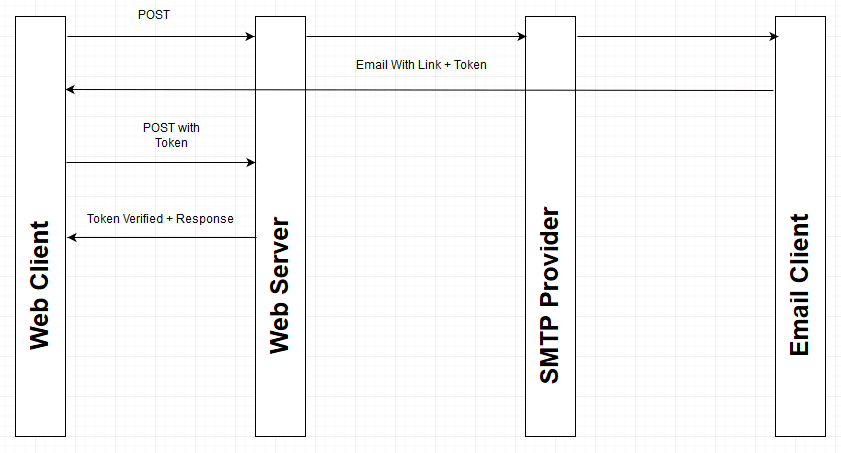
Once a token is supplied from our WebFlux server (by way of Sendgrid to your email client):
Mail mail = new Mail(
    new Email(fromProp),
    subjectProp,
    new Email(email),
    new Content("text/plain",
        String.format("%s %s?token=%s&username=%s",
        Constants.EMAIL_MAGIC_LINK_GREETING,
        Constants.AUTH_LOGIN_ENDPOINT_FULLY_QUALIFIED,
        token,
        username))
);

SendGrid sg = new SendGrid(apiKeyProp);
Request request = new Request();

request.setMethod(Method.POST);
request.setEndpoint("mail/send");
request.setBody(mail.build());
log.debug(sg.api(request).toString());
Which is then captured in our React and Redux client after a user clicks the email link:
handleAuthentication () {
    const {save, location} = this.props,
      search = location.search,
      tokenParam = paramFromUrlString(search, /token=[01234567890]+/),
      usernameParam = paramFromUrlString(search, /username=[a-zA-Z0123456789]+/),
      isValidated = (tokenParam != null && usernameParam != null && location.pathname === SECURED_PATH)

    try {
      if (isValidated) {
        const username = usernameParam[0].substr(9, usernameParam[0].length),
          token = tokenParam[0].substr(6, tokenParam[0].length)
        save('auth', {
          'token': token,
          'expires_at': new Date().getMilliseconds() + 15 * 60 * 1000,
          'username': username
        })
      }
    } catch (ex) {
      console.log('Exception encountered validation authentication: ' + ex)
    }
}
We can then verify our credentials using two pieces - one in our React app:
isAuthenticated () {
    const {auth} = this.props
    if (checkObj(auth) && checkObj(auth['expires_at'])) return new Date().getMilliseconds() < auth['expires_at']
    return false
}
... - and then any subsequent request made to a protected WebFlux endpoint will use the handy authentication wrapper we looked at above! Woot!
To Database and Then Cache. That. Database.
Lastly, let's add our MongoDB and Redis configuration and domain items:
#!/usr/bin/env bash

docker stop redis
docker rm redis
docker run -d --name redis -p 6379:6379 redis
#!/usr/bin/env bash

docker stop mongodb
docker rm mongodb
docker run -d -p 27017:27017 --name mongodb mongo:3.4
P.S. - If run into an issue with MongoDB not running correctly in your container (which may or may not give an Exit Code 100 à la Issue #18), you might be able to resolve your issue by "factory resetting" your Docker install (which is what happened to me and how I solved it). I hope that saves you some time and stress <3!
Dockerizing. Everything.
We'll divide our app into a hosted static assets server, a Java WebFlux API (serving no static assets), and then provision the necessary MongoDB and Redis images to support persistence!
Our individual Dockerfiles:
FROM httpd:2.4-alpine
COPY ./public/ /usr/local/apache2/htdocs/
EXPOSE 80
FROM openjdk:8-jre-alpine
COPY ./xteamApi-1.0.0.jar /usr/src/xteamApi/xteamApi-1.0.0.jar
WORKDIR /usr/src/xteamApi
CMD ["java", "-jar", "xteamApi-1.0.0.jar"]
Those give us the ability to spin up each container as a stand-alone resource to aid with service-specific testing and development.
Our unified docker-compose.yaml:
version: "3"

services:
  mongo:
    image: mongo:3.4
    hostname: mongo
    command: []
    ports:
      - "27017:27017"
    volumes:
      - mongodb:/data/db
    networks:
      - x-team-network

  redis:
    image: redis:4.0.5-alpine
    hostname: redis
    command: ["redis-server", "--appendonly", "yes"]
    ports:
      - "6379:6379"
    volumes:
      - redisdb
    networks:
      - x-team-network

  x-team-api:
    build:
      context: ../xteamApi
    image: x-team-api-tpd
    environment:
      - SPRING_DATA_MONGODB_HOST=mongo
      - SPRING_DATA_REDIS_HOST=redis
    ports:
      - "8080:8080"
    networks:
      - x-team-network

  x-team-client:
    build:
      context: ../xteamClient
    image: x-team-client-tpd
    ports:
      - "8900:80"
    networks:
      - x-team-network

volumes:
  mongodb:
  redisdb:

networks:
  x-team-network:
Gotya's
I also wanted to go over a few things I encountered that I hope will reduce your stressors and help you to be continually awesome!
Reactive Spring Redis
This one got me bad -> You might encounter exceptions when combining the newest versions Lombok, Spring Boot, and Jackson:
- https://github.com/rzwitserloot/lombok/issues/1563
- https://github.com/rzwitserloot/lombok/issues/1677
- https://github.com/spring-projects/spring-boot/issues/12568
- https://stackoverflow.com/questions/48330613/objectmapper-cant-deserialize-without-default-constructor-after-upgrade-to-spri
There are many good resources out there that advise modifying your Lombok configuration when using 1.16.18+ like so:
//lombok.config
lombok.anyConstructor.addConstructorProperties=true
Configuring your Lombok file this way may help you to resolve those conflicts. It took me a couple more steps to jigger up a sufficiently functional example (and one that could use some more work to help improve it all up - open source team-work, anyone)?
I dug around and found what seem to be a few conflicting resources (to the extent that this pretty much summed up my feelings on the matter). For example, I discovered this ticket over on the Spring.io JIRA page. It appears that reactive Redis support is purely experimental at this point (and you can find a Reactive Redis Starter that's nearly empty on first blush). Hilariously, and conversely, the same example has several unit tests that dispense with Hash driven ReactiveRedisOperations in favor of ReactiveRedisOperations<String, String> if you dig around a bit. I was able to get things working using Strings.
So, my advice is to either use ReactiveRedisOperations<String, String> or attempt to customize a solution combining the native Jackson Databind ObjectMapper and the apparently functional Reactive Redis Starter (for more on this see the official docs).
If you have some advice to improve the serialization of cached Redis data, feel free to send me a message over at adam.gerard@x-team.com and I'll happily credit you (and would even more happily be interested in expanding this example)!
Freemarker
Spring Boot 2.x.x WebFlux also does not support the use of JSP or JSTL (or at least very easily). Instead, it's recommended that you configure your views using Freemarker which can be cleanly and easily set up as follows:
@Bean
public FreeMarkerConfigurer freeMarkerConfigurer() {
  FreeMarkerConfigurer configurer = new FreeMarkerConfigurer();
  configurer.setPreferFileSystemAccess(false);
  configurer.setTemplateLoaderPaths("classpath:/templates/");
  configurer.setResourceLoader(this.context);
  return configurer;
}

@Override
public void configureViewResolvers(ViewResolverRegistry registry) {
  registry.freeMarker();
}
Future Plans
There are at least a couple other ways to improve on this example:
- To incorporate SMS text authentication using associated phone-number SMS gateways!
- To leverage a random-seed with
nonceand IP Address to go one step further and obviate the need for a magic email (or at least provide the option). There would be no manually entered information required.
On 2, every time a user session begins, a randomly generated, hashed (or salted), String with padding, a time-dependent nonce, and IP Address could be generated. That value would then be sent via POST right over to the server and cached after decryption into a new token. That new token would then be returned which could be used to authenticate directly and which would contain the nonce and IP Address values.
That's just a rough-sketch, and I hope there are some better ways to go about it.
Conclusion
Our example is an interesting admixture of React and Reactor (as wrapped and supplied by Spring.io's new WebFlux architecture). We get "reactive" in both senses (well in three?) since React (™) provides clientside reaction to change and since our backend is supported by the new functional programming, non-blocking, and high-concurrency Java Spring WebFlux dependencies!
All the code used in this article is available over on GitHub! Until next time, be well and take care!
P.S. - Special shout-outs to:
-
Meiying Ng by way of Unsplash
-
Creactiviti's in-memory example available here
-
EZGIF for the rad .gifs
-
One of the best WebFlux summaries out there by E4developer


