
ReactiveX, also known as Reactive Extensions or RX, is a library for composing asynchronous and event-based programs by using observable sequences. This is perfect for Android, which is an event-driven and user-focused platform.
ReactiveX is a combination of the best ideas from the Observer pattern, the Iterator pattern, and functional programming
The library is widely available for different programming languages. There's even a dedicated Android version which we're going to use in this tutorial (although we could also manage with plain Java flavor). Please refer to the website in order to learn more about ideas and reasoning behind the project.
Introduction to ReactiveX
The two main actors in RX world are:
- Observable -- it emits events (in form of data)
- Observer -- it subscribes to Observable in order to receive its events
Many Observers can subscribe to single Observable, manipulate data streams using operators (more on this later on), which is the real strength of RX approach. Functional programming allows us to greatly decouple dependencies and separate business logic, that operates within clearly defined boundaries of simple streams of data objects.
Although ReactiveX has very well-defined concepts and the API is mature, at first, everyone struggles a bit with more advanced concepts. It's not easy to shift your mind from classic imperative programming to functional programming, as well as intuitively pick the right RX operators from the vast array of possible solutions. Live examples are far better than theory in the case of RX. Familiarity with Java 8 Streams helps a lot, but all you need to understand basics of RX is here anyway.
The following tutorial is specifically tailored to Android, but concepts and techniques explained are true for Reactive Extensions in general -- regardless the actual implementation, whether it's .NET, Java, JavaScript or others.
Prerequisites
Please refer to base tutorial How To Get Started With Android Programming for an explanation of basic Android concepts. This tutorial directly expands on that base project -- you can download starting source code here.
Project setup
Open your app's build.gradle file and add RxAndroid library in dependencies section. Sync project.
dependencies {
    compile fileTree(dir: 'libs', include: ['*.jar'])
    testCompile 'junit:junit:4.12'
    compile 'com.android.support:appcompat-v7:23.1.1'

    compile 'io.reactivex:rxandroid:1.1.0'
}
Basic Observable & Observer in action
1. Define an Observable
We're going to use one of many available helper operators to create our first Observable. Go to MainActivity.java and define a new class field along with its initializer:
Observable<Integer> integerObservable = Observable.just(4, 8, 15, 16, 23, 42);
We've declared a field integerObservable that holds an Observable parameterized by Integer. The Observable.just() method creates an Observable from parameters passed in -- this is the simplest way to create an object that will emit those ints in a ReactiveX way. Now, integerObservable is ready to do its job, but it's waiting for some interested party to subscribe to it.
Don't hesitate to look at the documentation at any time, it's comprehensive and contains very helpful marble diagrams.

2. Define an Observer
Define a second field in your Activity class.
    Observer<Integer> integerObserver = new Observer<Integer>() {
        @Override
        public void onCompleted() {
            Log.d("PLAYGROUND", "onCompleted");
        }

        @Override
        public void onError(Throwable e) {
            Log.d("PLAYGROUND", "onError", e);
        }

        @Override
        public void onNext(Integer integer) {
            Log.d("PLAYGROUND", "onNext: " + integer);
        }
    };
The Observer is going to consume data events emitted by the Observable through its onNext method. Invocation of onCompleted is going to tell us that there are no additional events coming -- the Observable finished its work, and we can do the cleanup. Likewise, onError is going to be called in case of an unrecoverable error -- the source of events can not continue emitting them because there has been an error that potentially compromises data and system integrity. These conventions are essential for ensuring proper health of your system because data streams are theoretically endless -- we need to know when special events happen.
3. Subscribe Observer to Observable
Up until this point, we've got a source of events in the form of Integer objects and a consumer that is able to process them. An Observable is not emitting events until it has been subscribed to. An Observer has no source of data attached. Let's change that in onCreate method of MainActivity:
    @Override
    protected void onCreate(Bundle savedInstanceState) {
        super.onCreate(savedInstanceState);
        setContentView(R.layout.activity_main);

        integerObservable.subscribe(integerObserver);
    }
4. Run the code
Run the Android app and look at the logcat, you should see every single event being written out by the Observer handler method.
01-24 07:43:47.511 27439-27439/? D/PLAYGROUND: onNext: 4
01-24 07:43:47.511 27439-27439/? D/PLAYGROUND: onNext: 8
01-24 07:43:47.511 27439-27439/? D/PLAYGROUND: onNext: 15
01-24 07:43:47.511 27439-27439/? D/PLAYGROUND: onNext: 16
01-24 07:43:47.511 27439-27439/? D/PLAYGROUND: onNext: 23
01-24 07:43:47.511 27439-27439/? D/PLAYGROUND: onNext: 42
01-24 07:43:47.511 27439-27439/? D/PLAYGROUND: onCompleted
5. Inline the Observer code
ReactiveX not only simplifies the logic workflow, but it also allows you to type less code than usual. This is how we can inline the Observer code that actually does the work:
        integerObservable.subscribe(new Action1<Integer>() {
            @Override
            public void call(Integer integer) {
                Log.d("PLAYGROUND", "call: " + integer);
            }
        });
Notice this peculiar interface named Action1. This number says how many parameters can be taken by call() method of any given instance of that interface. This looks ugly, but it's helpful for us and compilers. We're going to remedy this in the future.
Command-click (CTRL-click on Windows) on Action1 and go to the source. It's defined as follows:
package rx.functions;

/** * A one-argument action. */
public interface Action1<T> extends Action {
    void call(T t);
}
This and similar interfaces are there because up until Java 7 there were no Lambda Expressions support in the language. It comes in handy in our Android programming, and it's a neat convention that you should keep in mind. You'll see more of that in the next section.
Taking inline approach we supply only code for handling new events. We're not going to know when the stream ends and that might be fine for some needs. The actual problem lies in the absence of error handling routines. If the Observable throws any error at us, we're going to end up with the
OnErrorNotImplementedException. Be sure to know what you're doing.
Operators
The most important tool at your disposal when working with ReactiveX are Operators. They can compose and transform streams of data, in order to make computations such as mapping or filtering in a functional way.
Let's do the classic example of calculating squares of numbers, ReactiveX way. Add this code to onCreate:
        integerObservable.map(new Func1<Integer, Integer>() {
            @Override
            public Integer call(Integer integer) {
                return integer * integer;
            }
        }).subscribe(integerObserver);

As you can see, we reuse the existing Observable that emits integers, apply the map function to it and subscribe to the new Observable returned by this transformation. Func1<T, R> represents a Function that takes type T as the only argument and returns a result of type R.
A more complicated yet powerful and concise example:
        integerObservable
                .map(new Func1<Integer, String>() {
                    @Override
                    public String call(Integer integer) {
                        return Integer.toBinaryString(integer);
                    }
                })
                .filter(new Func1<String, Boolean>() {
                    @Override
                    public Boolean call(String s) {
                        return s.endsWith("1");
                    }
                })
                .map(new Func1<String, Integer>() {
                    @Override
                    public Integer call(String s) {
                        return Integer.parseInt(s, 2);
                    }
                })
                .subscribe(integerObserver);
We can freely change data types along the chain of transformations. We:
- map
Integervalues to their binary representations asStrings - pass further only those binary Strings that end with
1-- return Boolean value says if the data should be filtered out or not - map String representations back to Integer, so the original Observer (without touching its code) could use values matching only our desired criteria
There are many other useful operators, and these are only presented to demonstrate functional possibilities that are made possible using ReactiveX, on platforms without FP support.
Handling background work in Android
Every long-running piece of code in Android is required to be performed on the background thread, leaving the UI Thread available to render the UI and process user's actions such as touch events and input. ReactiveX supports scheduling jobs on different threads, making it suitable for every type of computation we might perform on Android.
1. Define custom Observable
We're going to create an example worker Observable by hand this time, to really illustrate what's going on internally. Create a field in your Activity:
    Observable<Integer> computeNumbersObservable = Observable.create(new Observable.OnSubscribe<Integer>() {
        @Override
        public void call(Subscriber<? super Integer> subscriber) {

            int i = 0;

            while (true) {

                try {
                    Thread.sleep(1000);
                } catch (InterruptedException e) {
                    subscriber.onError(e); // report error
                }

                subscriber.onNext(i++); // emit data

                if (i == 10) {
                    break;
                }

            }

            subscriber.onCompleted(); // indicate stream completion
        }
    });
Notice we're emitting events by hand, making sure to call onError and onCompleted when necessary. It's important to follow conventions and be a good citizen in the RX world. As you can see, we're doing a fairly long-running computation, simulating it by calling Thread.sleep().
2. Subscribe
Now, subscribe to this Observable, as usual in the onCreate method:
computeNumbersObservable.subscribe(integerObserver);
Run the app and witness total unresponsiveness until the computation finishes. It turns out we're performing those computations on the UI Thread, which is unacceptable in real world apps.
3. Declare Scheduler to use
Let's quickly fix this by moving it to background thread:
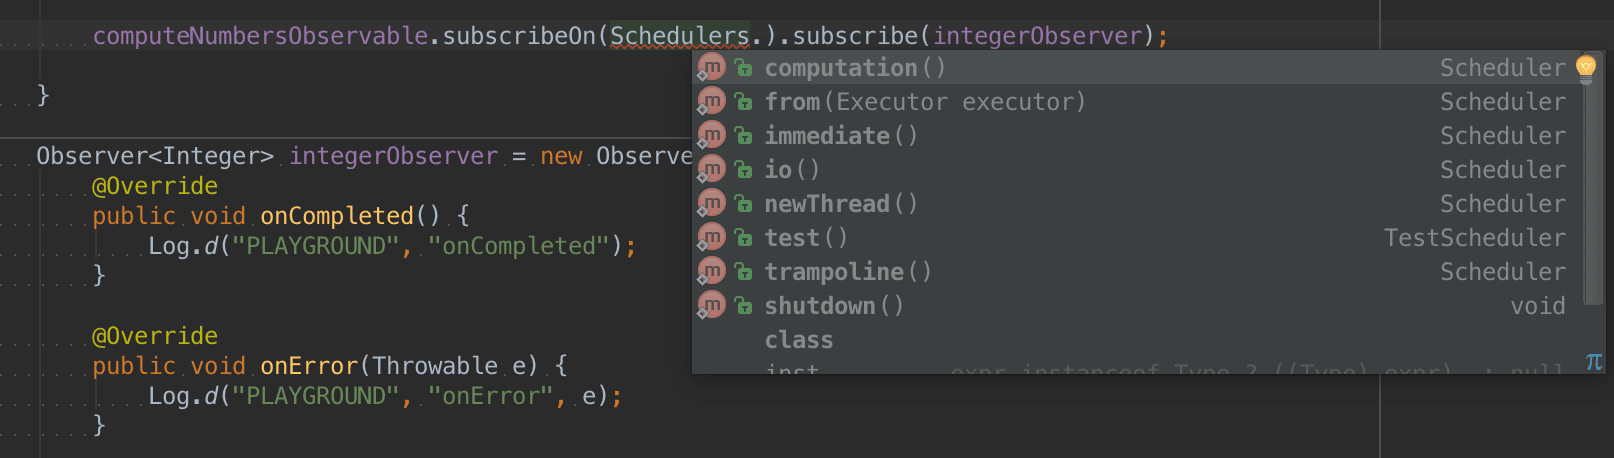
computeNumbersObservable.subscribeOn(Schedulers.computation()).subscribe(integerObserver);
This is a very straightforward way to utilize the powerful concept of Schedulers supplied by the RxJava library. Take note of different kinds of Schedulers. One method call can move our jobs to the desired Thread optimized for various kinds of computations, without us having to manage threads by hand -- all you do is supply the business logic code.
4. Use AndroidScheduler to update UI
The documentation for subscribe() method states:
subscribe does not operate by default on a particular Scheduler
As we could see so far, it has always been the UI Thread. To be on the safe side however, let's always explicitly define schedulers both for subscribing and observing. RxAndroid provides a custom Scheduler specific to Android, to ensure that any work that needs to be done in UI Thread can be simply declared this way. The following code requests computing the data on the background thread, but results will be delivered on UI Thread, so we can safely update UI from Observer's callbacks:
        computeNumbersObservable
                .subscribeOn(Schedulers.computation())
                .observeOn(AndroidSchedulers.mainThread())
                .subscribe(integerObserver);
One last thing -- Subscriptions
A Subscription is a reference to a link between the Observable and the Observer that allows us to unsubscribe should we not need it anymore. It is a good practice to unsubscribe using Android's lifecycle callbacks. The following code shows how to obtain the Subscription object and unsubscribe on button click:
    @Override
    protected void onCreate(Bundle savedInstanceState) {
        super.onCreate(savedInstanceState);
        setContentView(R.layout.activity_main);

        textView = (TextView) findViewById(R.id.textView);
        button = (Button) findViewById(R.id.button);

        final Subscription subscription = computeNumbersObservable
                .subscribeOn(Schedulers.computation())
                .observeOn(AndroidSchedulers.mainThread())
                .subscribe(integerObserver);

        button.setOnClickListener(new View.OnClickListener() {
            @Override
            public void onClick(View v) {
                subscription.unsubscribe();
            }
        });

    }
Summary
In this tutorial you've learned how to setup and use basic ReactiveX components on the Android platform, such as Observables, Observers, Subscriptions, and Operators. You are now able to apply functional a programming approach to your apps as well as greatly simplify and shorten the source code, shifting from imperative to reactive programming style.
Source code for this tutorial can be found on GitHub.


