
Android programming has undergone many changes over the years, both in tooling we use and features available on the platform. Today, the typical development environment and applications we are able to create are nothing like they used to be. Long gone is the Eclipse IDE, replaced by Android Studio, virtual device emulators are getting faster and more feature rich, and lastly, the number of knowledge sources and third-party helper libraries is finally at the point where you can easily pick up Android development basics in few hours of work.
This tutorial will teach you how to setup and run an Android project using Android Studio on OS X (Windows and Linux are not much different). This will be a starter project for all other tutorials. Basic concepts of Android and its development process will not be explained in every following tutorial, so please refer to this post as needed.
Prerequisites
Android programming is primarily done in the Java 1.6 programming language — at least intermediate knowledge is necessary to fully understand concepts specific to Android that will be introduced throughout the tutorials.
Development tools and code libraries are ever-changing, and no tutorial post can stay up-to-date with that. Every library version that our project depends on will be provided here — in case of any trouble, please set your dependencies to exact versions as listed in the tutorial, to prevent any breaking changes in newer versions.
What you'll need:
- Java Development Kit 1.6 or newer (Java SE 8 recommended)
- Android Studio 1.5 or newer (2.0 recommended)
At the time of writing, Android Studio 2.0 is available in Preview Version, and the current stable version is 1.5.1.
Please consult above links for installation instructions specific to your operating system. Java is needed to run Android Studio and compile Android source code (Open JDK is also fine). Nowadays Android Studio comes bundled with everything you need, which is the IDE itself, Android SDK, build tools and emulator system images.
1. Setup Android Studio
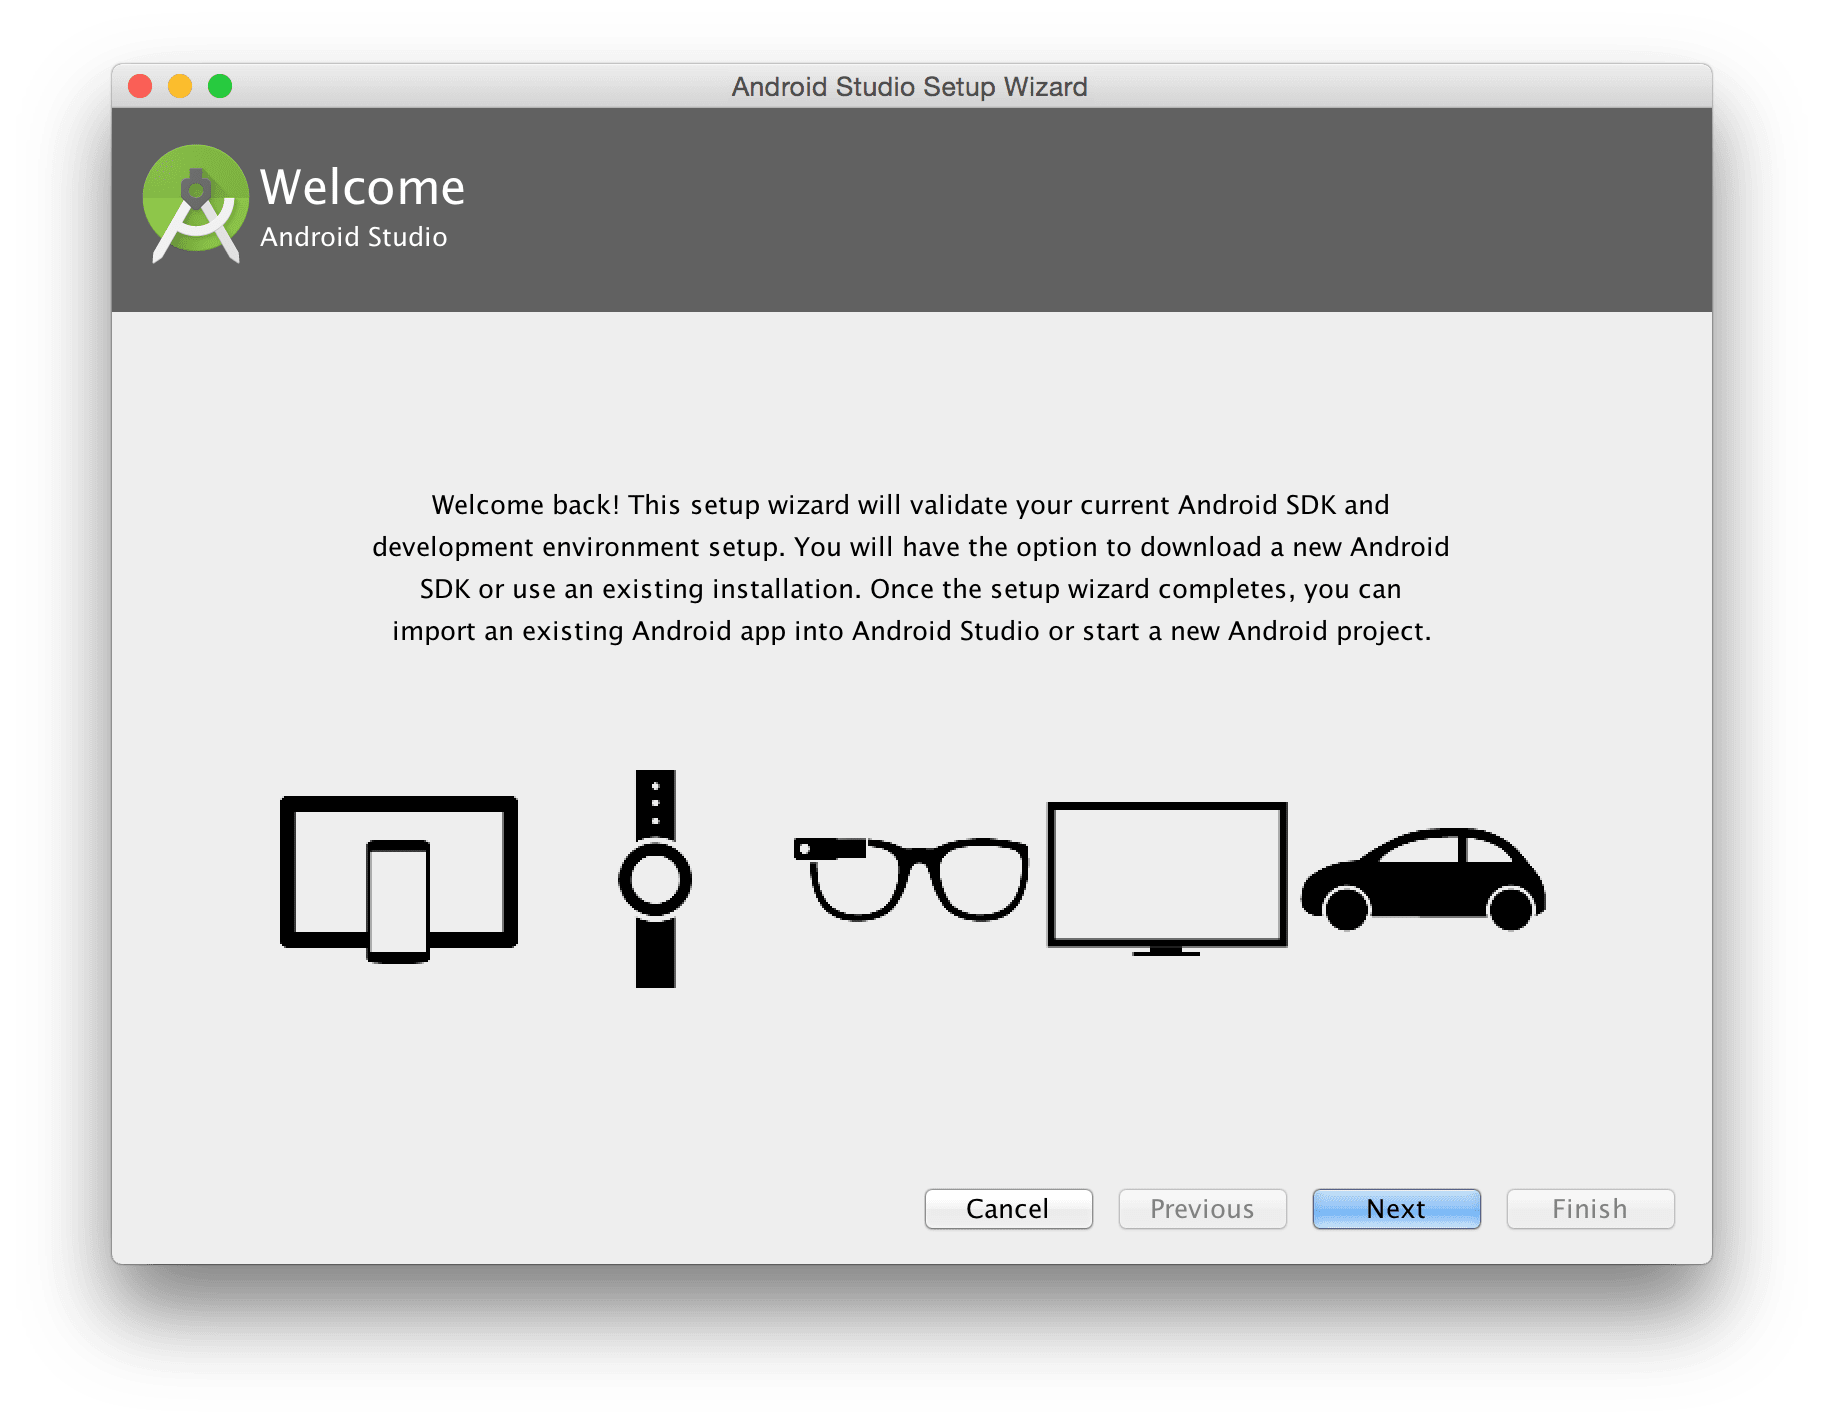
If you have a fresh installation of Android Studio, you need to perform a little setup. Thankfully, new versions of AS guide you through the whole process and default values are sane and useful.
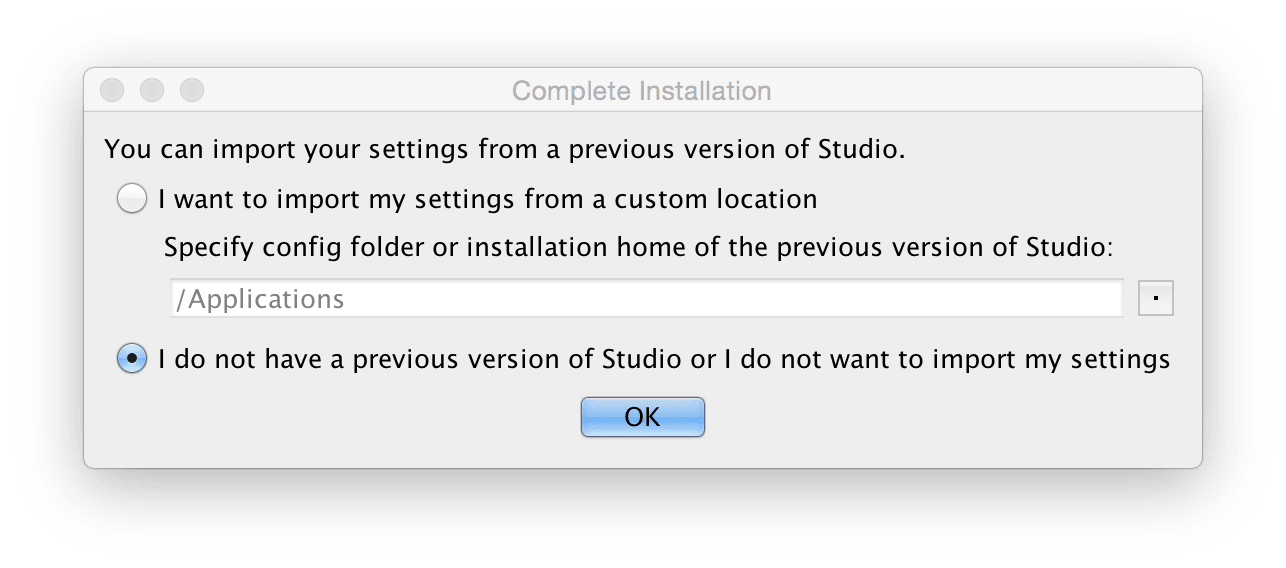
Import previous settings
In case you have a previous version of AS already installed, you can choose to import its settings. The following section assumes you don't.
If you had Android SDK already installed on your machine, you should see this information:
It does what it says, follow the instructions to repair or update your current SDK files.
Configure Android Studio
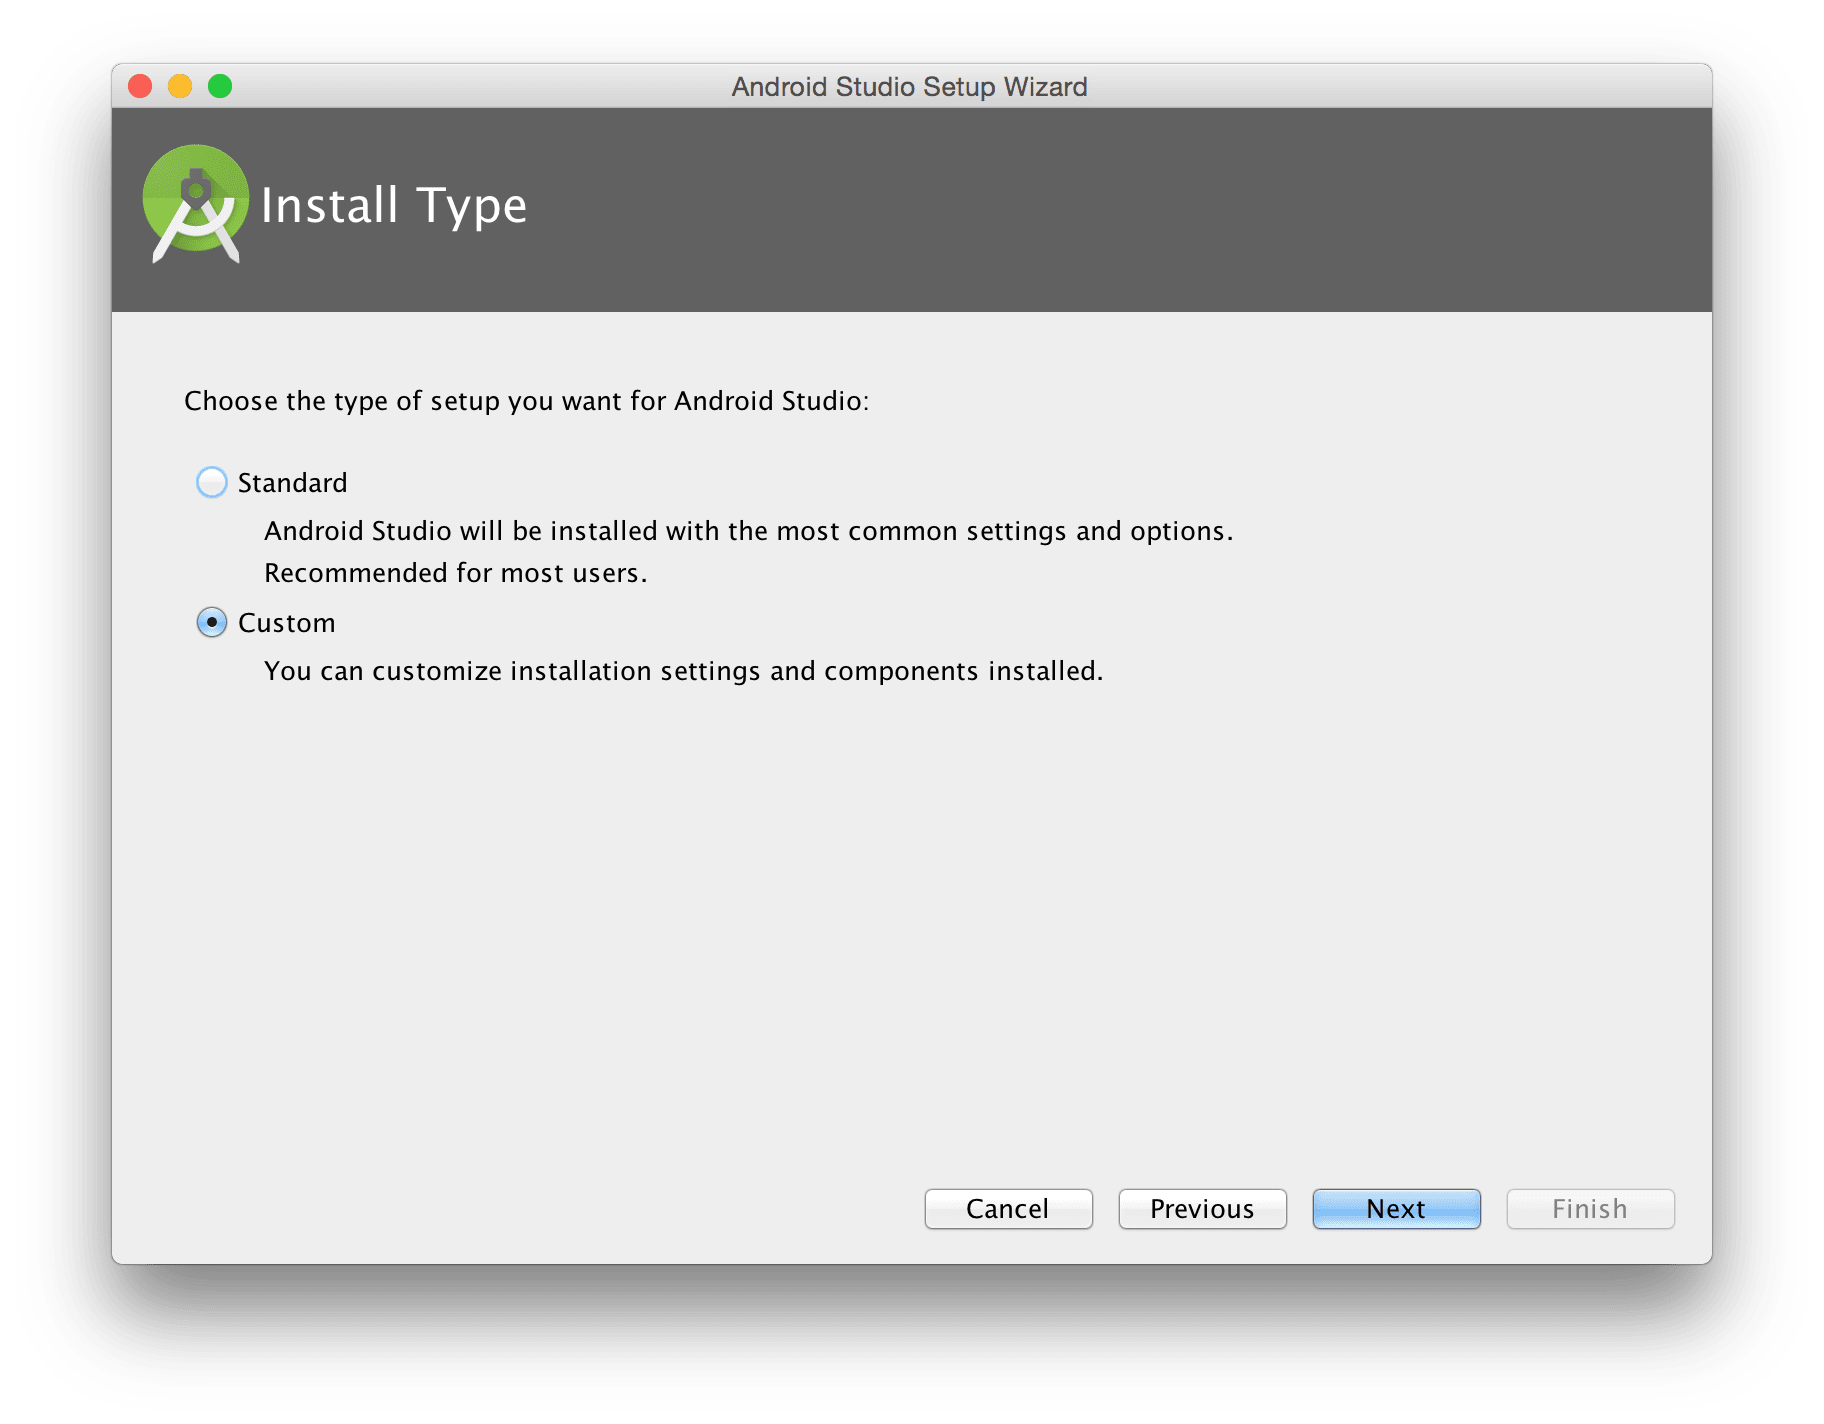
Let's review and change some of the default settings, choosing the Custom Install Type option.
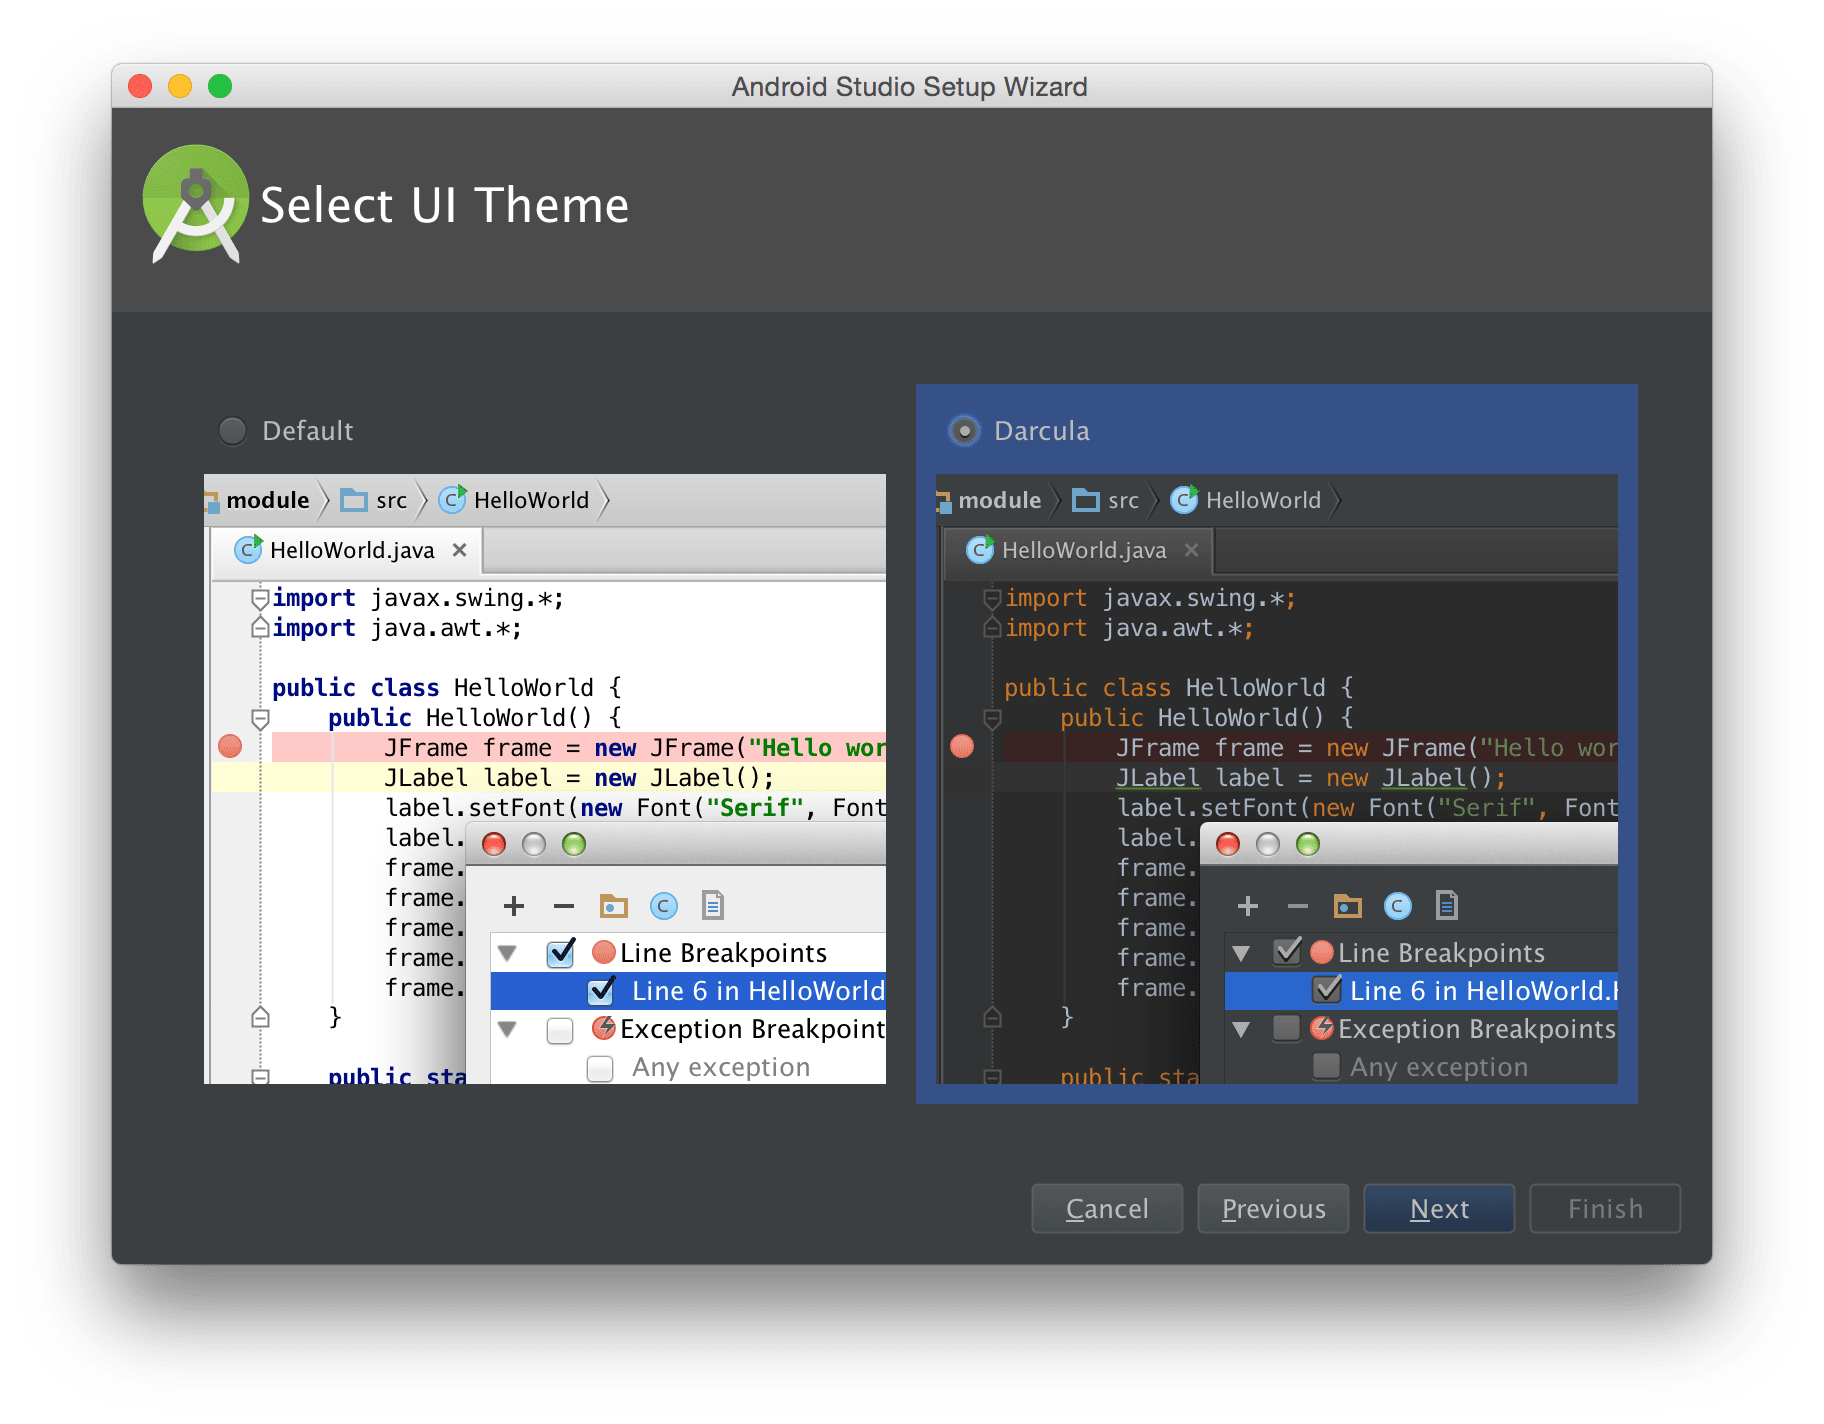
In the next step, you should choose the Darcula theme, which is modern and easier on the eyes than the default one. All tutorial screenshots will be created using this theme.
Download the SDK, Android platform, and Virtual Device files
The following components are essential to your development process:
- Android SDK — the base Software Development Kit, meaning custom API libraries that interact with Android devices on the application's behalf[1]
- Android Platform — the Android operating system in a specific version (23 in the screenshot) that allows you to run applications compiled using the SDK and have access to features introduced in that version
- Android Virtual Device — also called an emulator — a piece of software that emulates real hardware with Android installed as the operating system. This allows you to run and test your applications without having physical device.
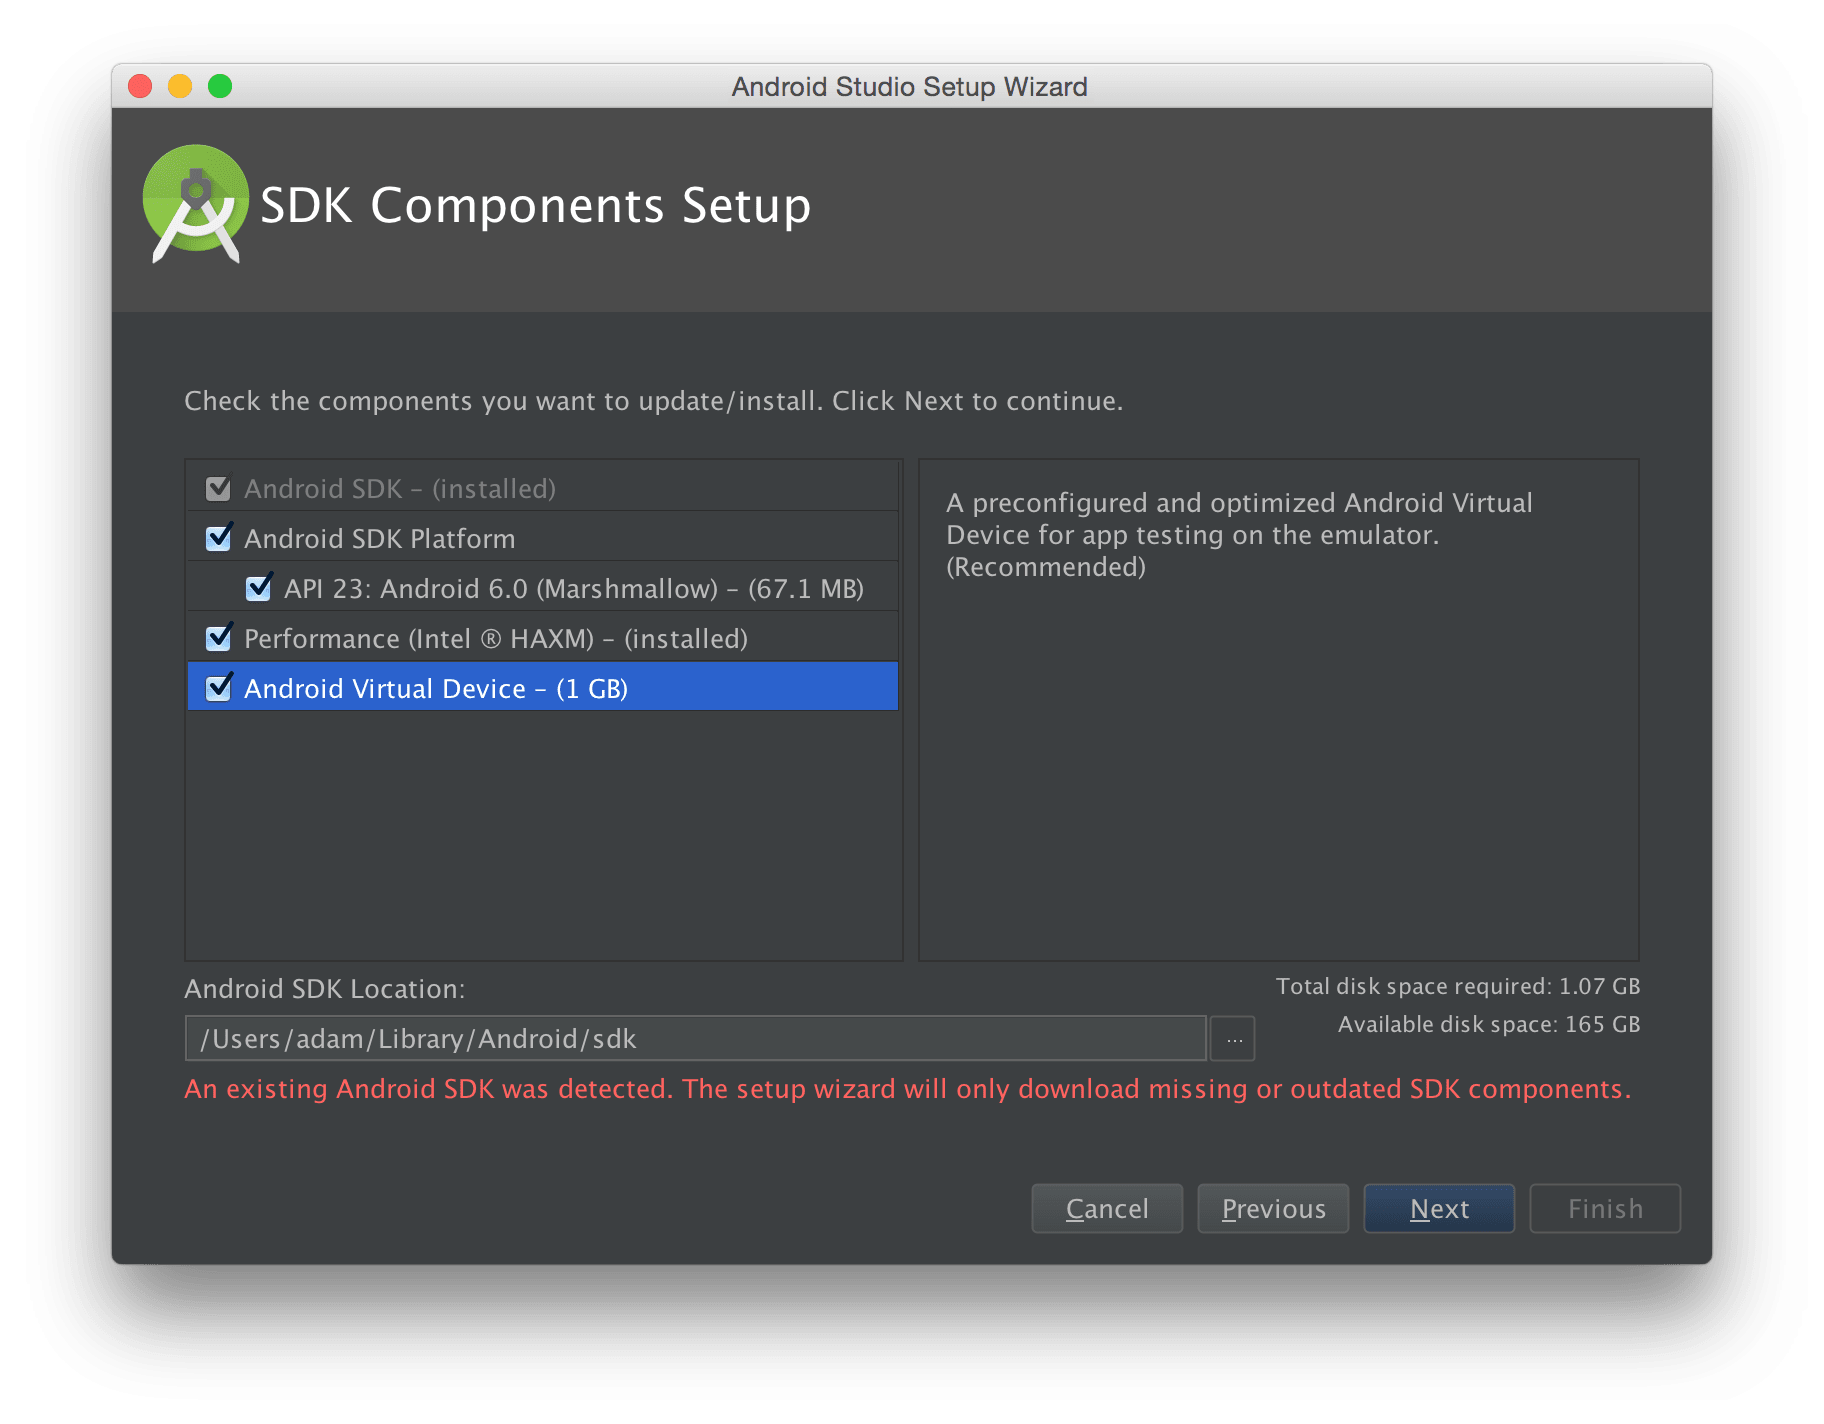
Notice that in our example, the setup wizard is going to download only the necessary components, because some are already available on the machine.
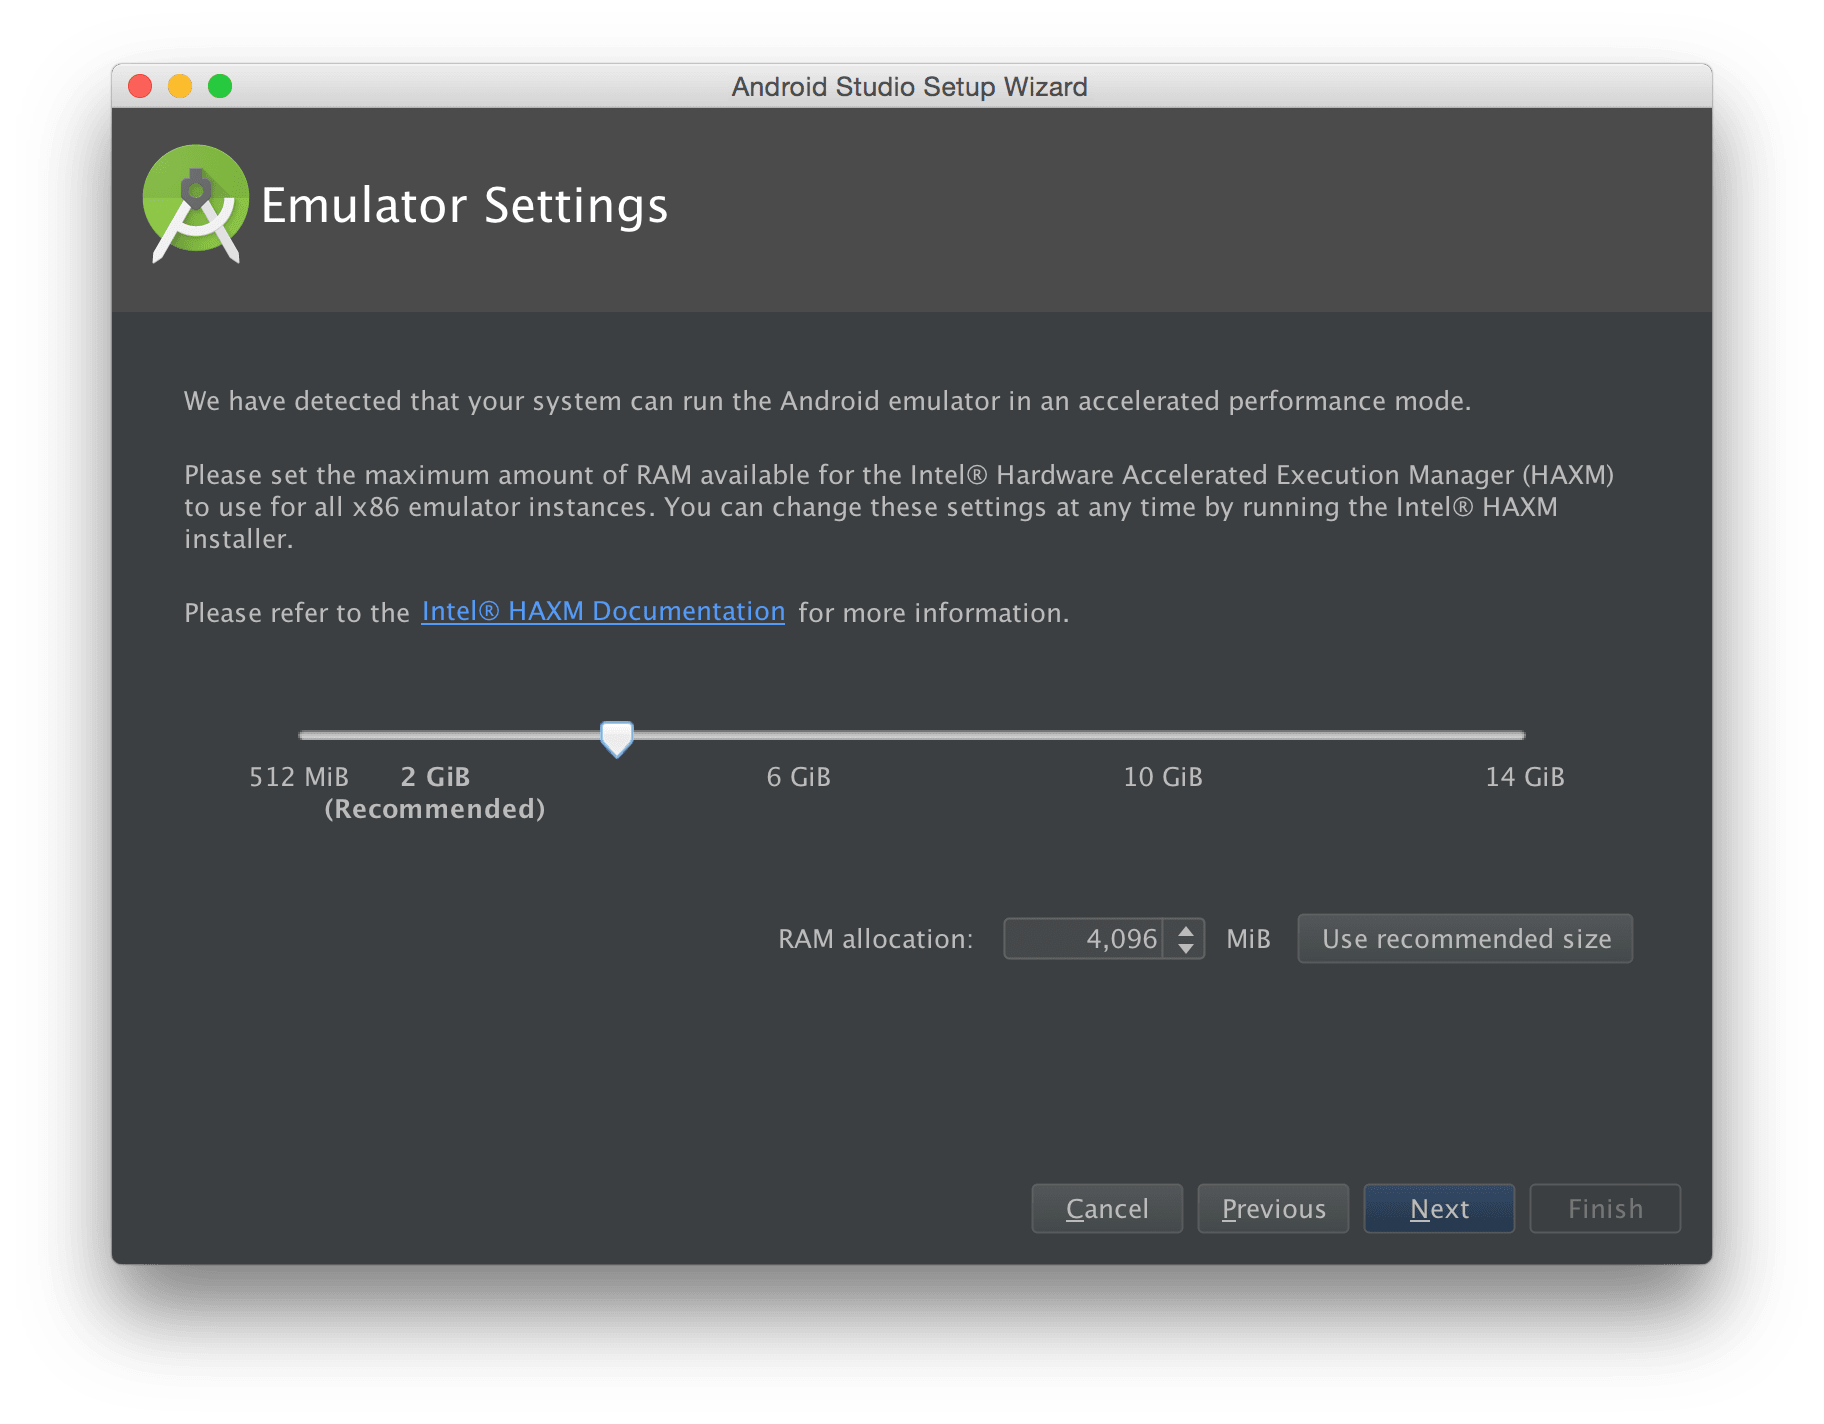
Emulator needs to know how much memory it can allocate; the rule of thumb is more memory is better than less so we'll pick 4GB, but 2GB or less is also fine.
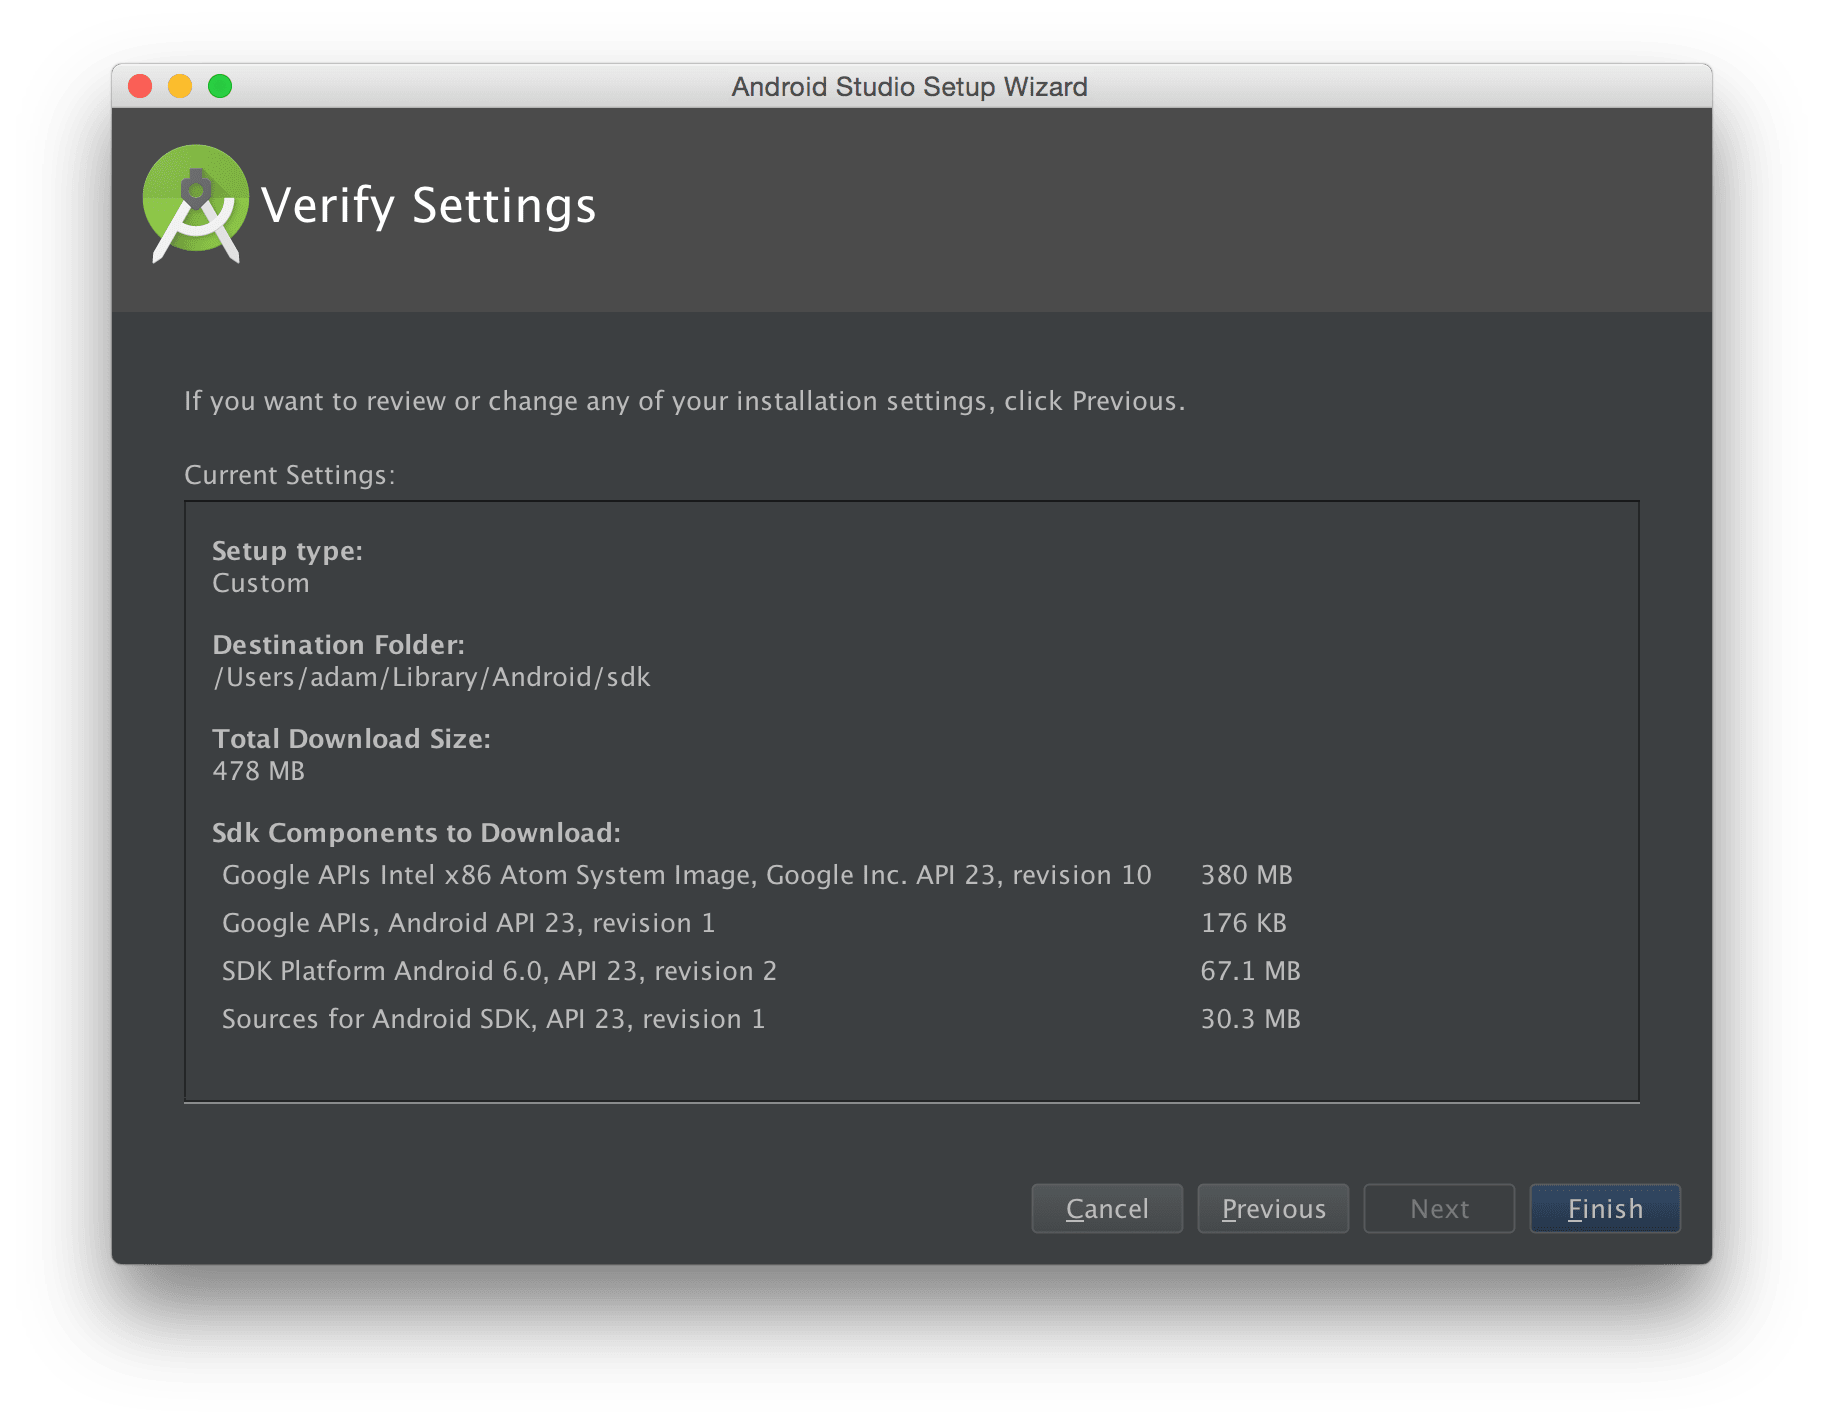
The review screen allows you to have a final look at the install settings.
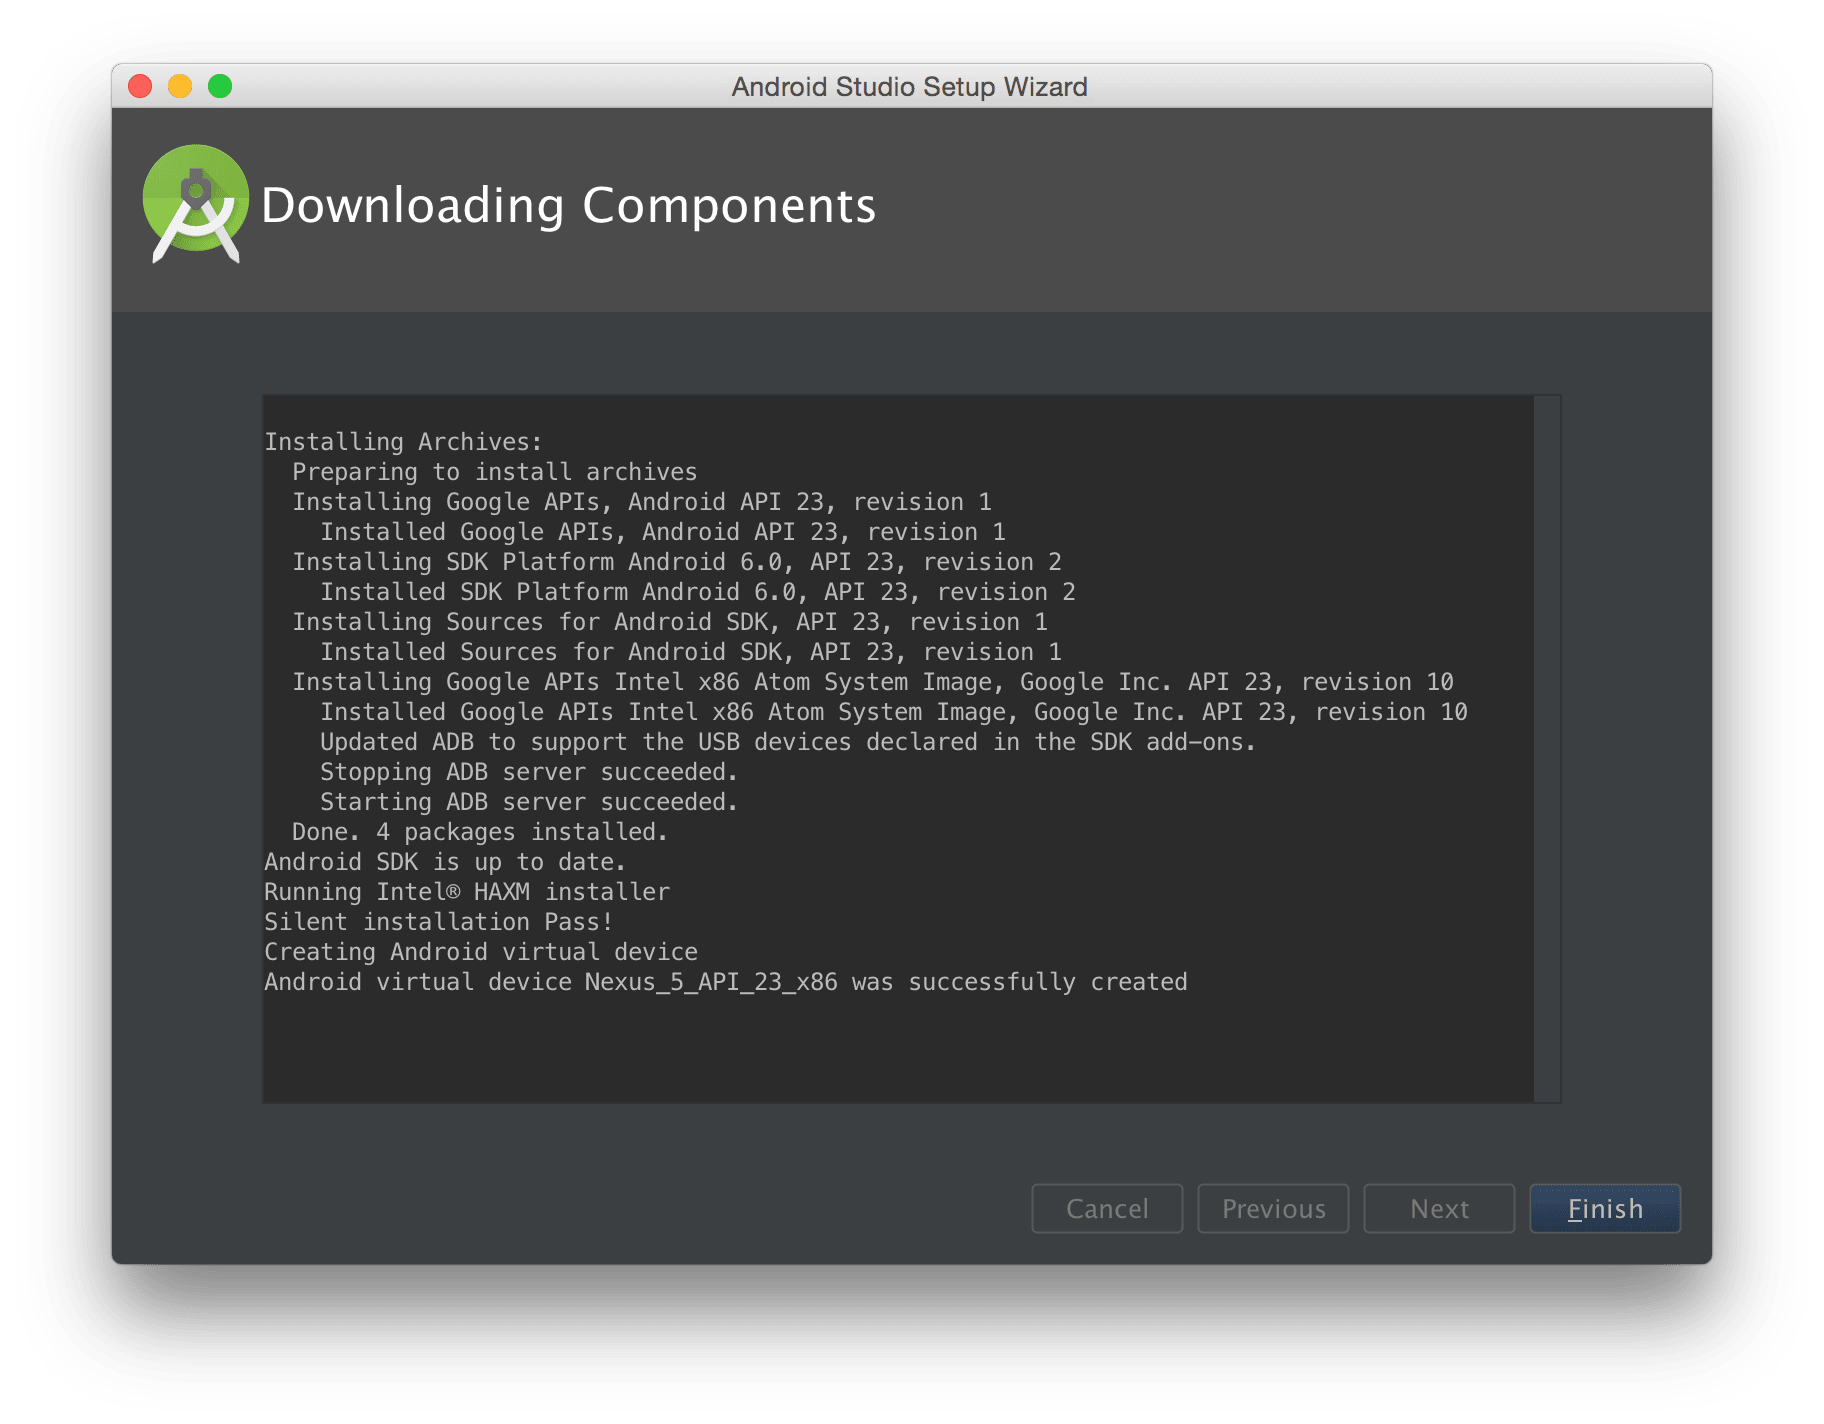
After finishing, the installation begins. You can see what particular packages are being downloaded.
2. Create new project
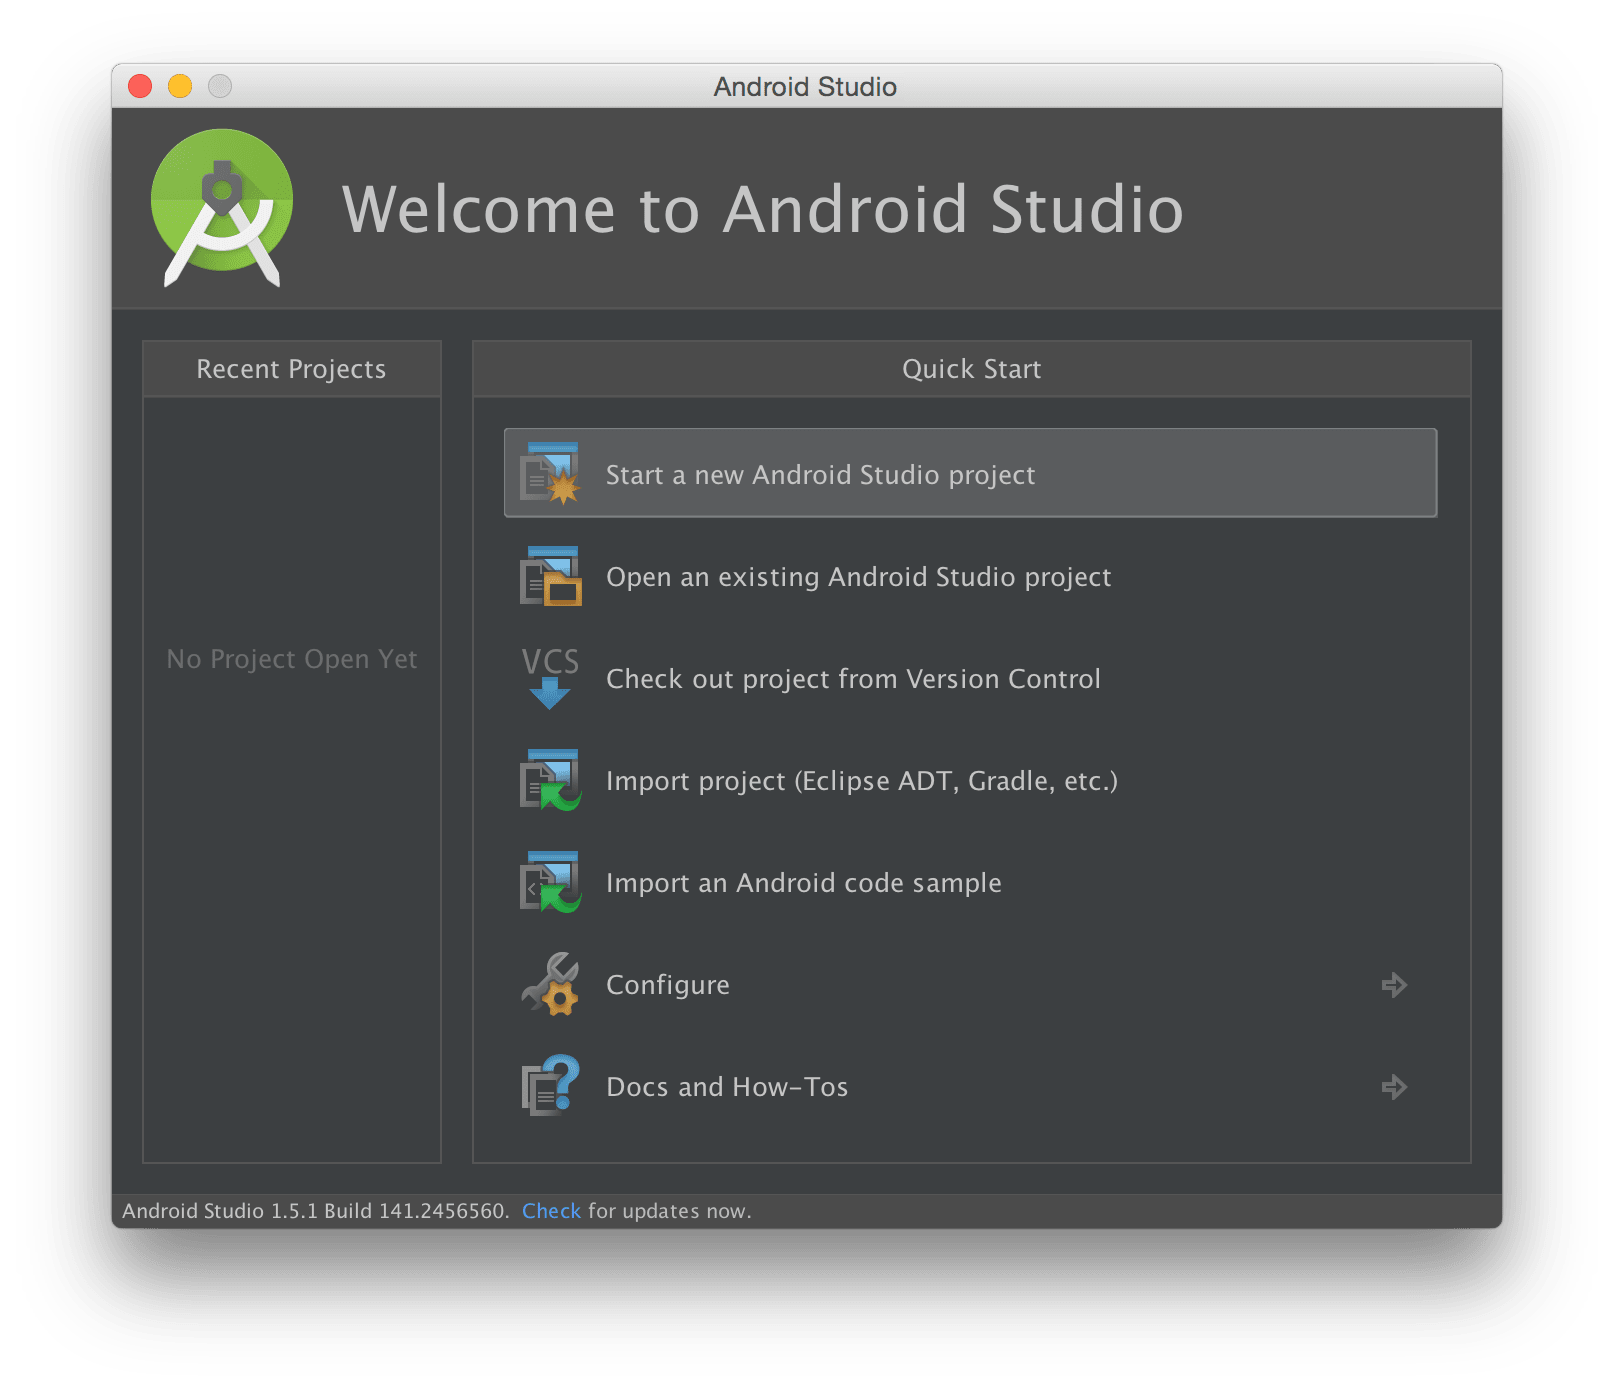
The welcome screen shows the current software version (AS 1.5.1 in the example) and a few basic options to get you started. Click the highlighted option to create a new project. The recent project list is empty because we have no other projects.
As you can see, in addition to creating a new project, you can open and import an existing one, check one out from version control, and import an Android code sample.
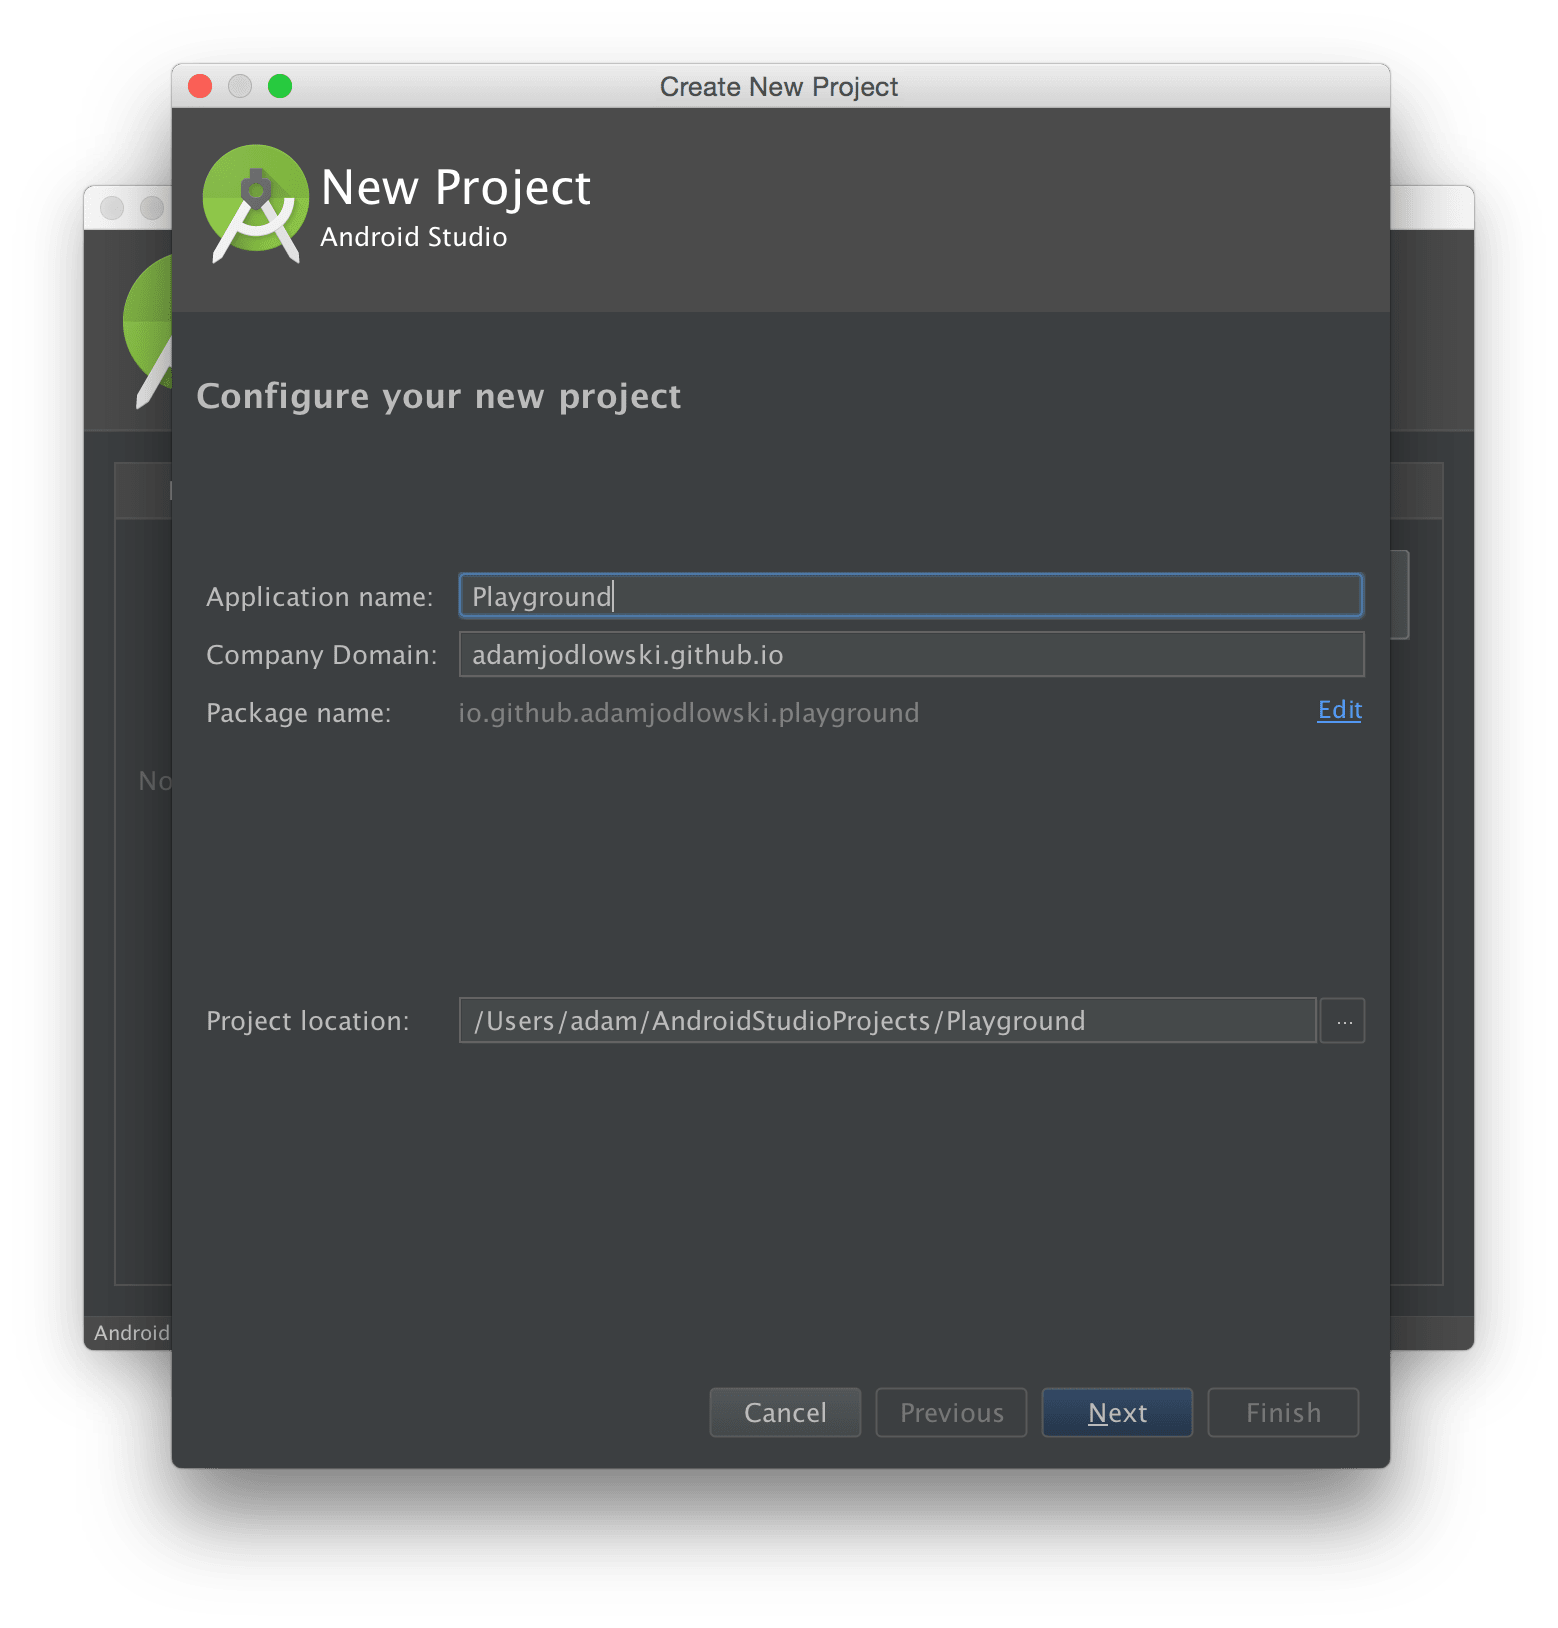
In the New Project window, fill out the input boxes as you wish. The example application's name is Playground. Android projects follow Java conventions and keep source code organized as packages. The main package canonical name for our application is io.github.adamjodlowski.playground, and this value is extremely important for various reasons. Three of them would be:
- the application main package name distinguishes it from other applications on the Google Play Store
- it's associated with your application that lives alongside others on the Android device, allows for efficient and secure communication between your own application components and external ones — for instance, for the purpose of exchanging data between them
- is necessary to properly configure your application via the Android Manifest which we'll come back to later on
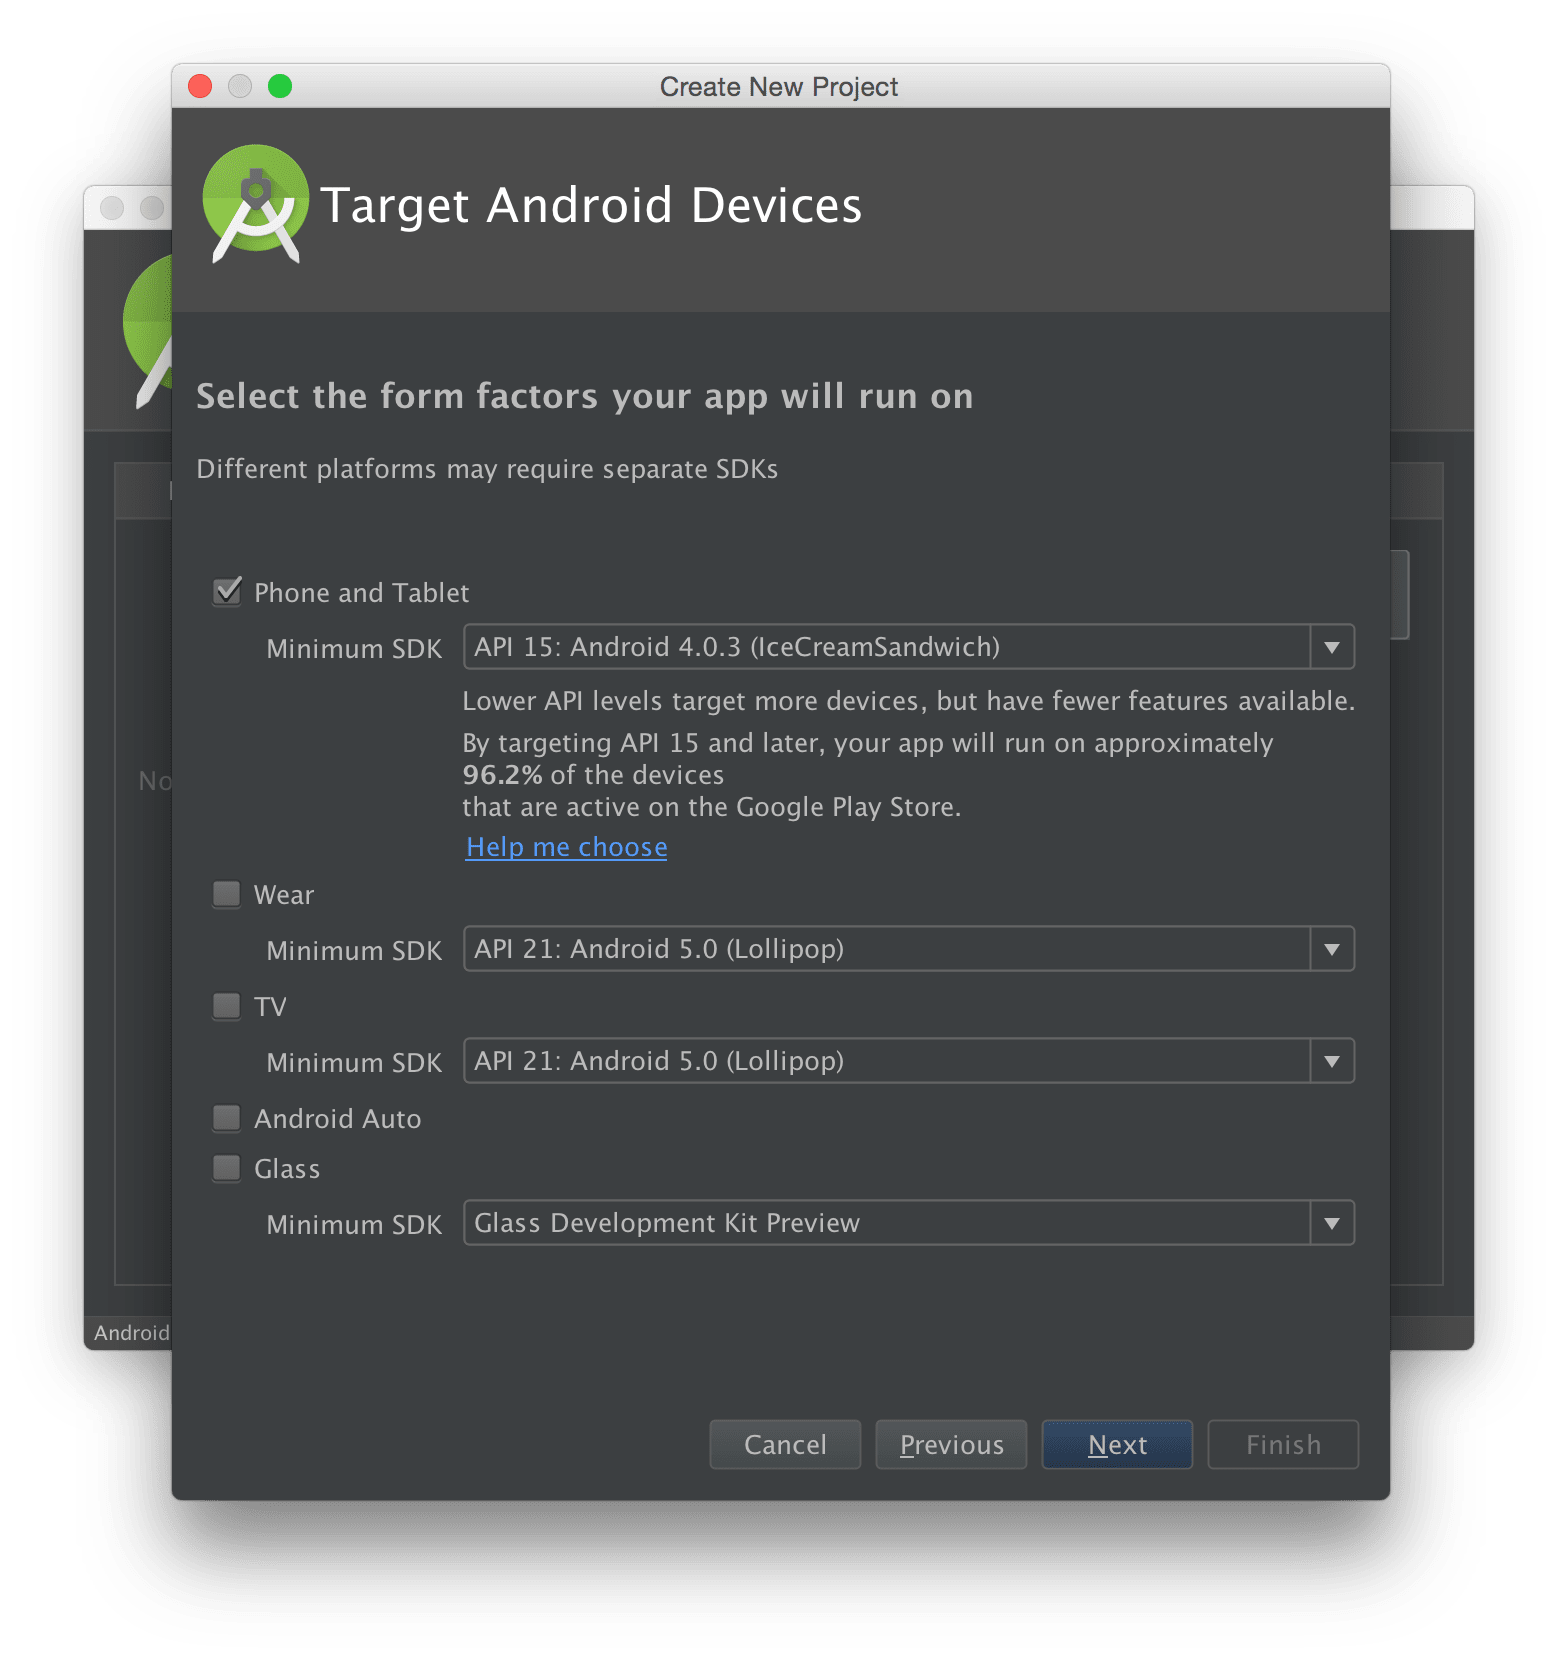
Because of Android's design and flexible configuration possibilities, it's present on a wide range of form factors and manufacturer brands. Let's leave this option default, choosing the Phone and Tablet variant with the Minimum SDK set to 15. Because of this decision, our application will be compatible with every Android device with the operating system version 4.0.3 (Ice Cream Sandwich) or higher. This is a reasonable decision these days, as you can see, we are given additional rationale coming from the IDE and Google Play Store.
Android is being constantly developed. New platform versions (SDK from programmer's perspective) are being published, to fix bugs and provide additional functionalities. New devices come with current platforms; older ones are updated or stay as they were. To give an example, let's say you build your application with the minimum SDK equal to 15 and have two devices with platform 23 and an older one with platform 8:
- we need to use only[2] features available up to platform 15 because this is the minimum our app is said to be compliant with
- the application can be installed on a device with the platform version 23, but there are many features added along the way which we can't use because we need to provide compatibility with all platforms from 15 to 23
- the application can not be installed on platform 8 because that's lower than the minimum — the API features added later are missing from the device
Feel free to lower the minimum SDK version if you're certain it's necessary for your project.
Android is backward compatible, so applications written for older platforms will work on newer ones, but default behaviors might change and affect our apps.
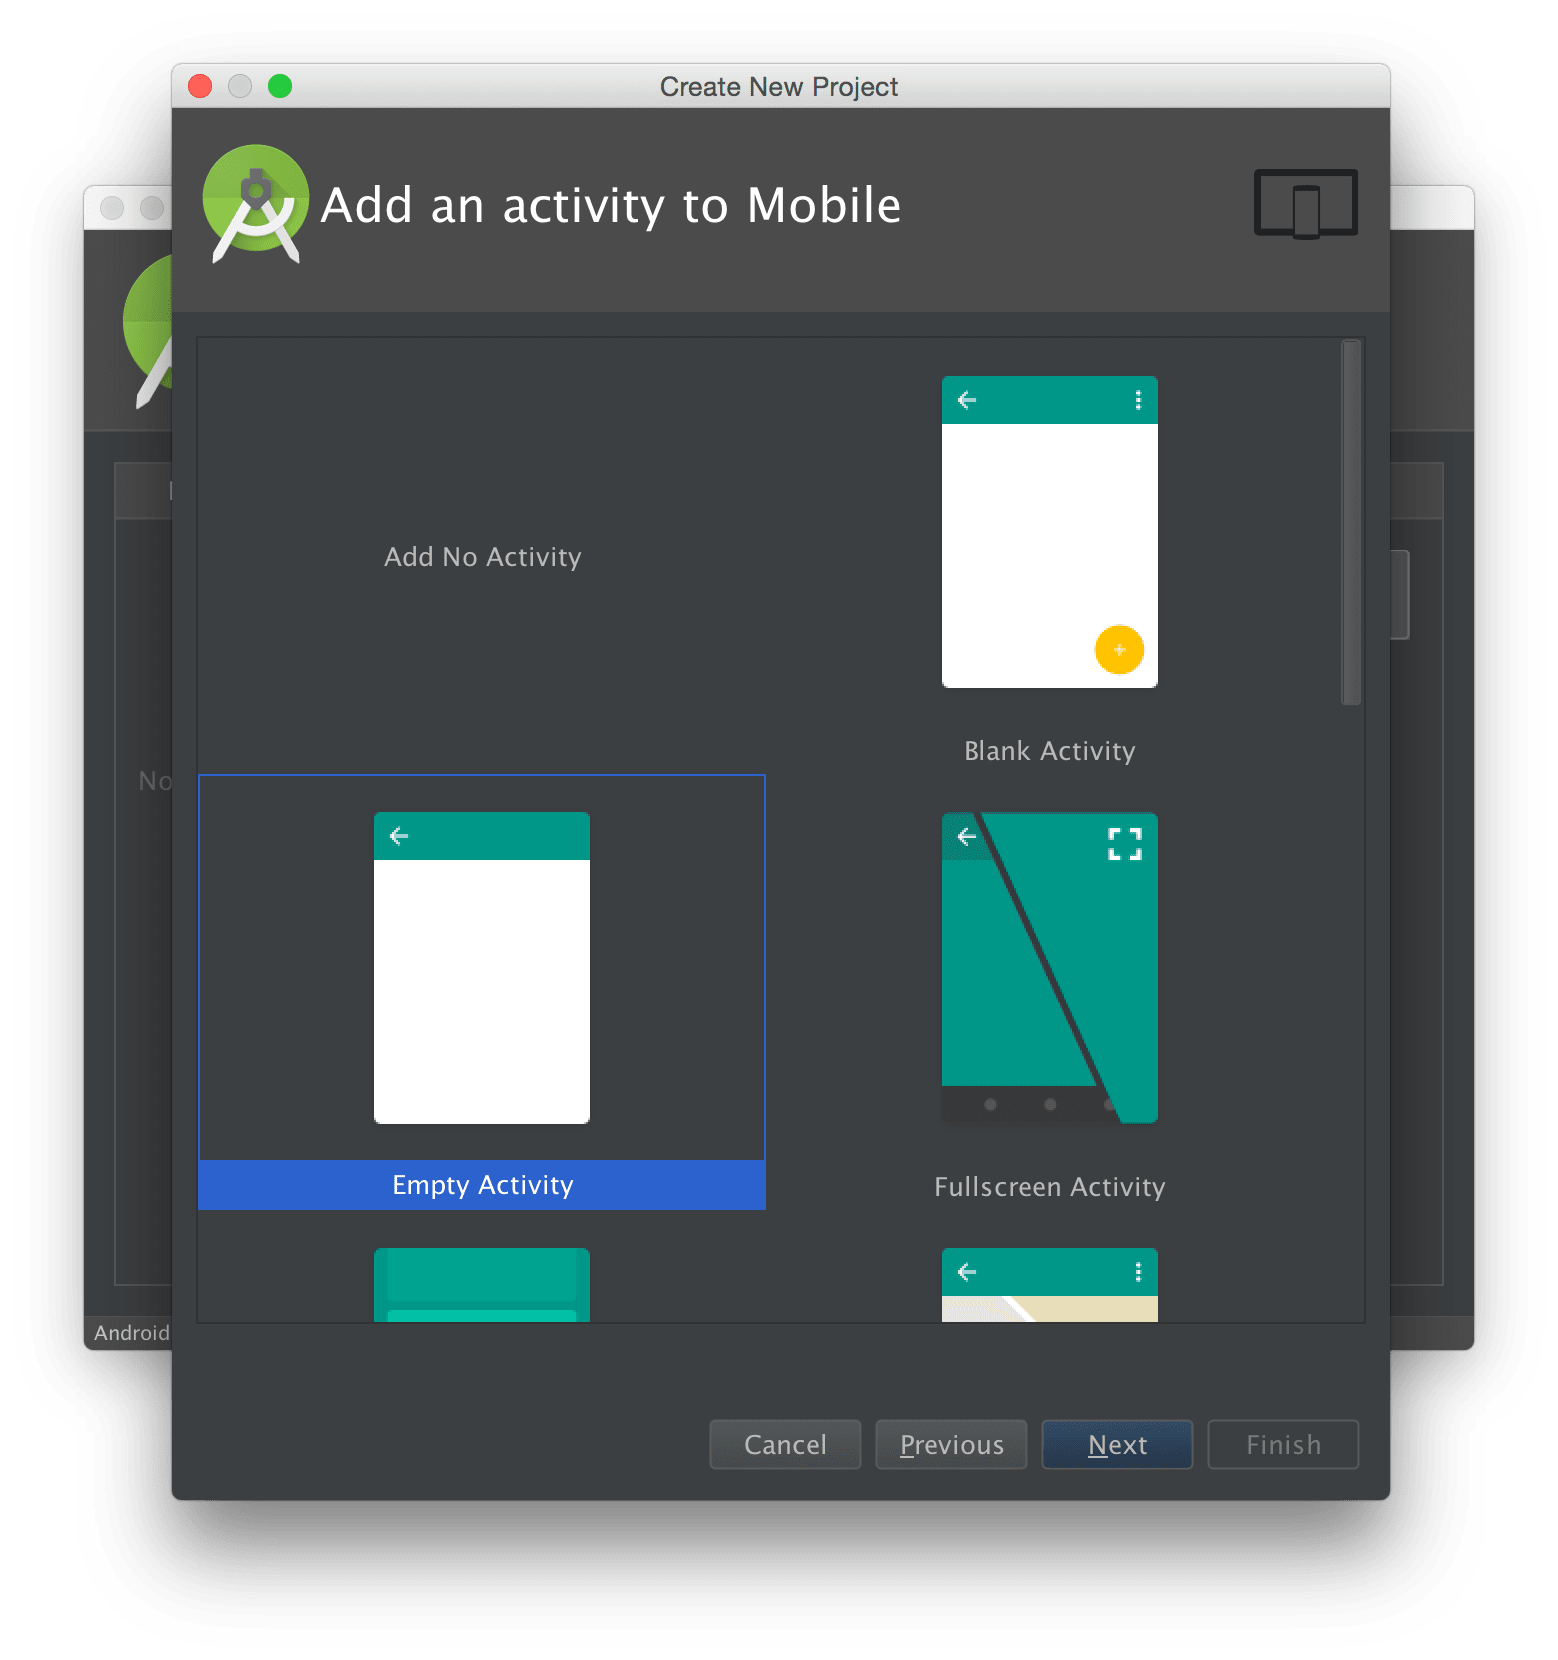
In this step we're going to pick Empty Activity, so the generated code is less complicated. You can add custom components at every point during development, so these mini creators are really for getting to know the basic types of navigation and application structure or really simple projects.
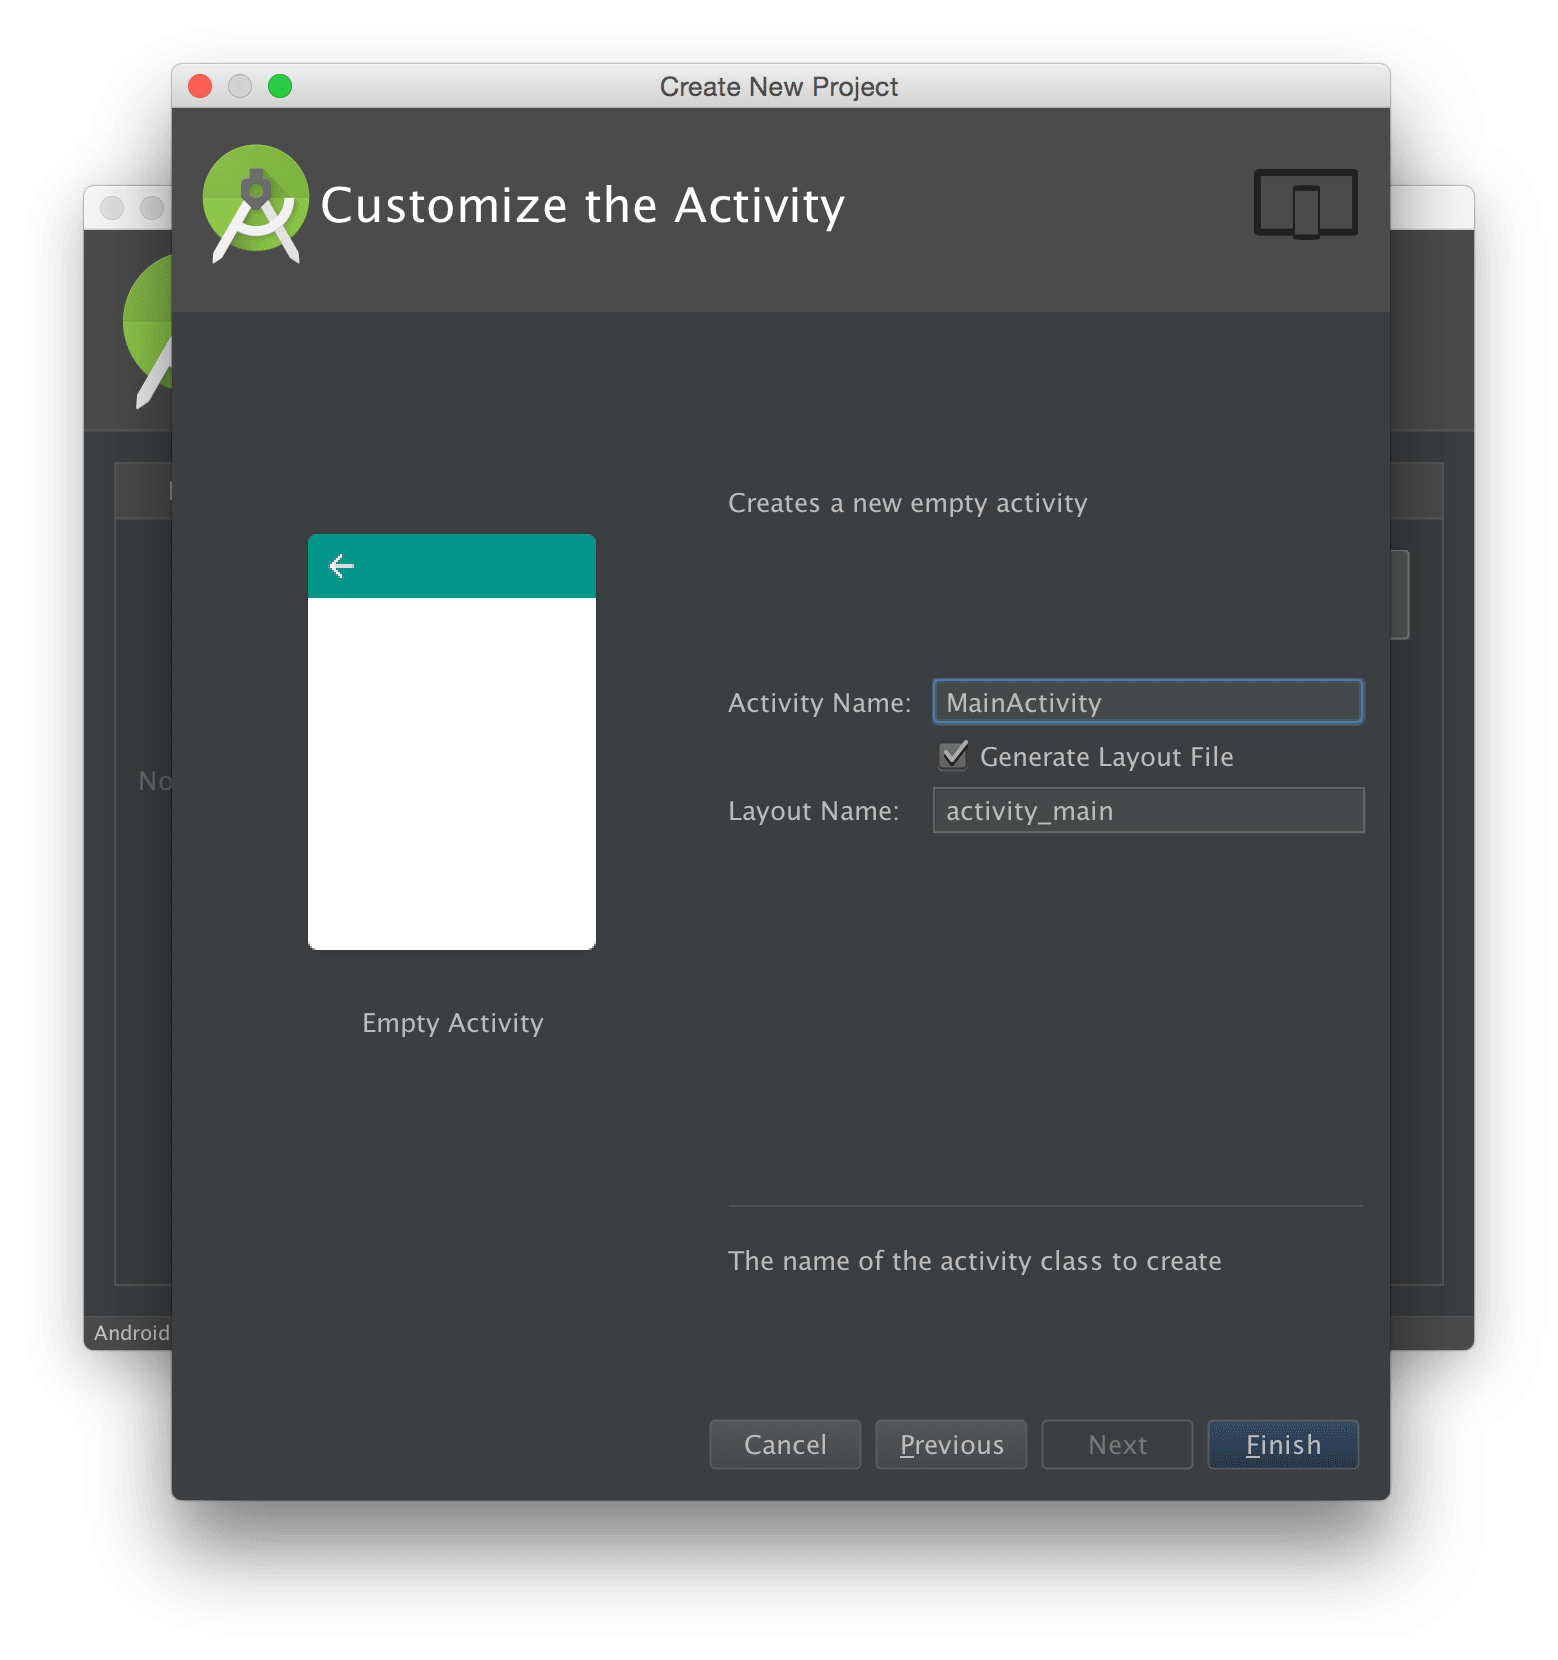
You can think of an Activity as the main building block of an application, representing one window of User Interface. Having at least one Activity in an application is not necessary, but this is almost always the case. This screen allows you to customize the first (and only, for now) Activity and you can already see the conventions used in Android:
- Activities are named as such: MyNameActivity
- layouts corresponding to activities are named: activity_MyName
Layout is an
.xmlfile representing visual components in a declarative style, most often corresponding to one Activity which contains the activity screen's application logic, in imperative code (.javafile).
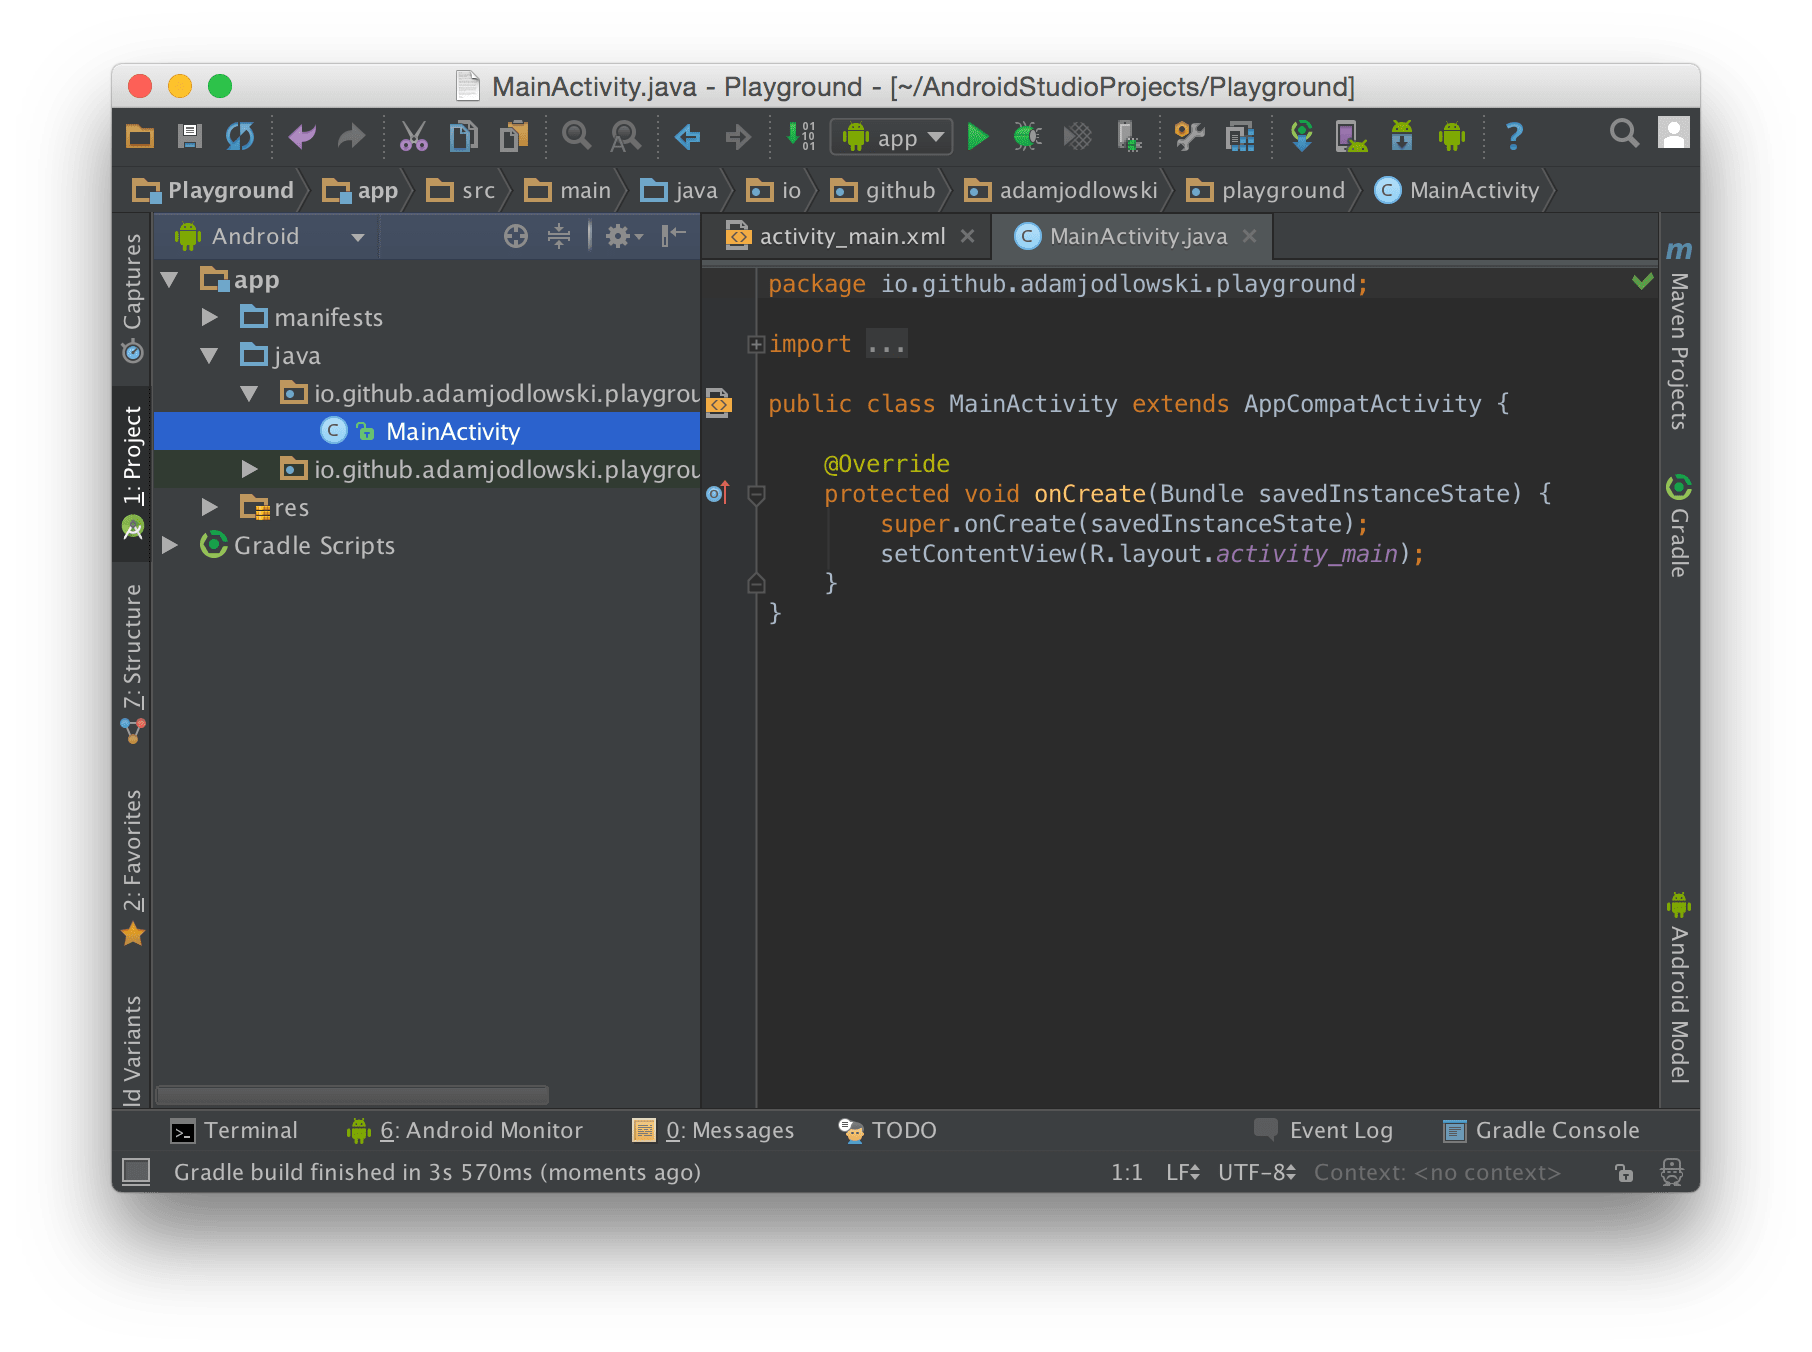
If everything went okay, you should now see the main Android Studio view with your main activity source file opened.
Android Studio is built on top of IntelliJ IDEA, if you're already familiar with that tool, you should feel at home.
If your IDE doesn't look similar to what's in the screenshots or if you accidentally closed an important window, reset to default settings by clicking Window > Restore Default Layout in the main menu bar at the top.
Switch to the activity_main.xml file by clicking on the top bar with current files.

What you see by default is the visual layout editor, denoted by the Design bottom tab. This is how your Activity is going to look like on this particular emulated device, in this case a Nexus 4 with the platform 23 in portrait mode. Next to it at the bottom is a tab Text; select it.

You should see an XML representation of the same layout, in the form of an activity_main.xml file. If you're not familiar with XML, you can refer to Wikipedia. Layout files consist of actual Layouts (they coordinate the alignment and positions of their children) and Widgets (basic visual building blocks — button, labels, etc.).
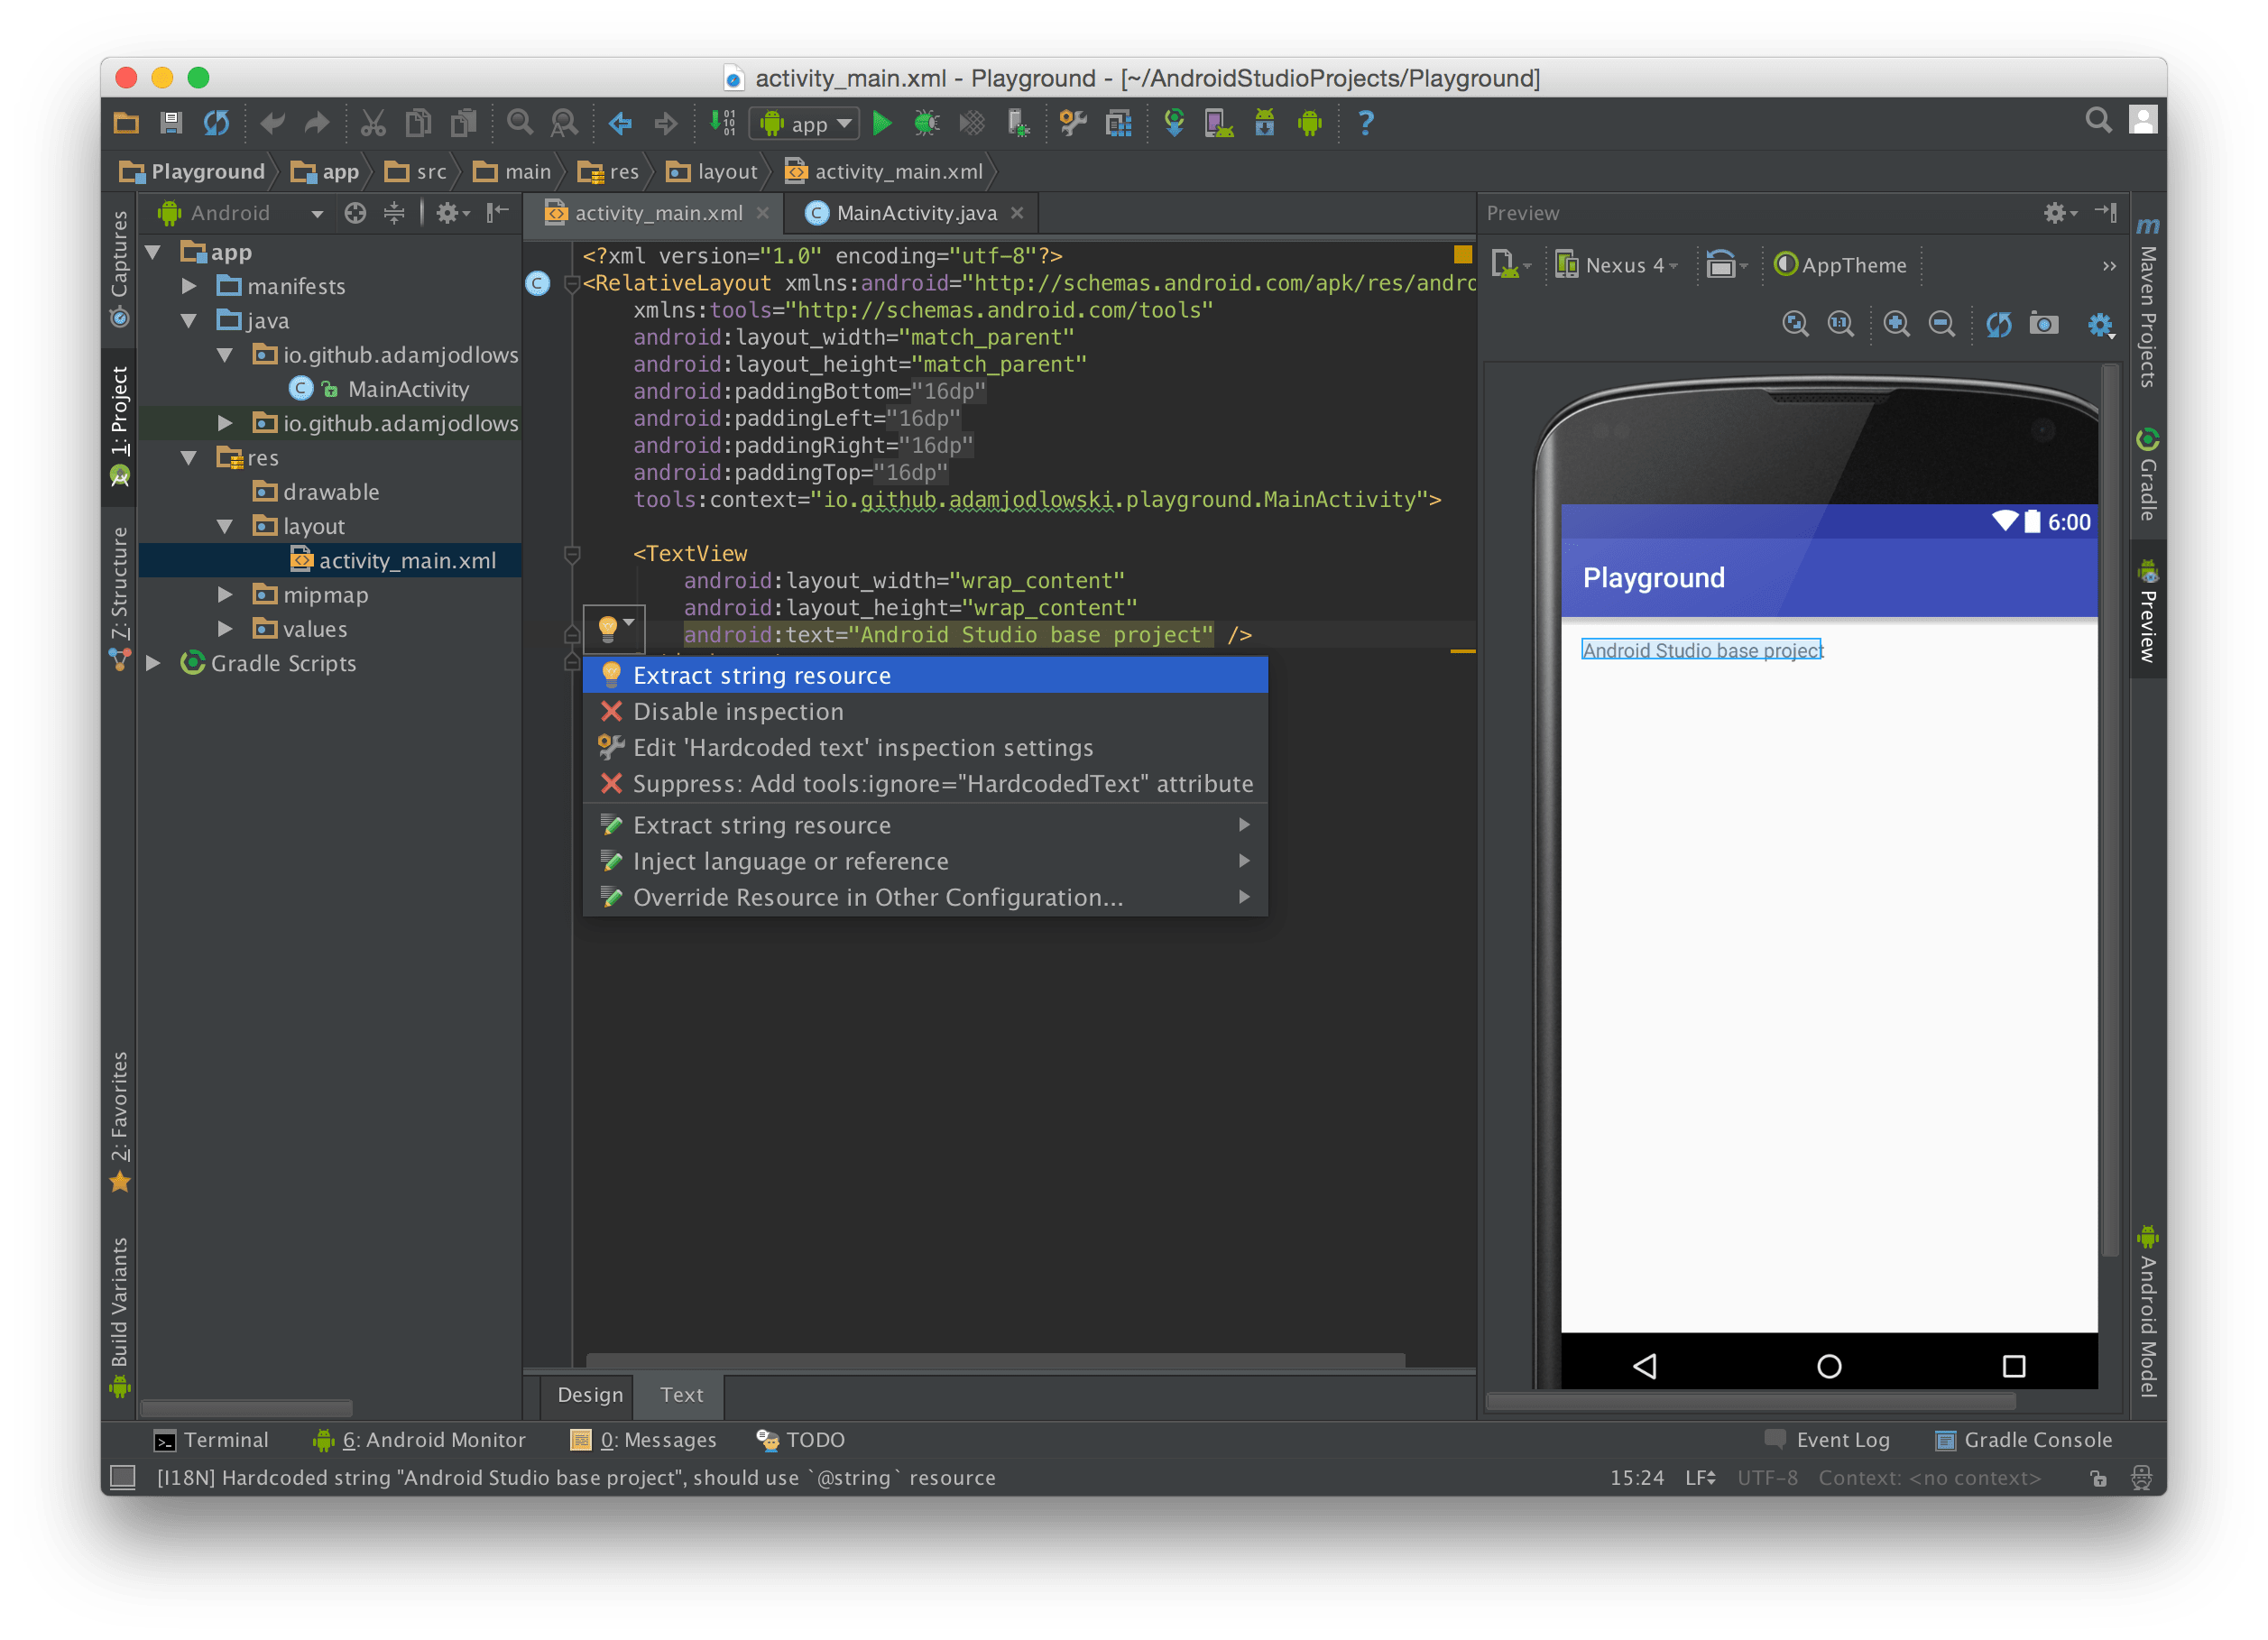
Edit the highlighted text in the TextView node, android:text property, to Android Studio base project. Hopefully, you can already see changes being done on the fly in the preview on the right.
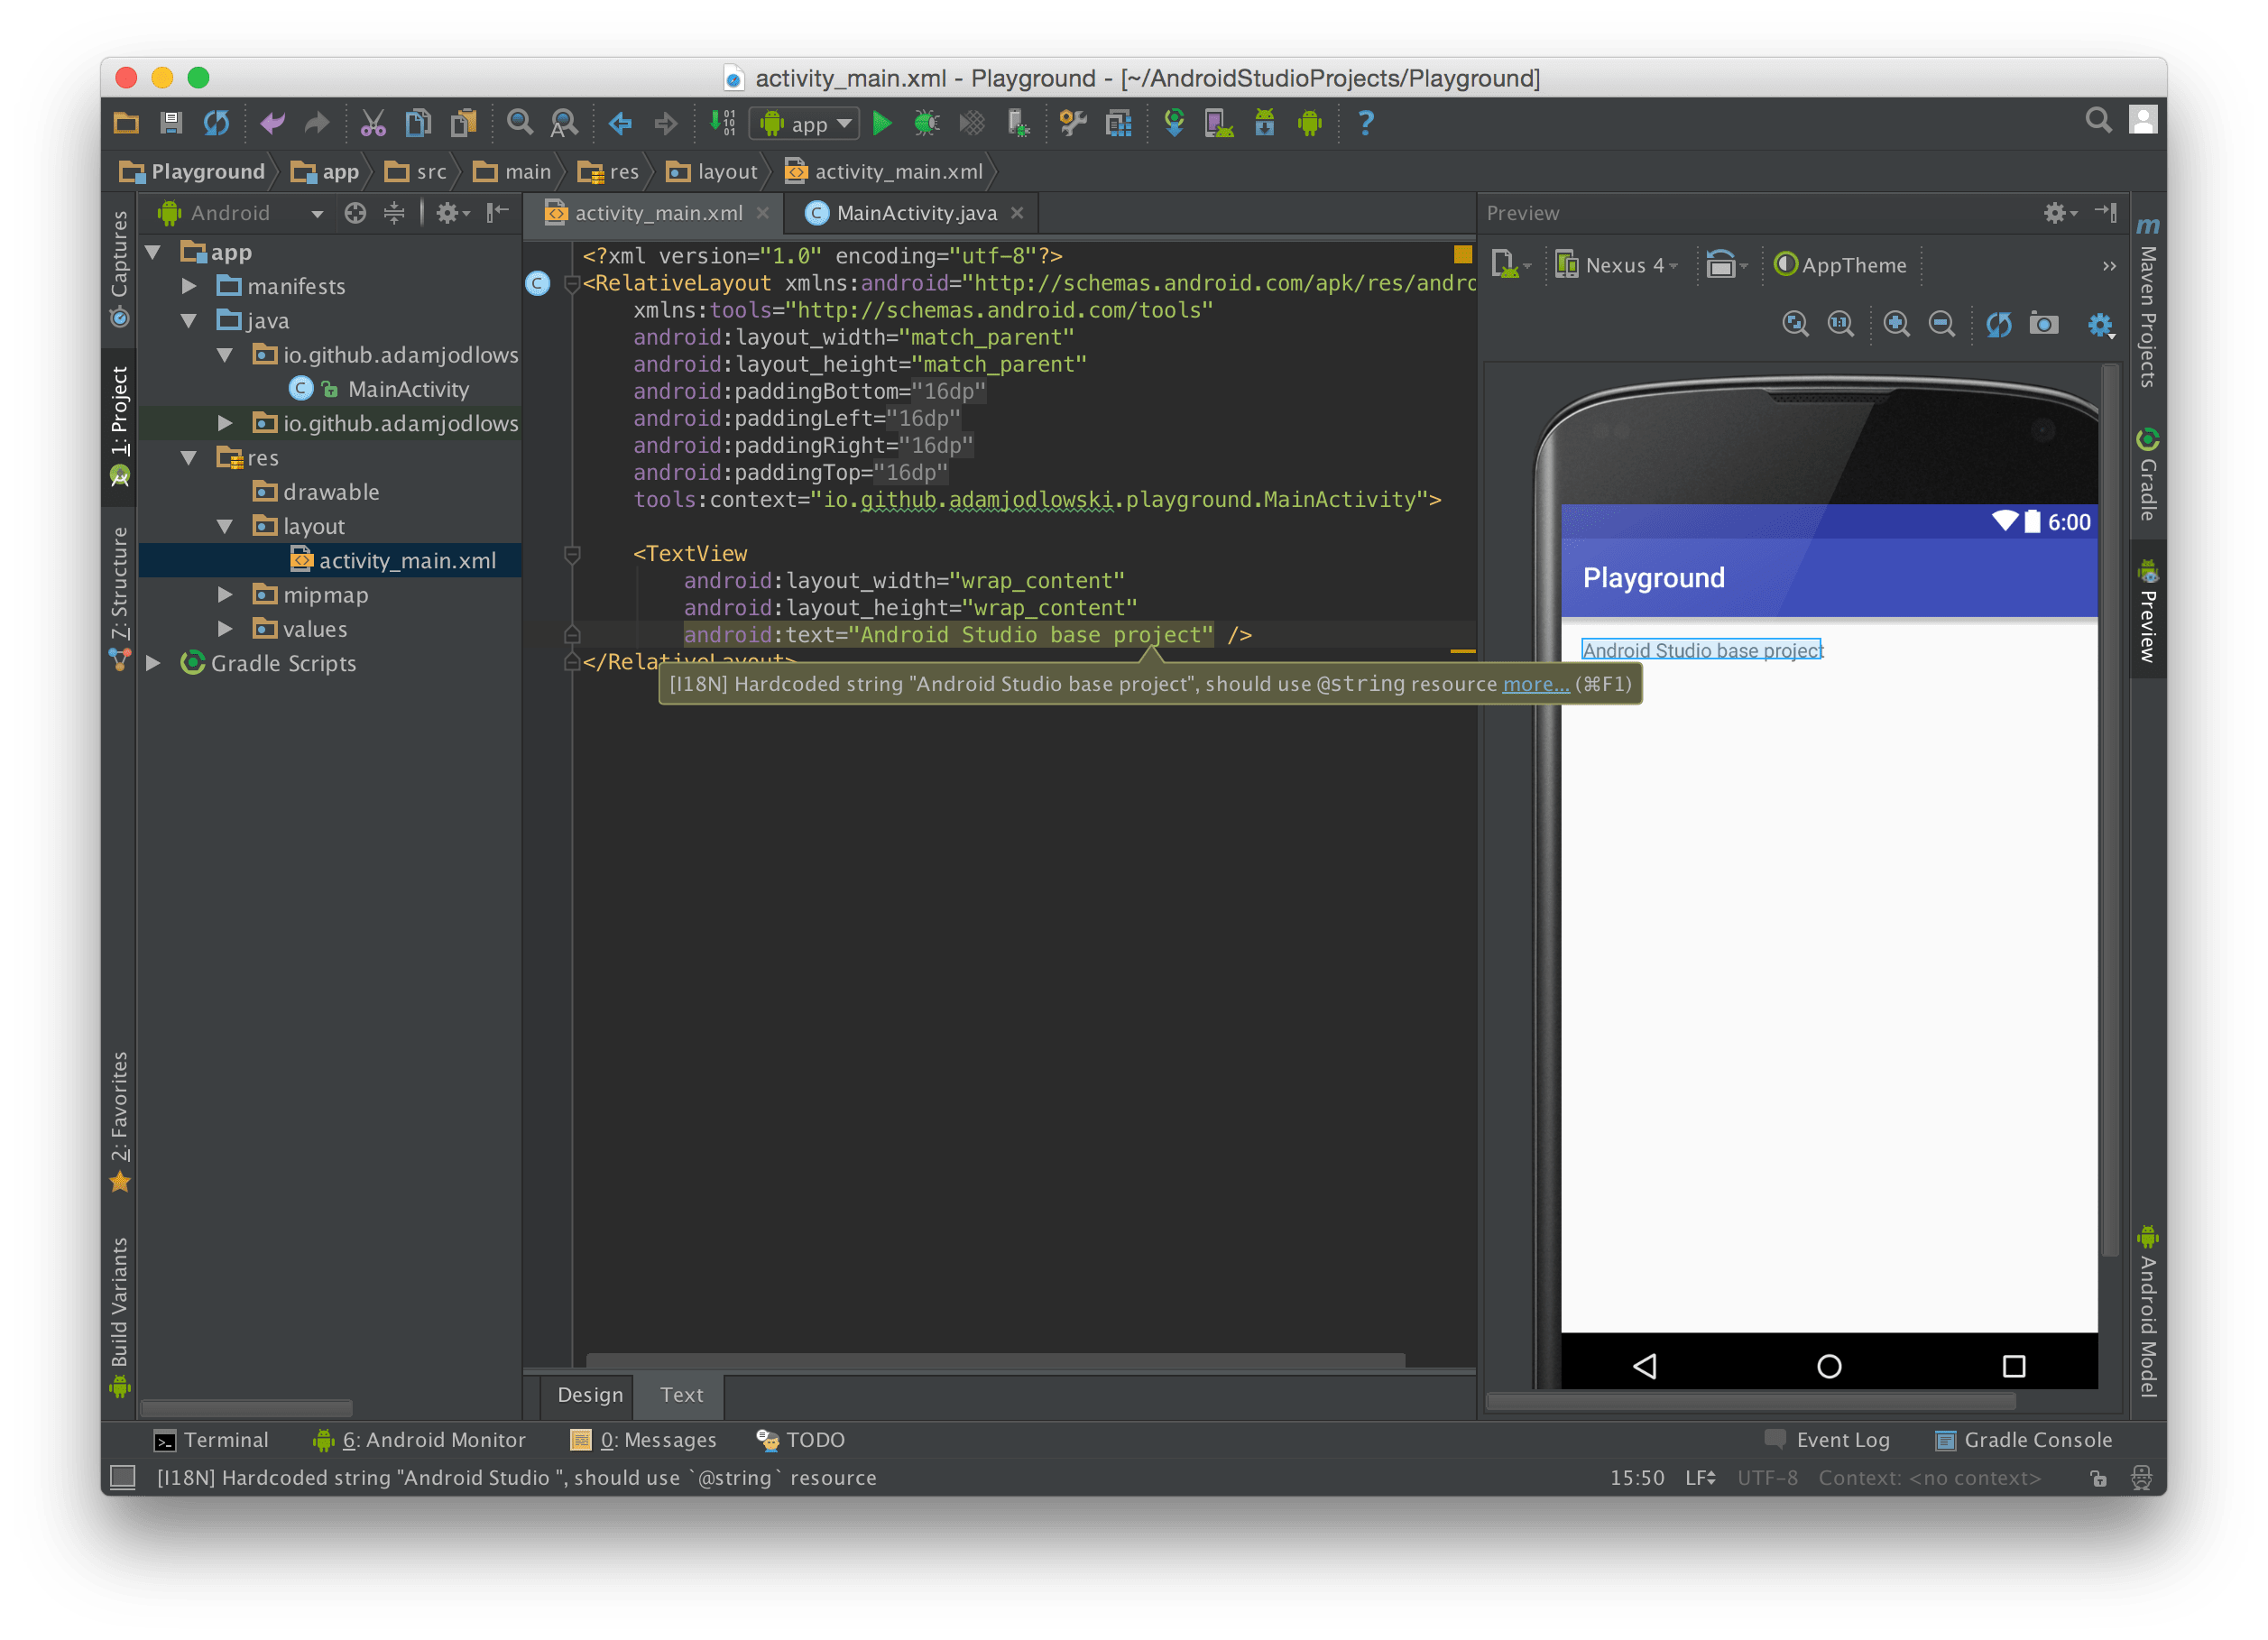
It looks like AS has some tips for us regarding the highlighted line of XML, hover over it and click more... next to the warning message to expand it. It says we should not hardcode strings in the source code, which is another convention and good practice for various reasons. Click on the yellow lightbulb on the left of the problematic line and choose extract string resource.
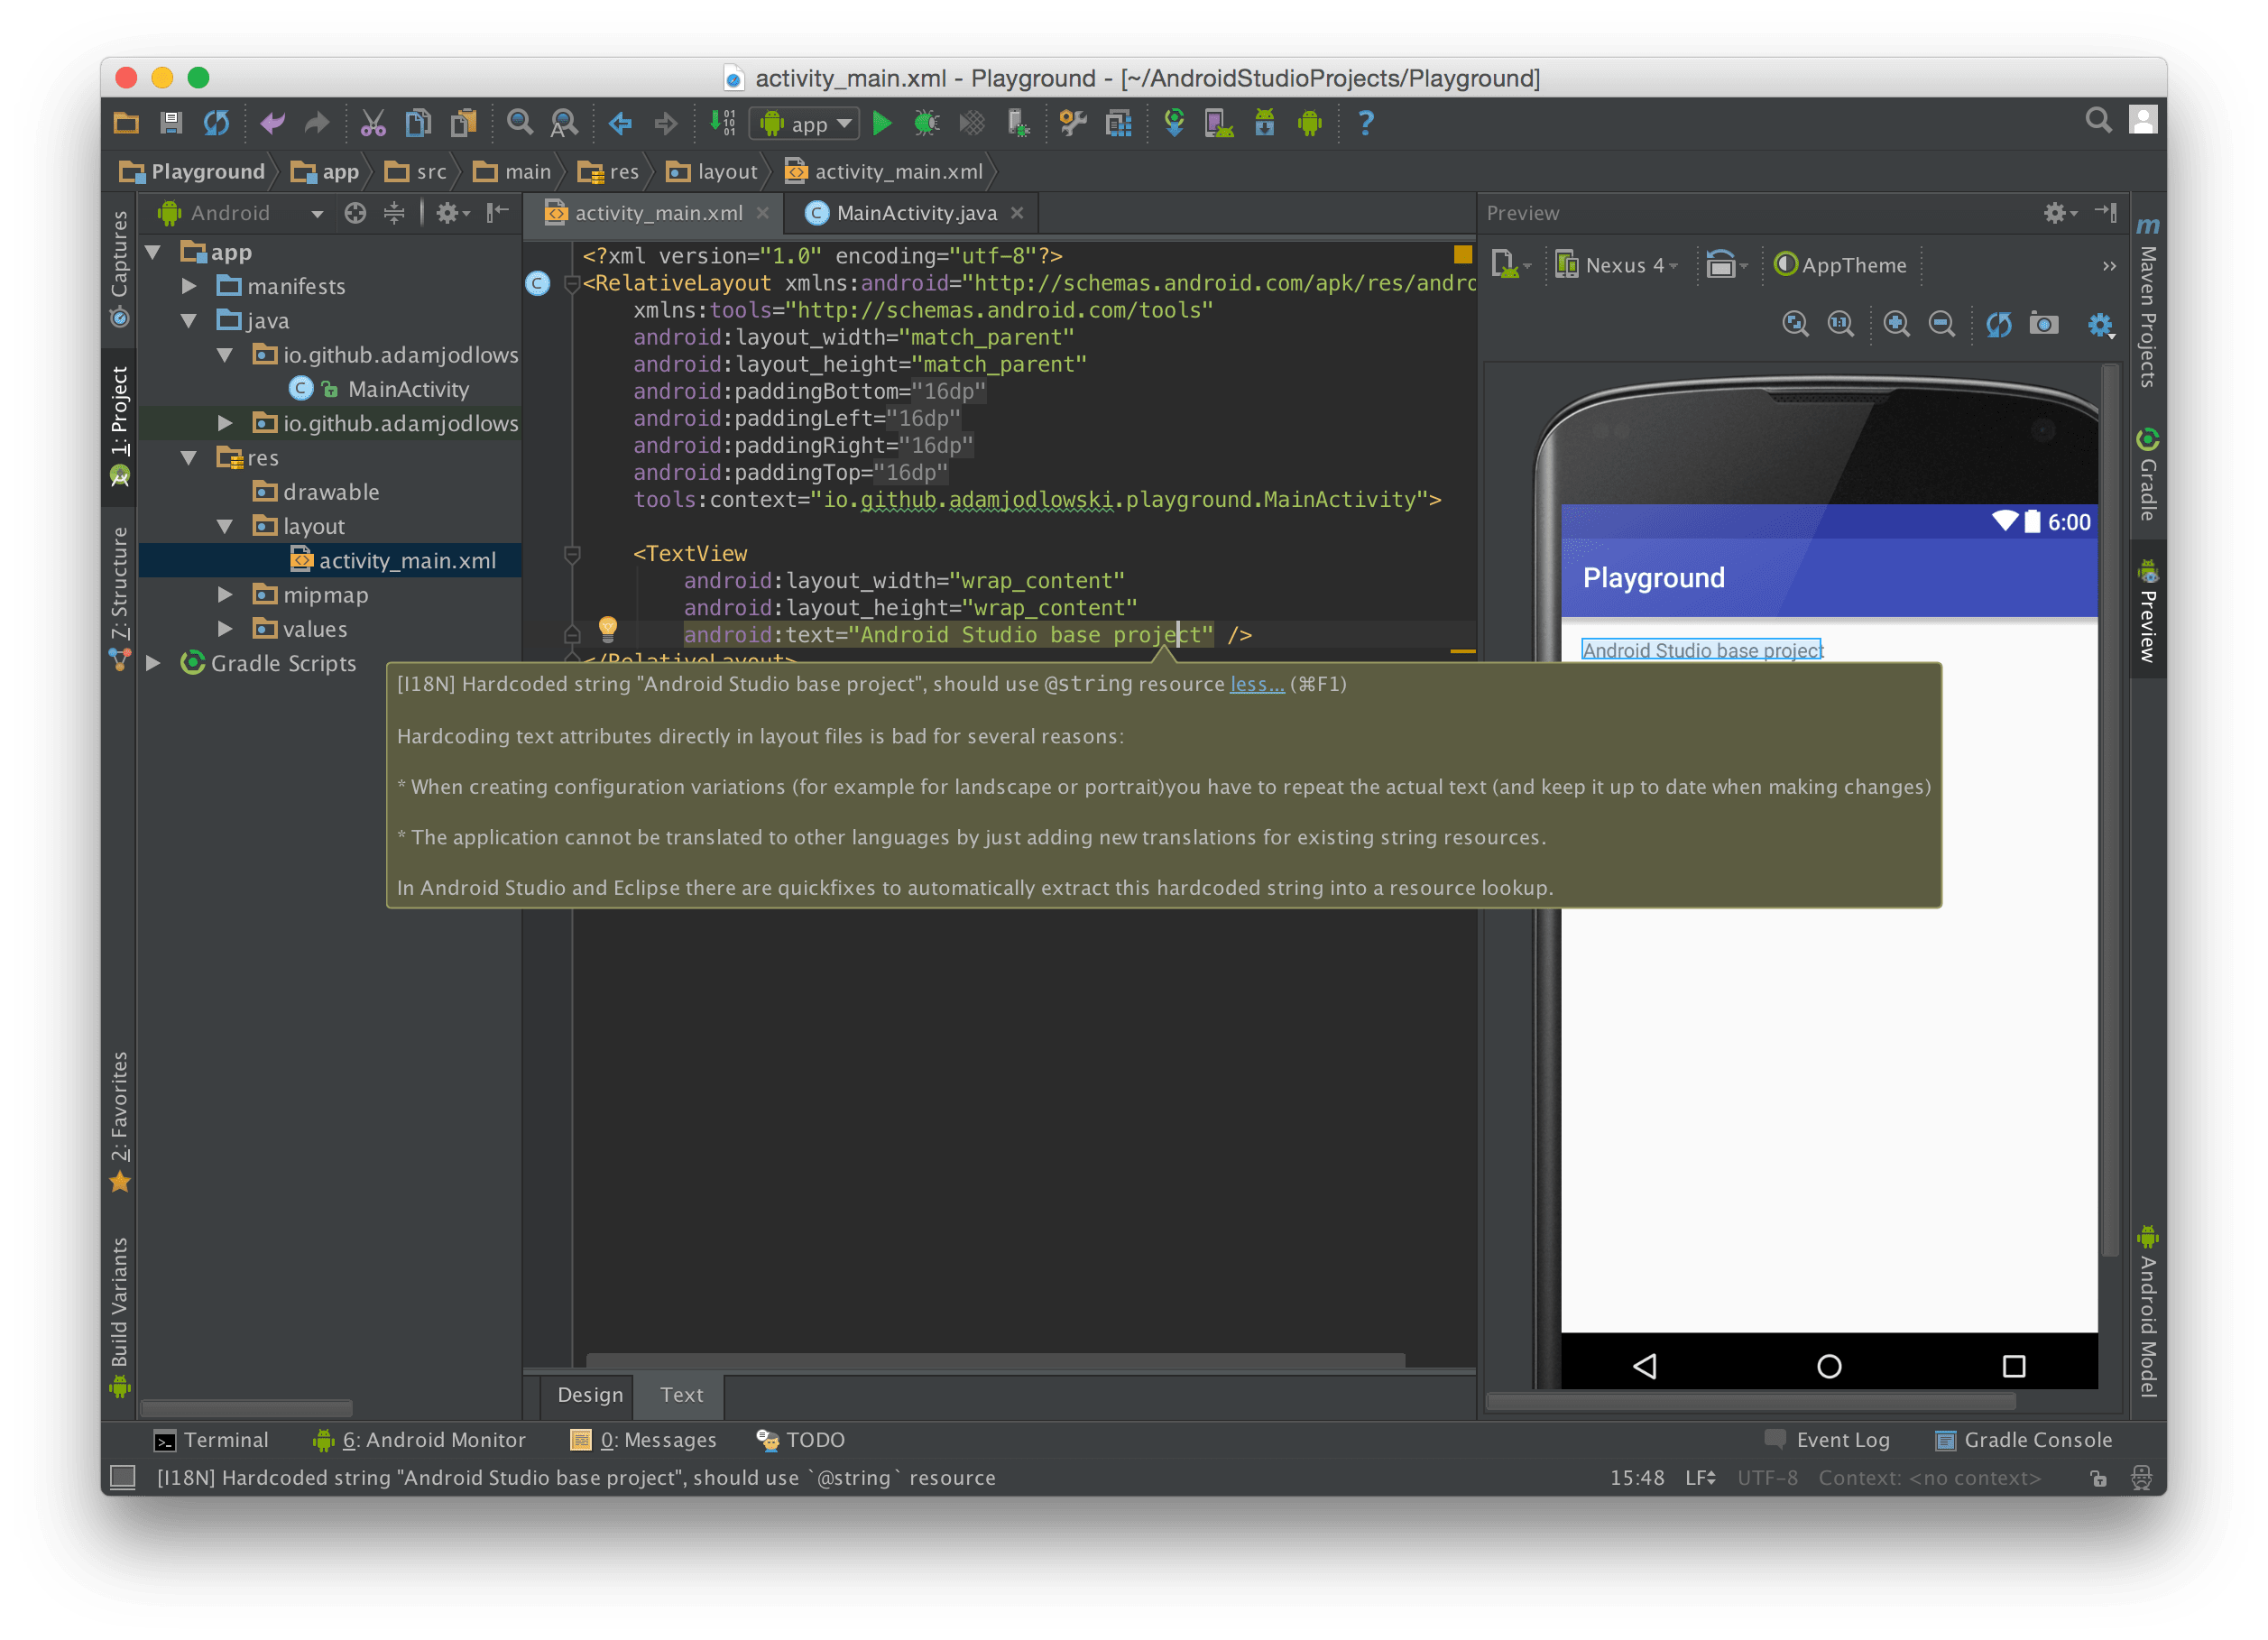
This quick fix is one of many available in AS. Pay close attention to warnings such as that — they can range from not optimal syntax structures to bad design choices impacting application performance. XML files are not validated like Java code by the compiler, so the vast majority of work is done by lint rules defined for Android projects.
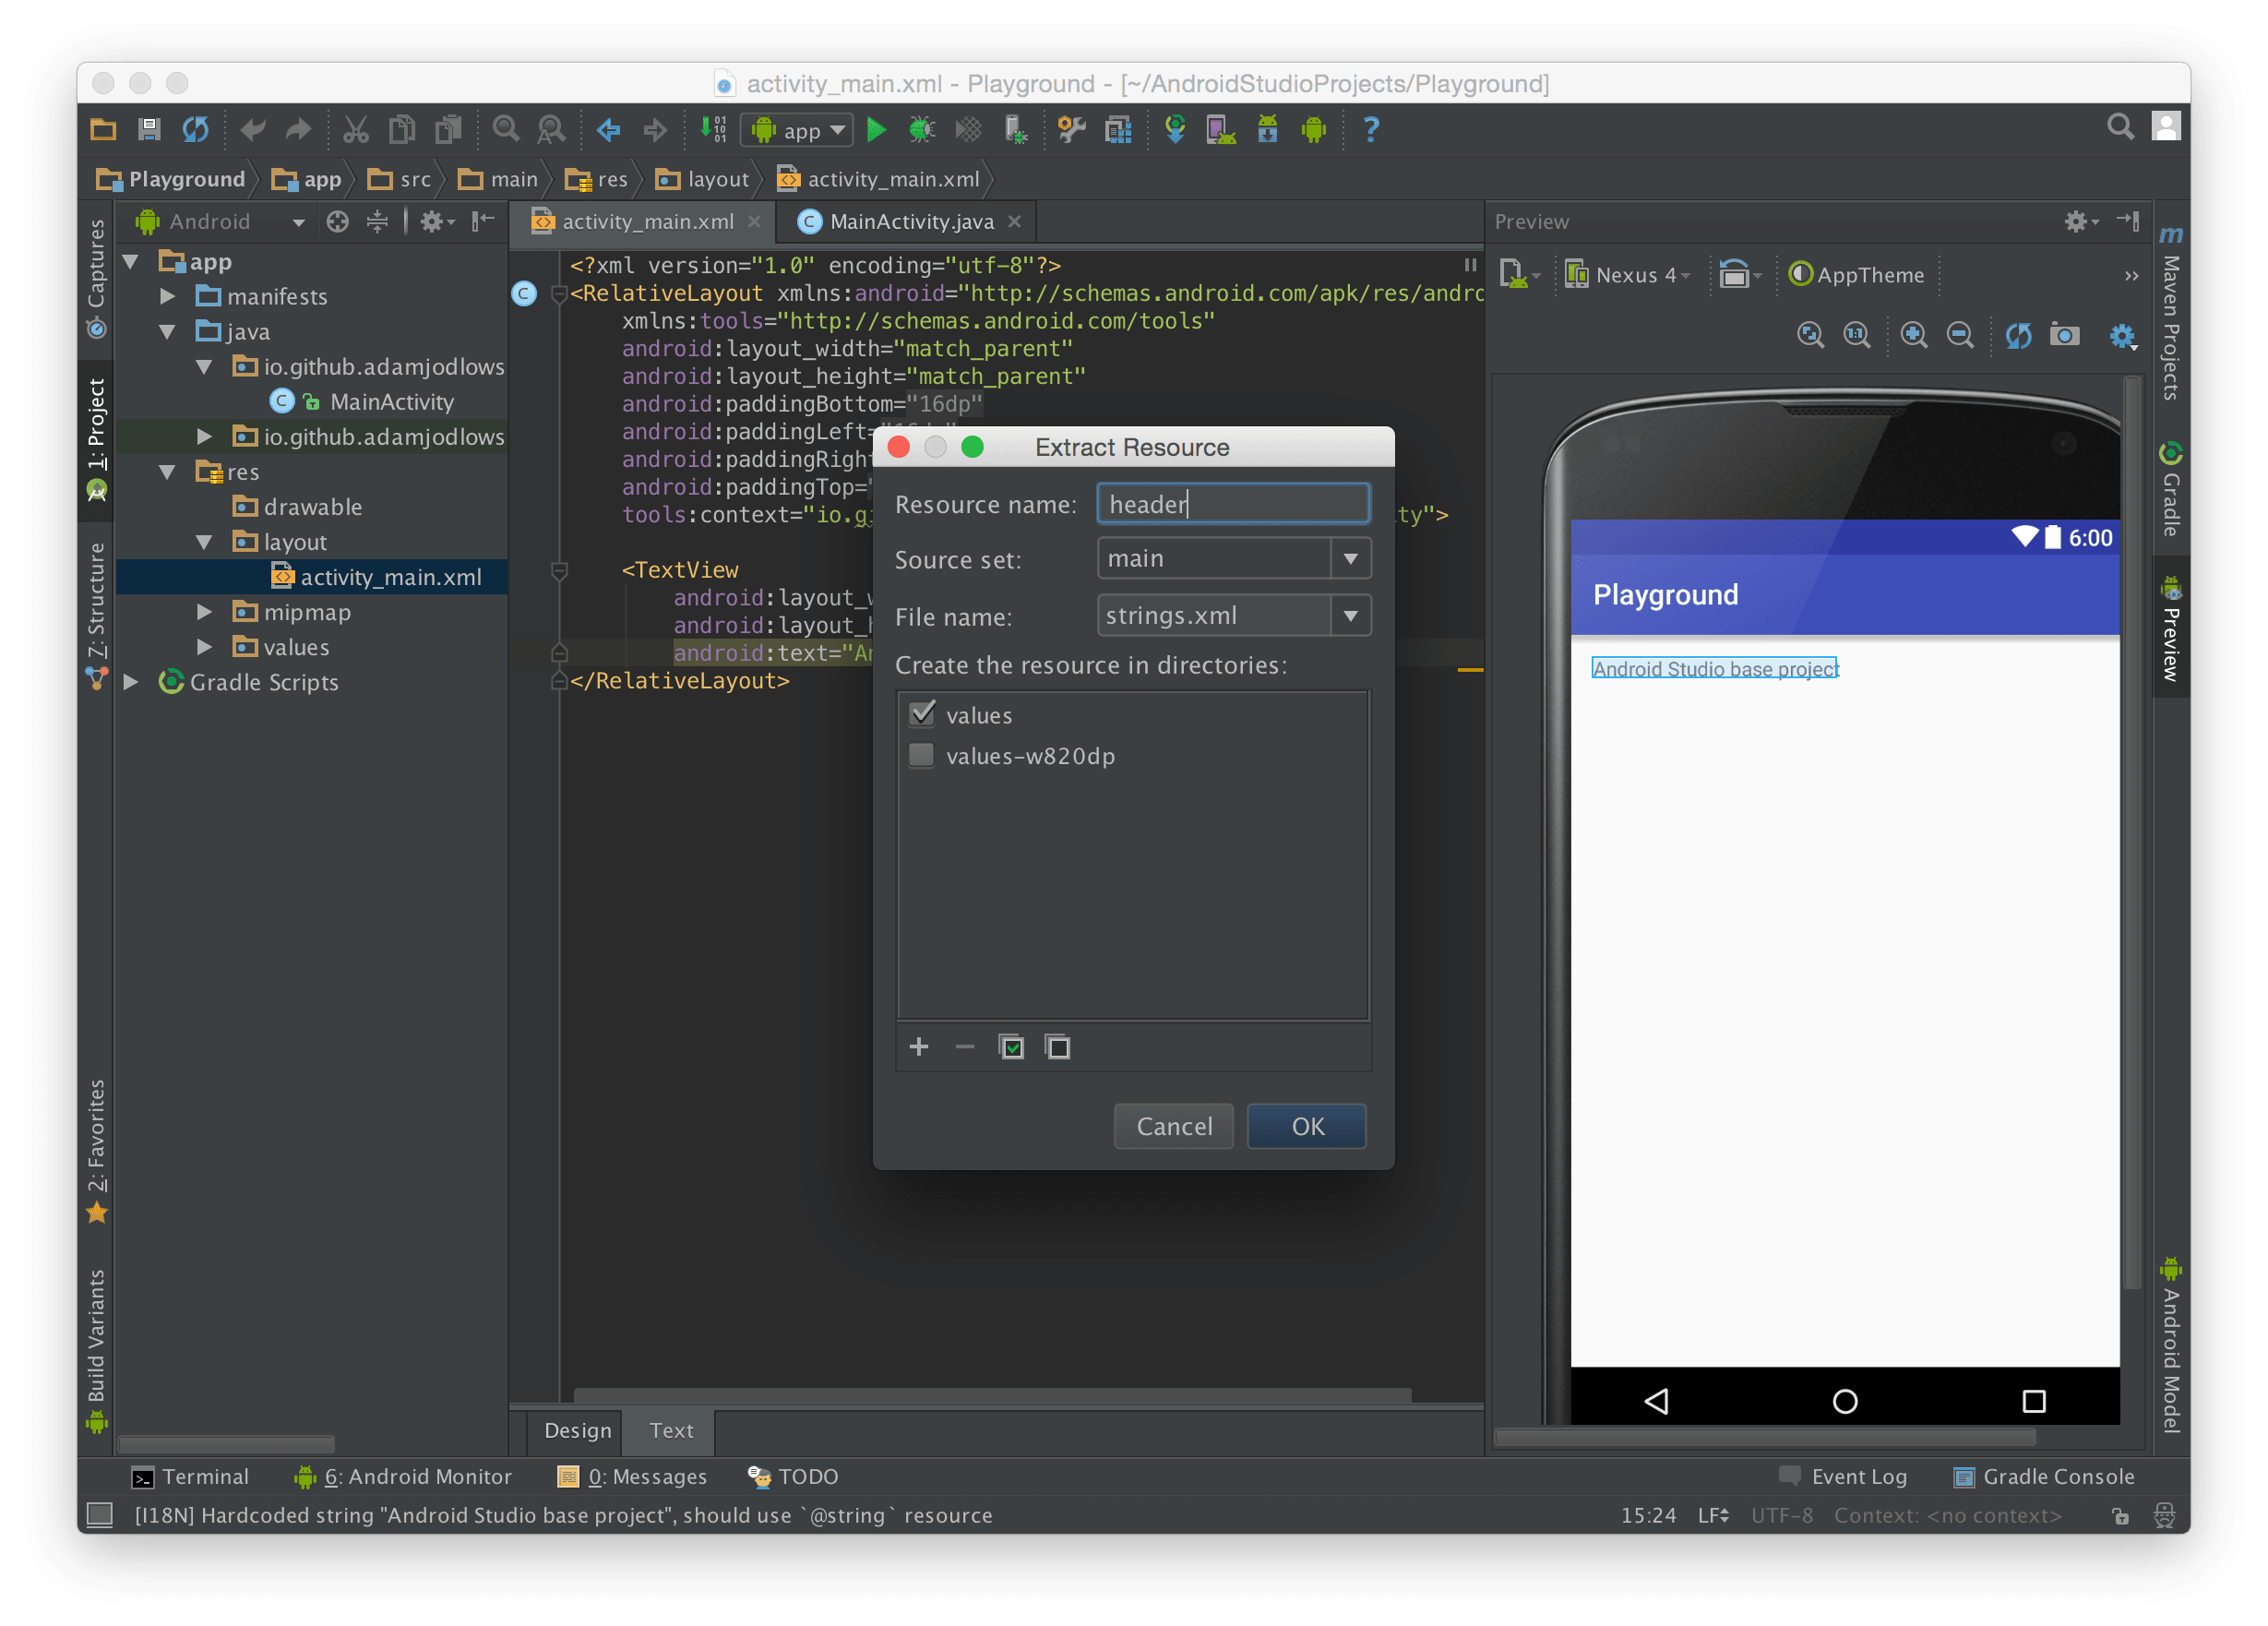
Give a meaningful name to a resource being extracted. The entry will be created in the file strings.xml, which is vital to every Android application.
Command-click (on OS X, or control-click on Windows & Linux) on @string/header which we have just extracted, or open the file strings.xml from the Project Explorer on the left (it's located in /app/src/main/res/values/).
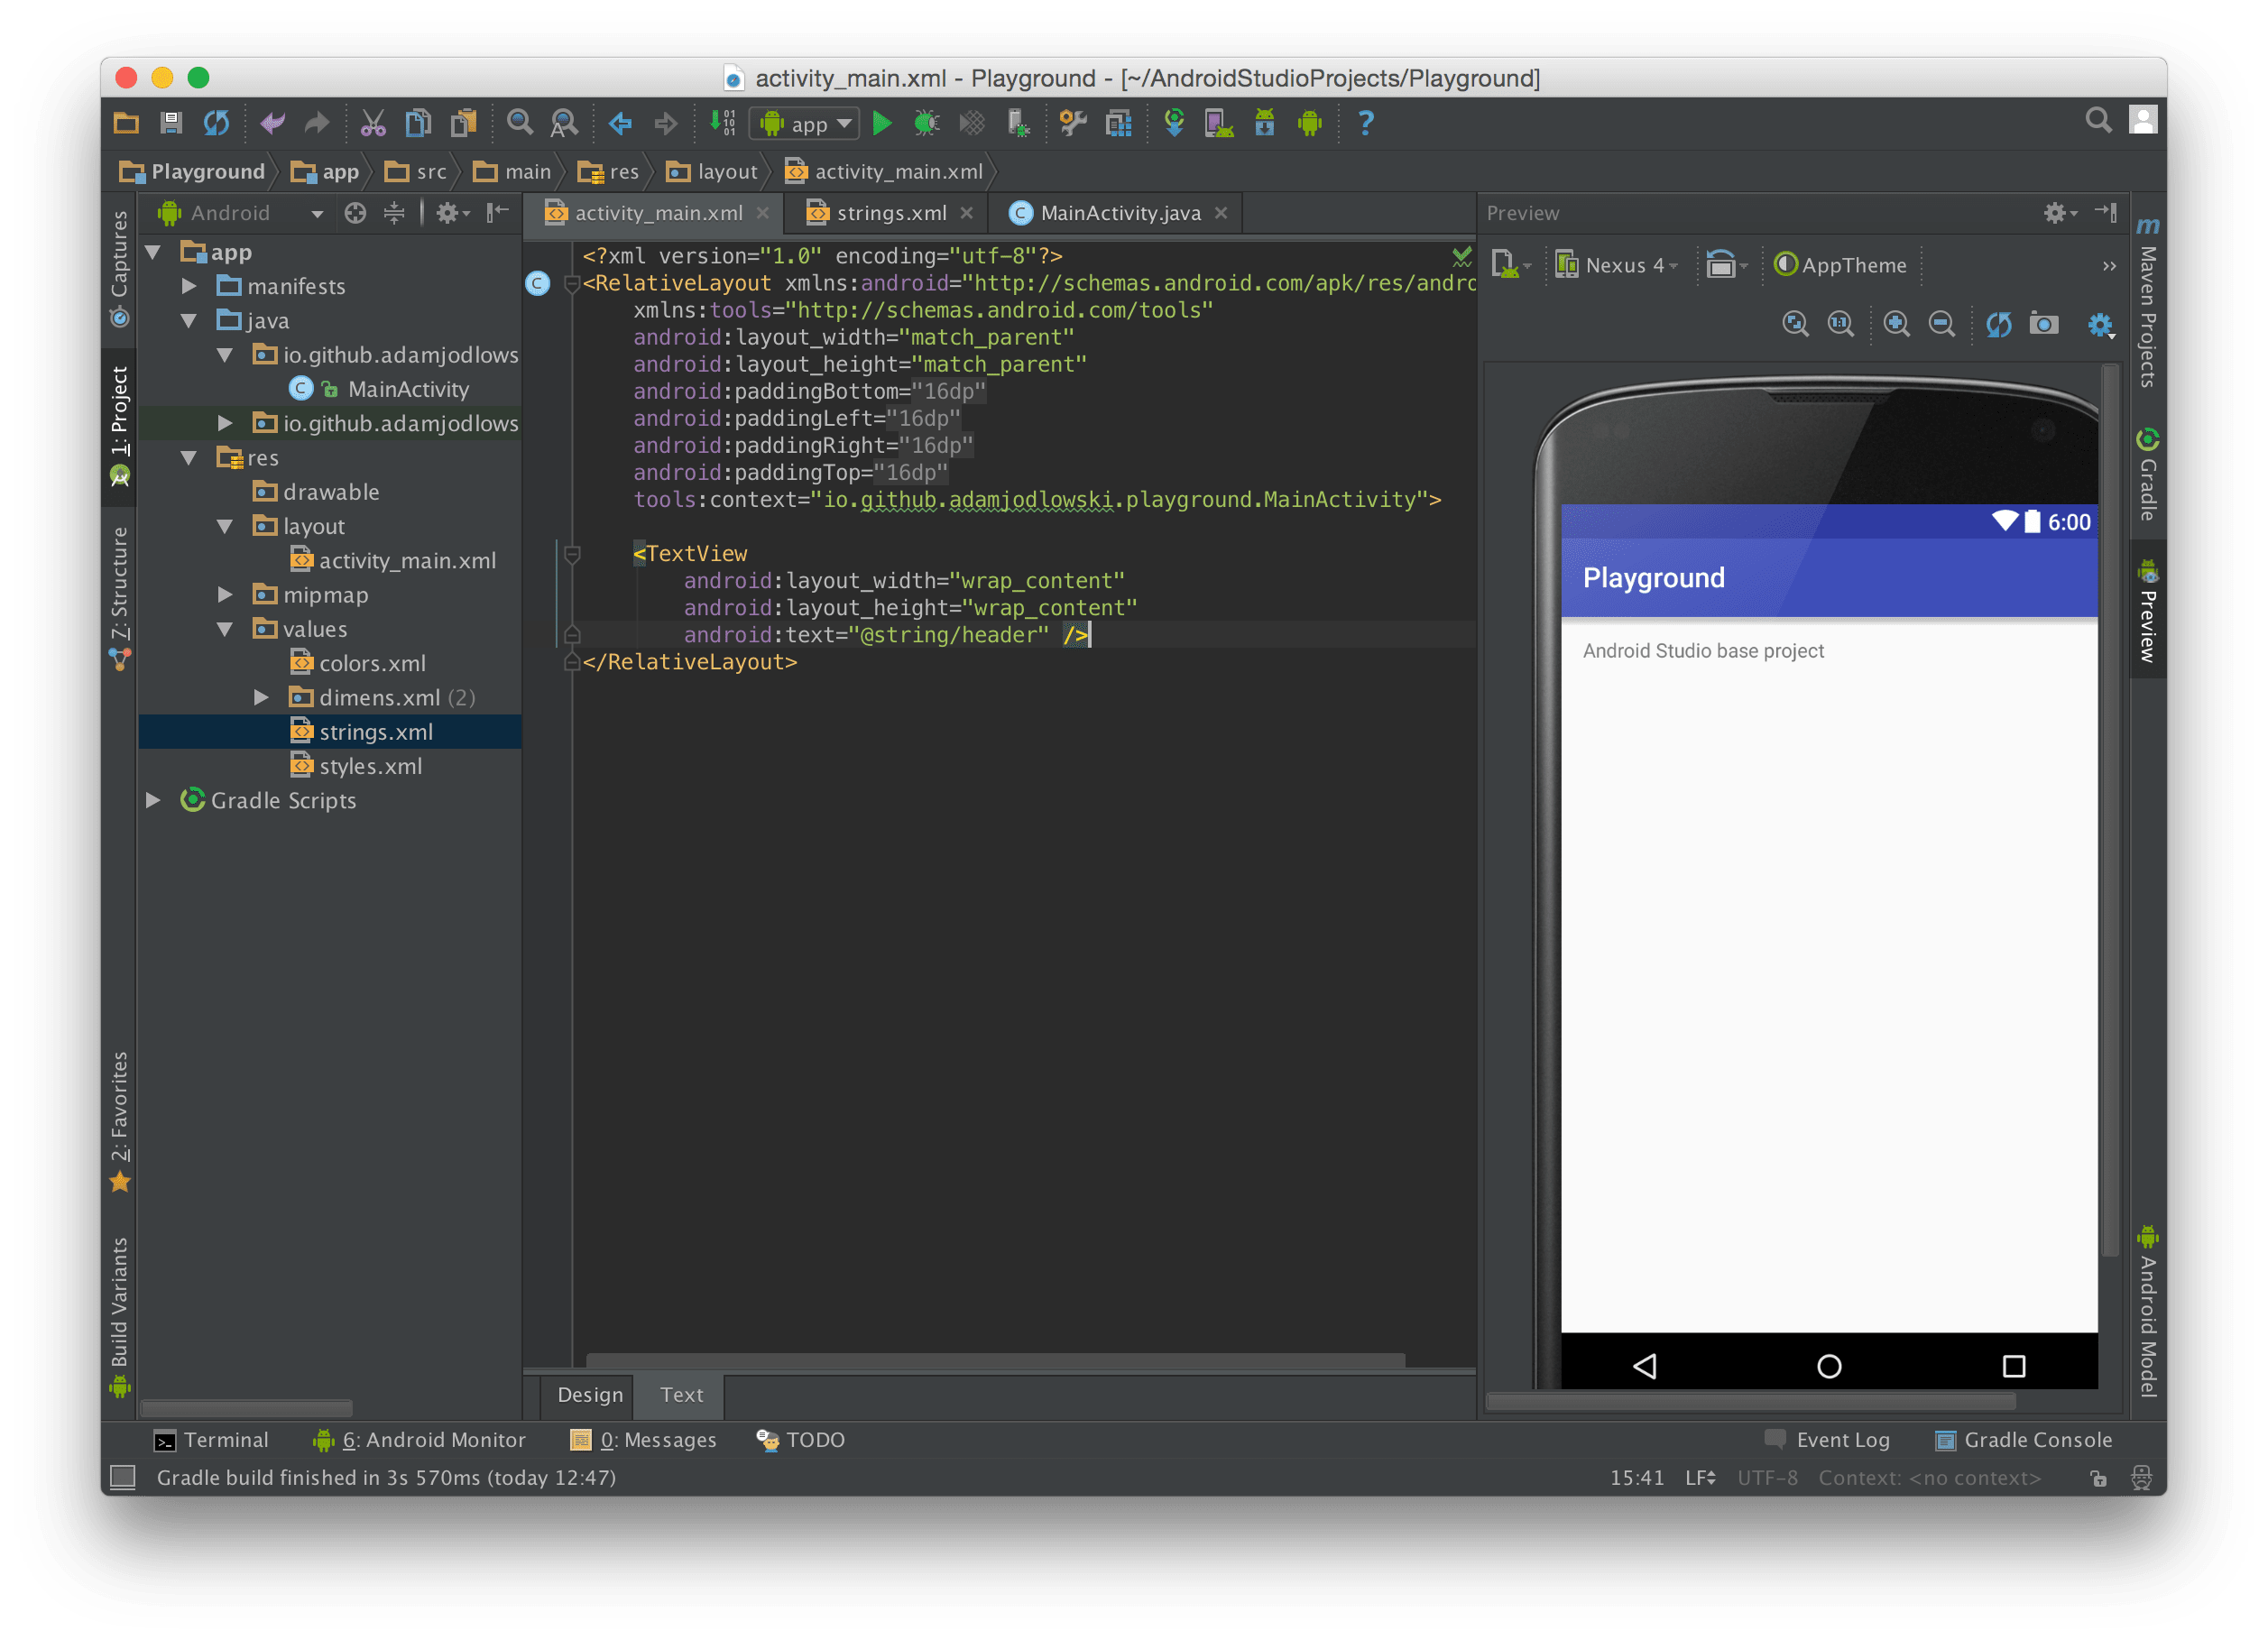
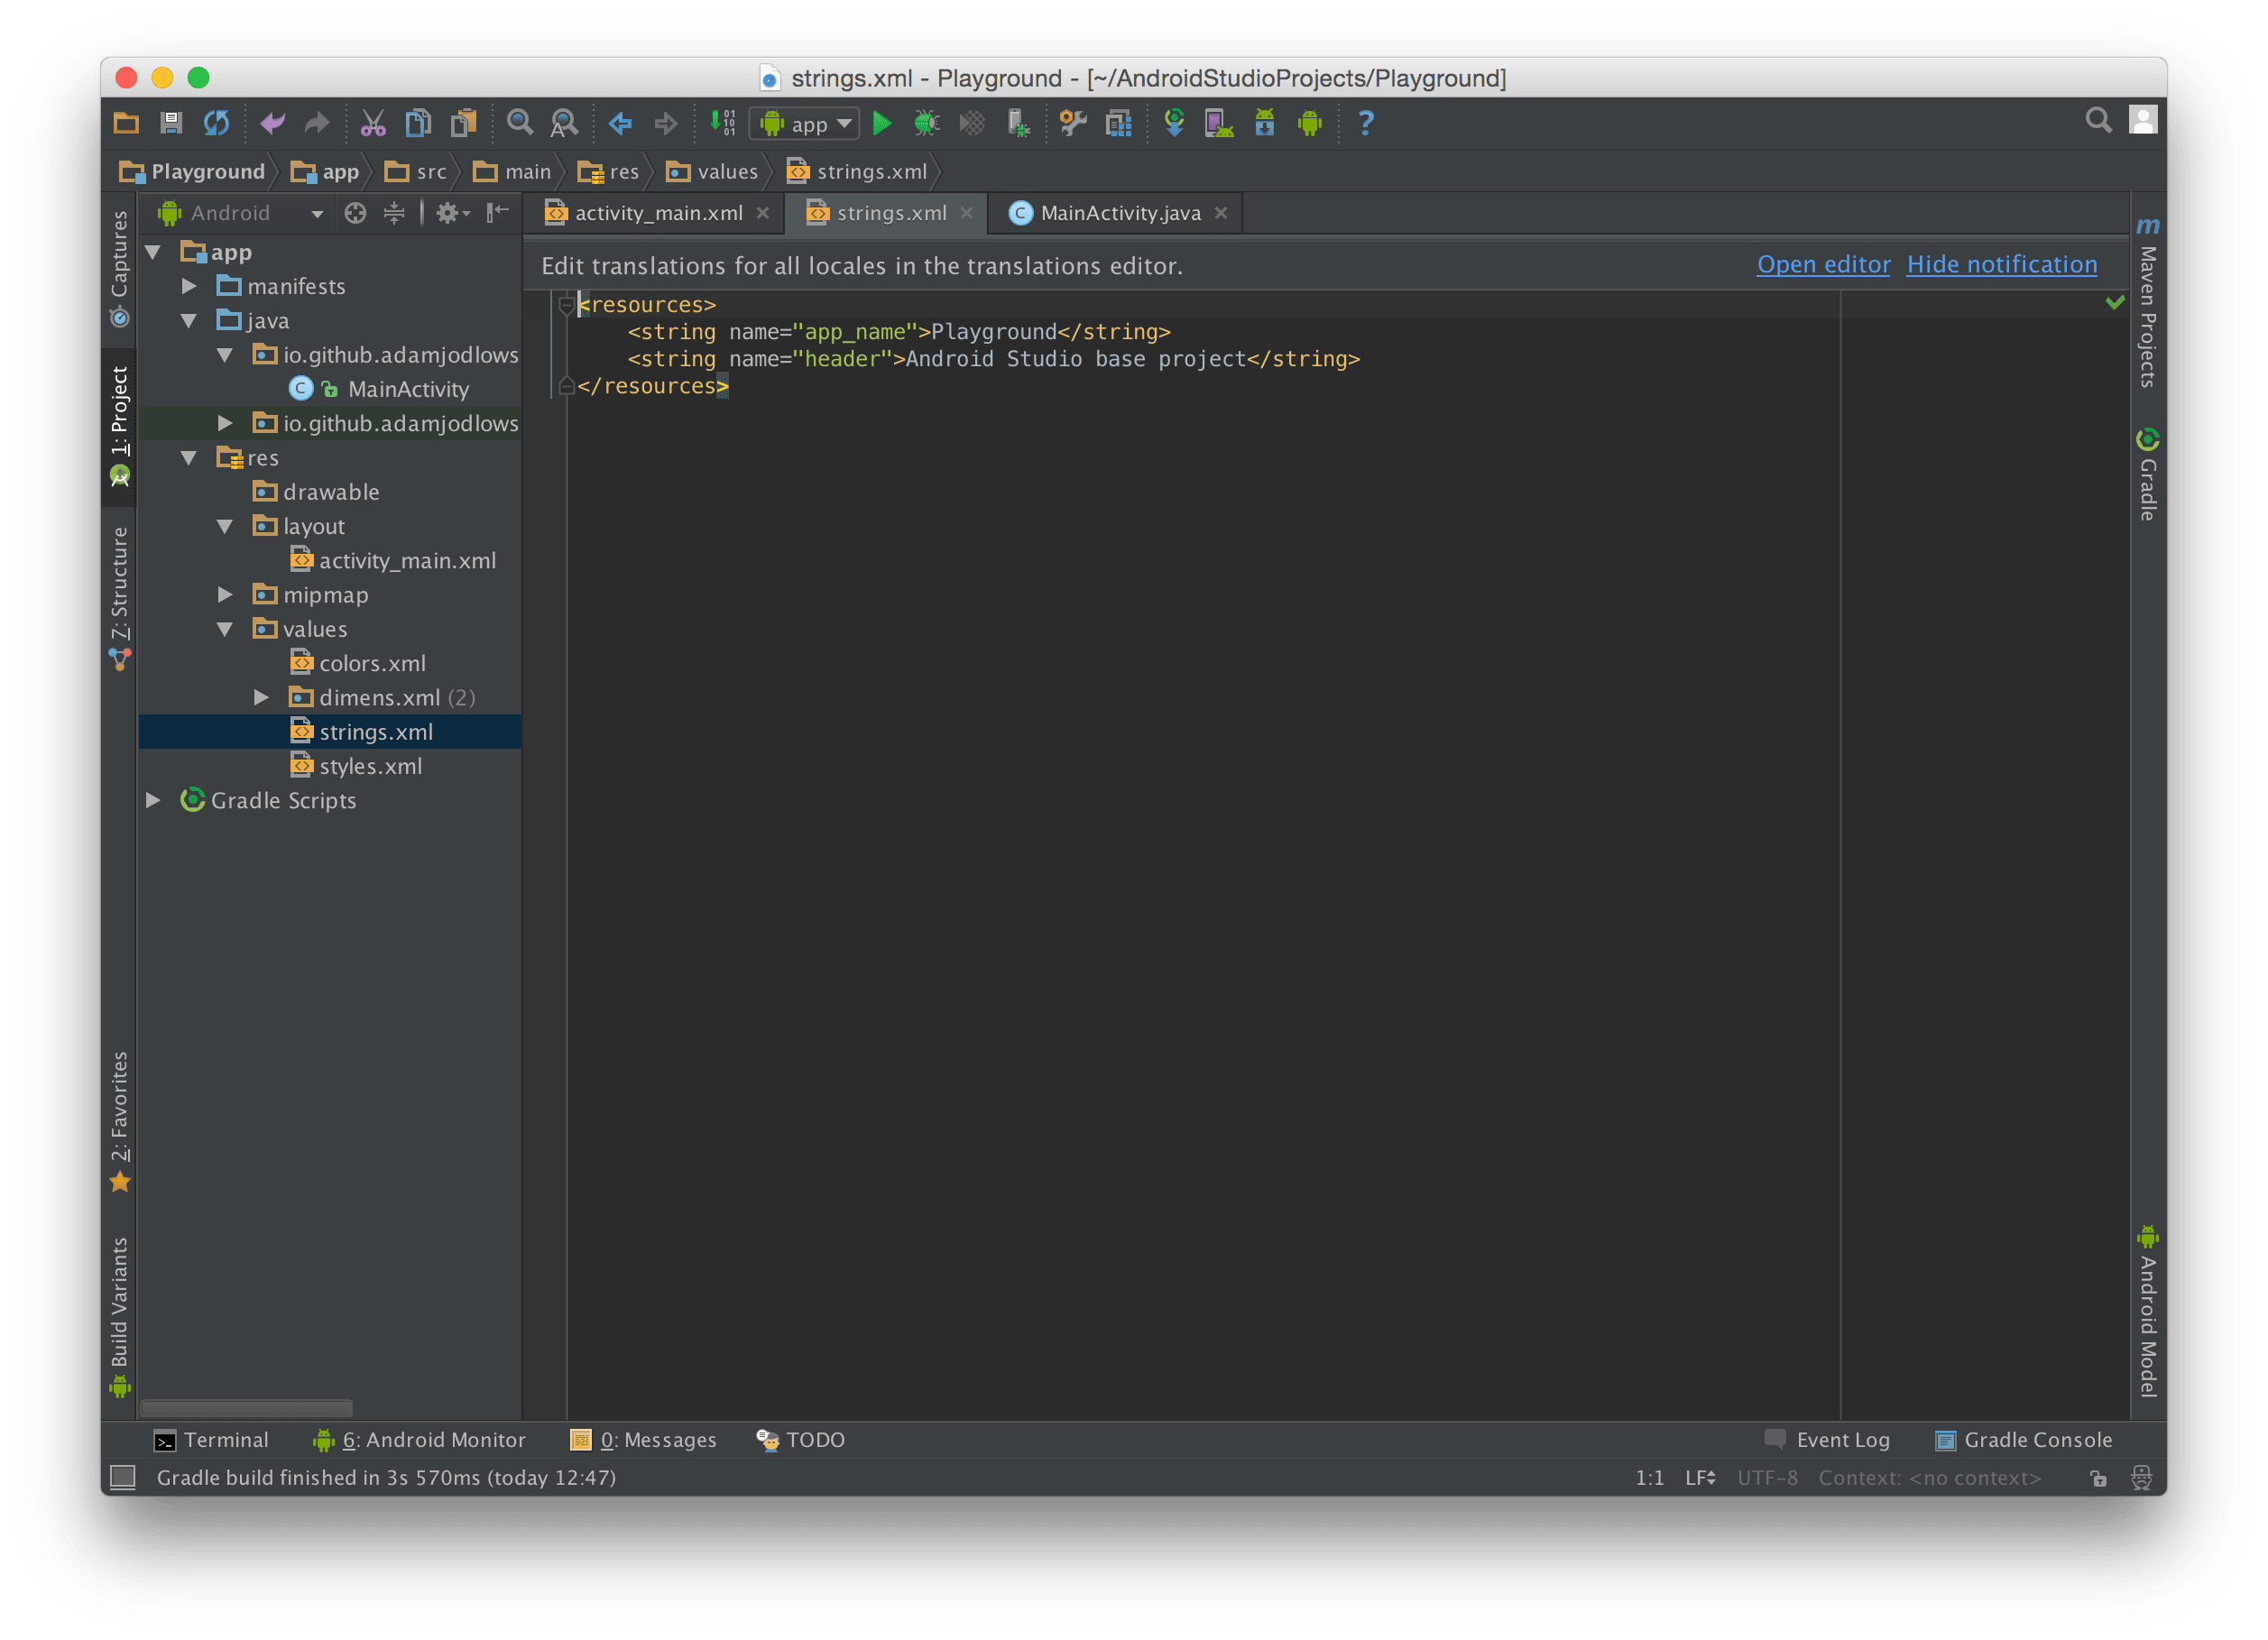
What you see is one of the many resource files which contains string resources. Every resource has a type (string), name (header) and value (Android Studio base project). You can open other resource files, colors.xml and styles.xml to see what they look like.
Android Studio contains a lot of useful tools, wizards, and contextual editors. Entering the
strings.xmlfile gives you the option to go straight to the Translations Editor that is helpful for working with translations. This is one of many examples of making a programmer's life easier.
3. Edit source code
So far we've changed one TextView's text. Let's add an interactive component in the form of a button to our application.
Switch to the activity_main.xml file and go to the visual Design tab.
From the Palette section, drag and drop the Button widget onto the layout preview.
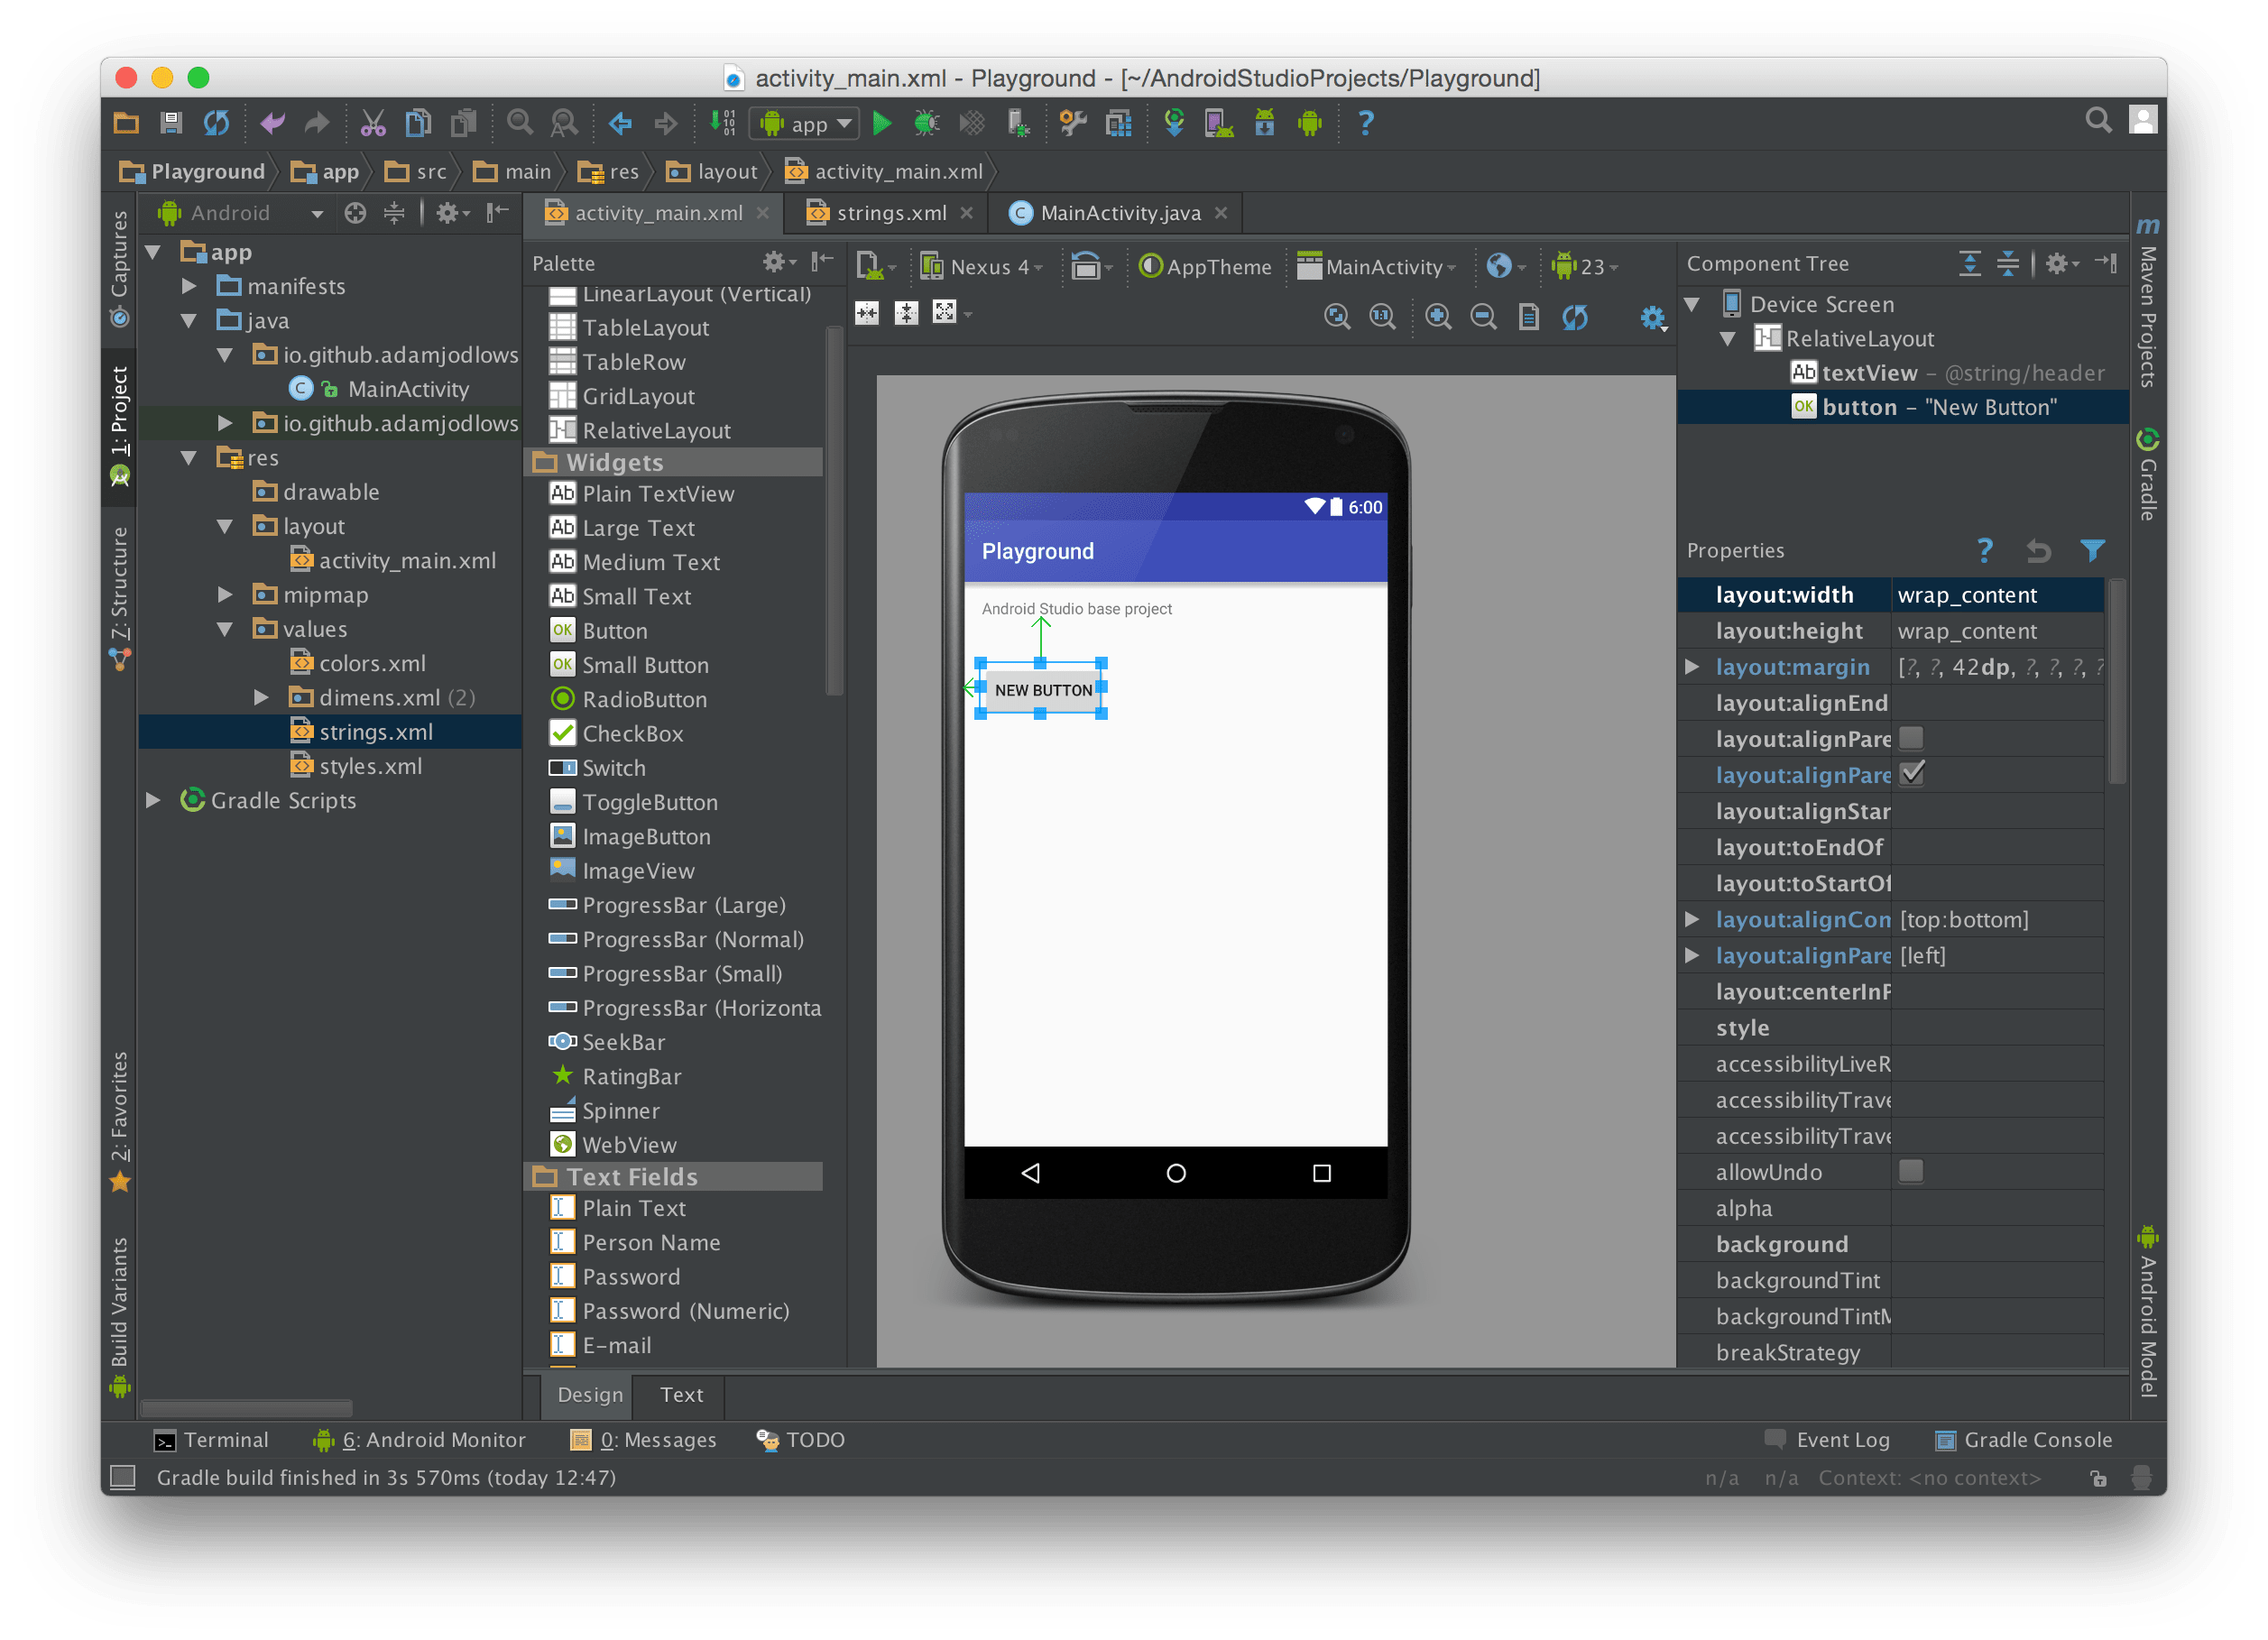
You've added the Button View to the Main Activity's layout. From the Properties section on the right-hand side, you can directly edit all properties available to the selected View. Above that, there's the Component Tree which shows a view hierarchy and highlights where you currently are. This is a powerful visual tool, in case you prefer raw XML editing, you can still do that by switching to the Text tab.
Switch to the XML view; it should look similar to this:
<?xml version="1.0" encoding="utf-8"?>
<RelativeLayout xmlns:android="http://schemas.android.com/apk/res/android" xmlns:tools="http://schemas.android.com/tools" android:layout_width="match_parent" android:layout_height="match_parent" android:paddingBottom="@dimen/activity_vertical_margin" android:paddingLeft="@dimen/activity_horizontal_margin" android:paddingRight="@dimen/activity_horizontal_margin" android:paddingTop="@dimen/activity_vertical_margin" tools:context="io.github.adamjodlowski.playground.MainActivity">

    <TextView android:layout_width="wrap_content" android:layout_height="wrap_content" android:text="@string/header" android:id="@+id/textView" />

    <Button android:layout_width="wrap_content" android:layout_height="wrap_content" android:text="New Button" android:id="@+id/button" android:layout_below="@+id/textView" android:layout_alignParentLeft="true" android:layout_alignParentStart="true" android:layout_marginTop="42dp" />

</RelativeLayout>
We'll focus on the newly added <Button> XML node. It says that there is a button widget defined with following properties, from top to bottom:
- width and height should be just enough to fit the content (in the case of a Button its text and padding, if applicable)
- text displayed by the button
- the crucial property id is set to button (we'll need it in a moment)
- it should be positioned below another component in the layout with the id equal to textView
- should be aligned to it's parent left and start
- should have top margin of 42 dp[3]
Those two widgets are wrapped in a Relative Layout, the most flexible layout used in Android. It lays out its widgets on the screen based on defined properties and constraints (alignments, paddings, margins, dimensions...).
android:id="@+id/button"reads: propertyidfrom the namespaceandroidhas the value@+id/buttonwhich itself is a resource property (@) of type id (id) with the valuebutton. The plus sign+applies to id resources and means that if this particular value is not defined already, it should be added to known identifiers.
Switch to MainActivity.java and make the onCreate method look like in the listing below. Don't forget to import the needed classes and pay close attention to any warnings that might appear while you type:
package io.github.adamjodlowski.playground;

import android.support.v7.app.AppCompatActivity;
import android.os.Bundle;
import android.view.View;
import android.widget.Button;
import android.widget.TextView;

public class MainActivity extends AppCompatActivity {

    TextView textView;

    @Override
    protected void onCreate(Bundle savedInstanceState) {
        super.onCreate(savedInstanceState);
        setContentView(R.layout.activity_main);

        textView = (TextView) findViewById(R.id.textView);

        Button button = (Button) findViewById(R.id.button);
        button.setOnClickListener(new View.OnClickListener() {
            @Override
            public void onClick(View v) {
                textView.setText("It works!");
            }
        });
    }
}
What this code does, from top to bottom:
- imports necessary classes; you should be able to guess what some of them are
- declares the MainActivity class extending AppCompatActivity — you'll see this often — in order to get access to the Android framework and reach outside the sandbox that our application lives in, we need to extend or obtain instances of the framework classes (the AppCompat prefix says it comes from a Support Library, backporting some of the features to older platforms)
- declares the textView field of the type TextView
- overrides
onCreatemethod, which is most often used to perform activity initialization - the
setContentViewmethod takes an identifier of the activity's layout file in the form of an autogenerated layout resource identifier (it corresponds to the actual file namedactivity_main.xml) — this layout will be inflated to represent the visual interface of the activity - the textView field is set to contain what is returned from the
findViewByIdmethod — see what actual type is returned from that method and think why the typecasting is needed here[4] - the handle to the Button object is obtained, and a click listener is set — it will set the text on the TextView when clicked
Now you see what we need id values for — every framework component (visual widget, resource file, etc.) needs to have an ID in order to reference it by another component.
Notice the use of the anonymous inner class of type
View.OnClickListener, this approach is ubiquitous in Android programming.
4. Run the application on emulator
Click the green play icon or choose the Run > Run 'app' option from the main menu. You'll see a chooser dialog which allows us to pick a specific emulator or physical device to run our application on.
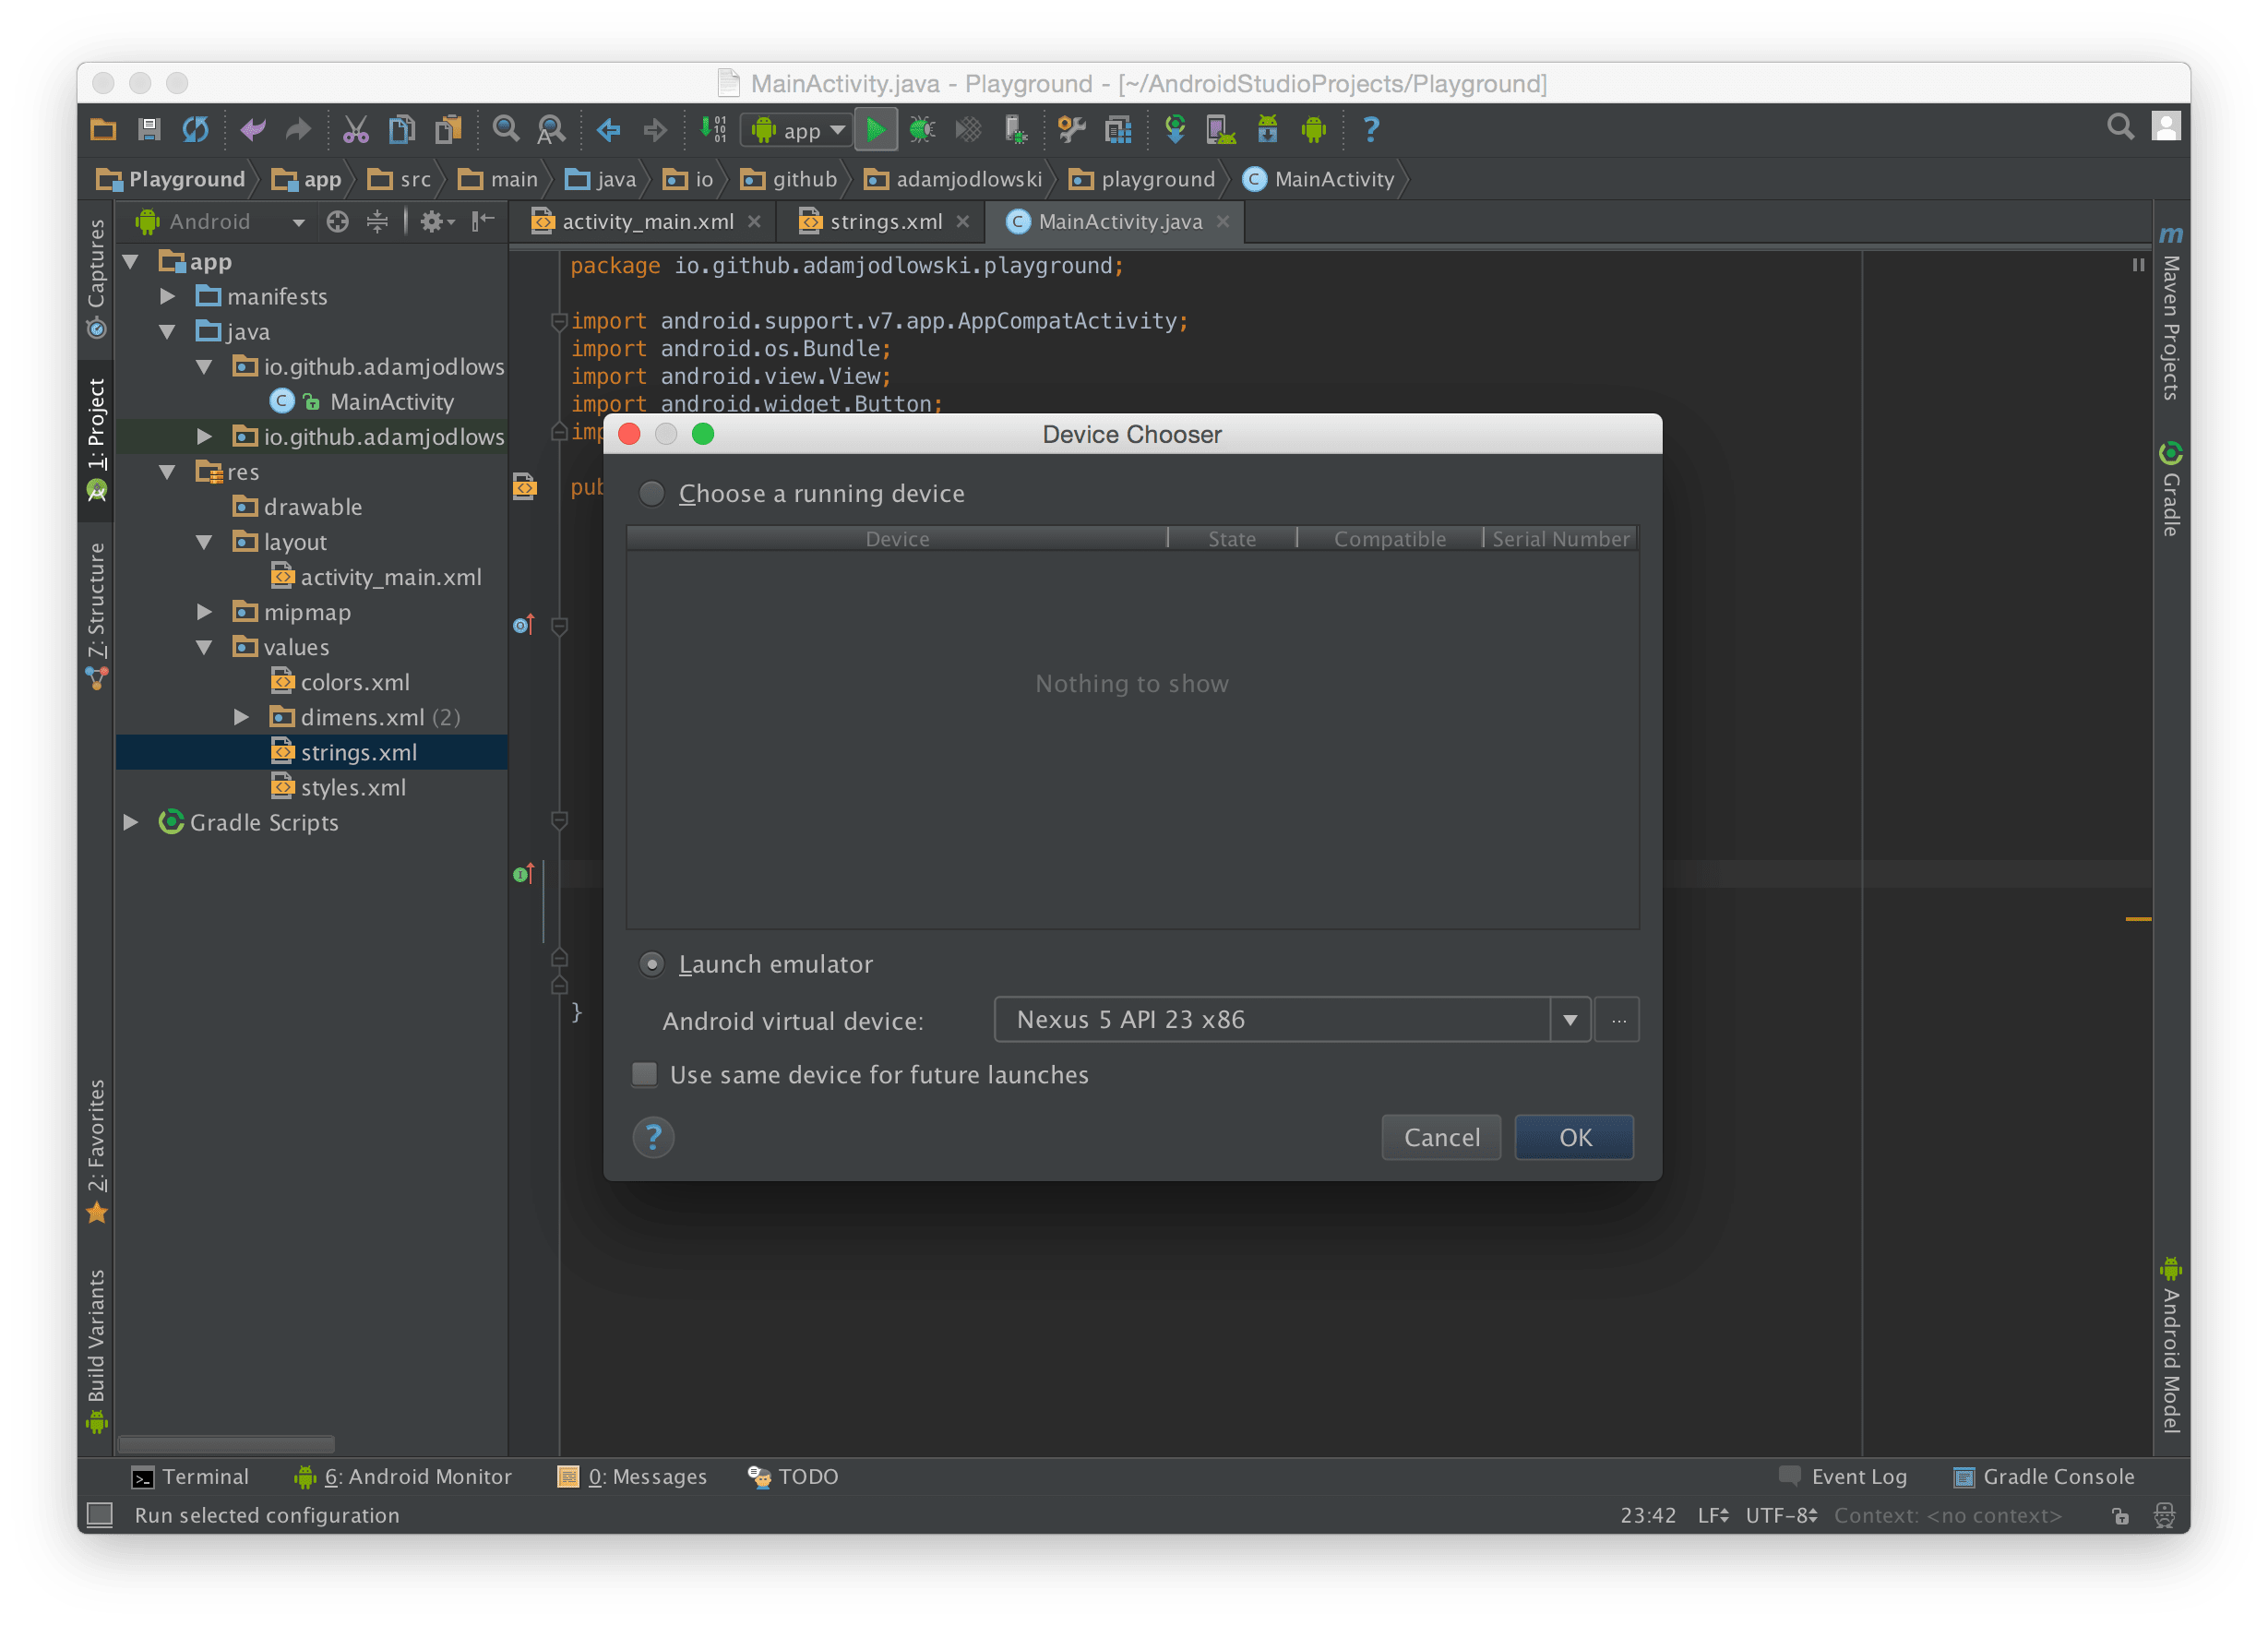
Select the Launch emulator option if you don't already have one running. You should have the default Nexus 5 API 23 x86 or similar already installed. If not, click the three dots button above the OK button to go the Android Virtual Device Manager. Click on Create Virtual Device, pick any hardware profile you like.
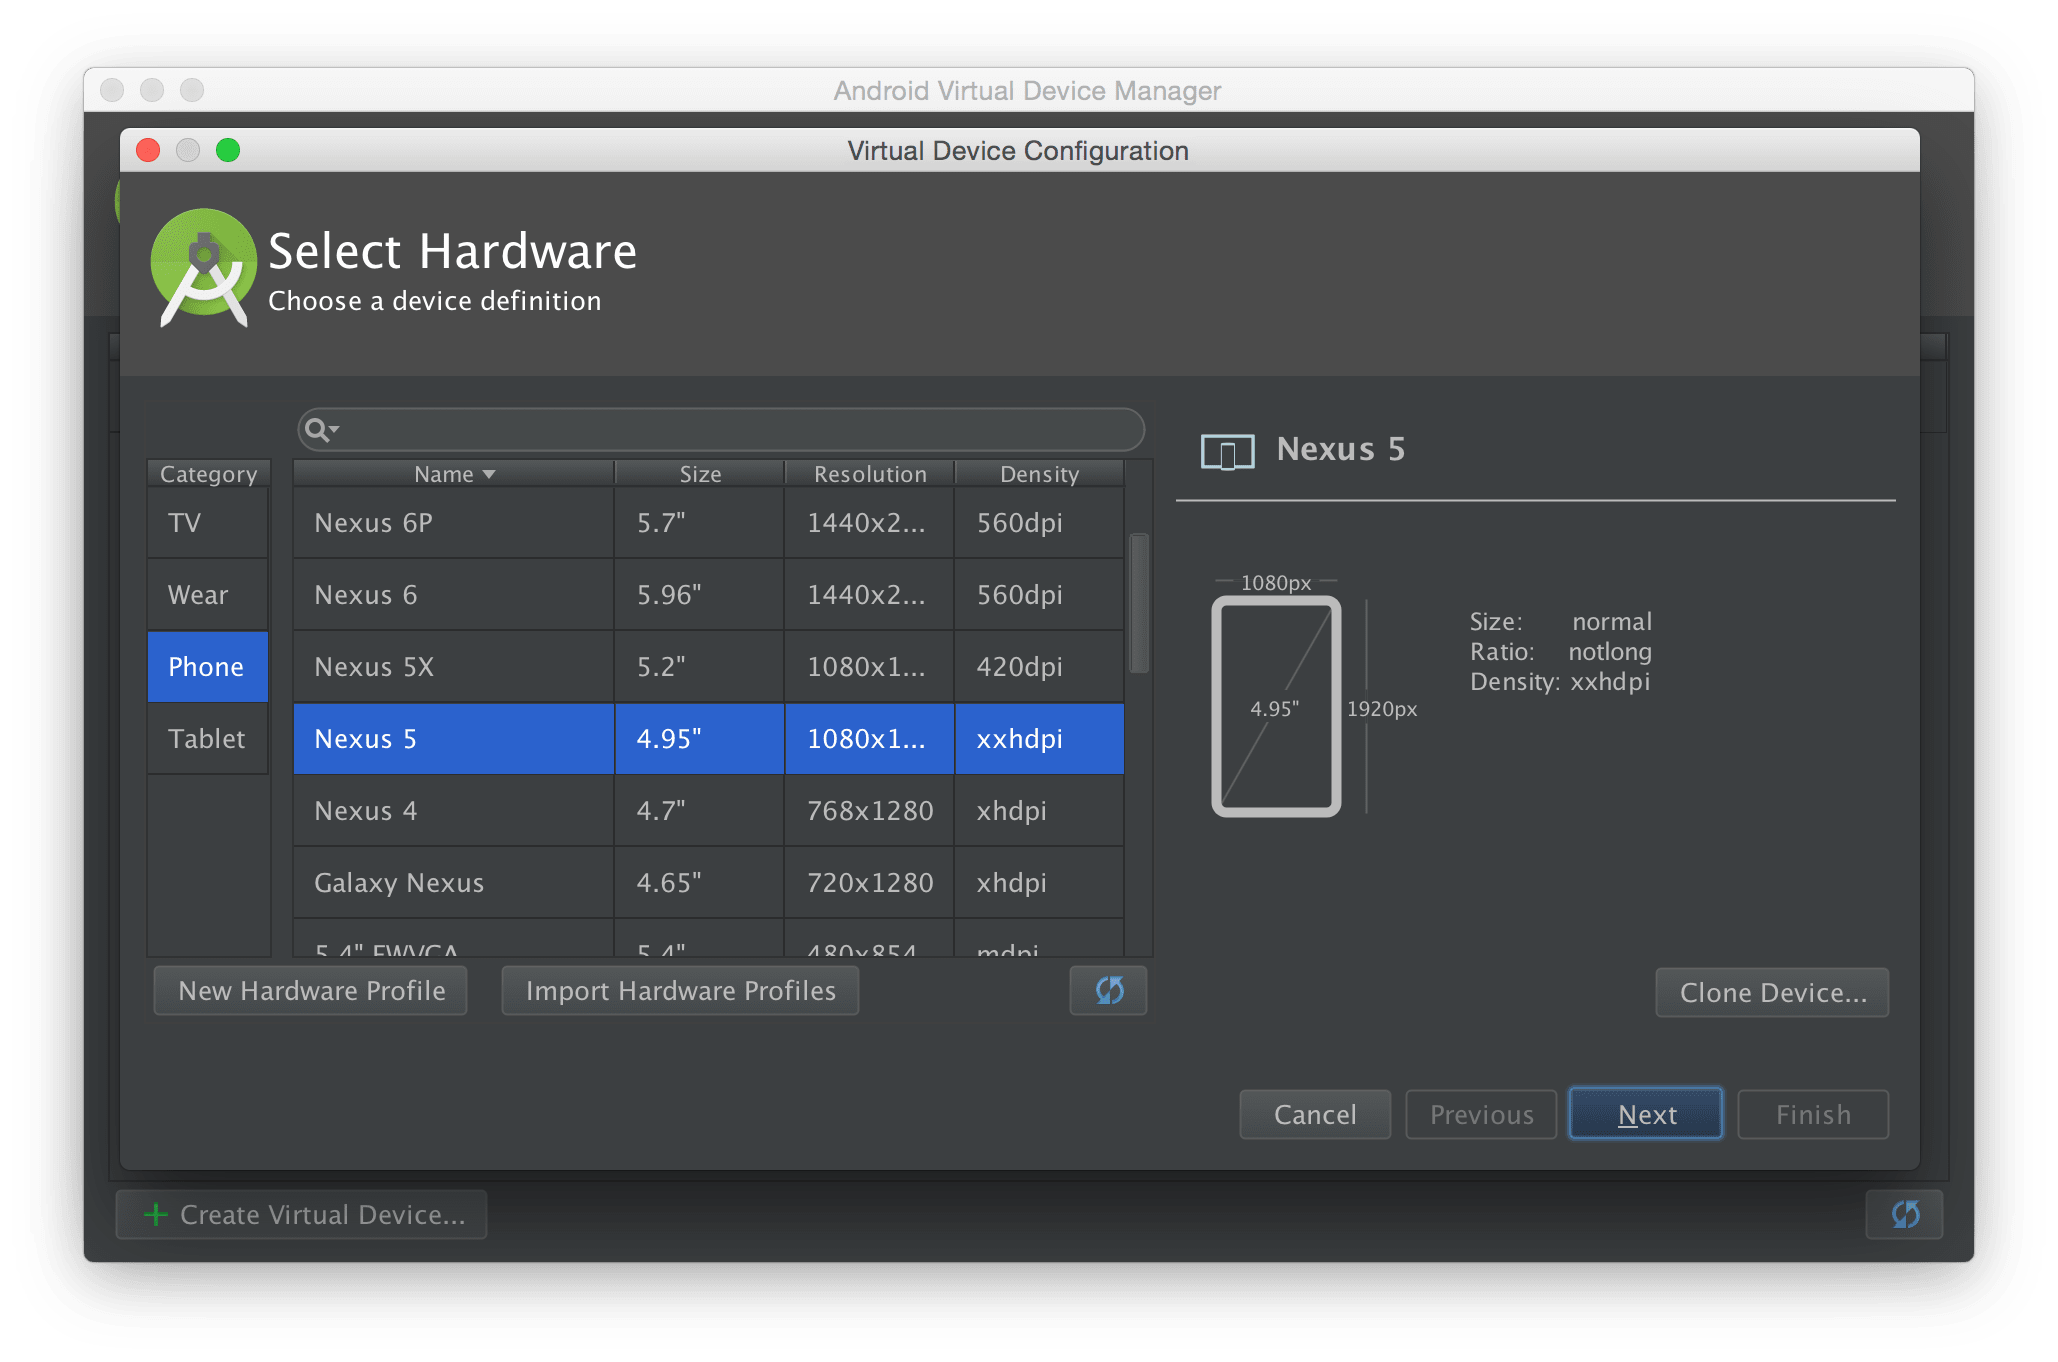
You should always test your application on several different platform versions, form factors, language settings, etc. Emulators allow us to do that at no cost of buying physical devices.
Select System Image, going with default is fine.
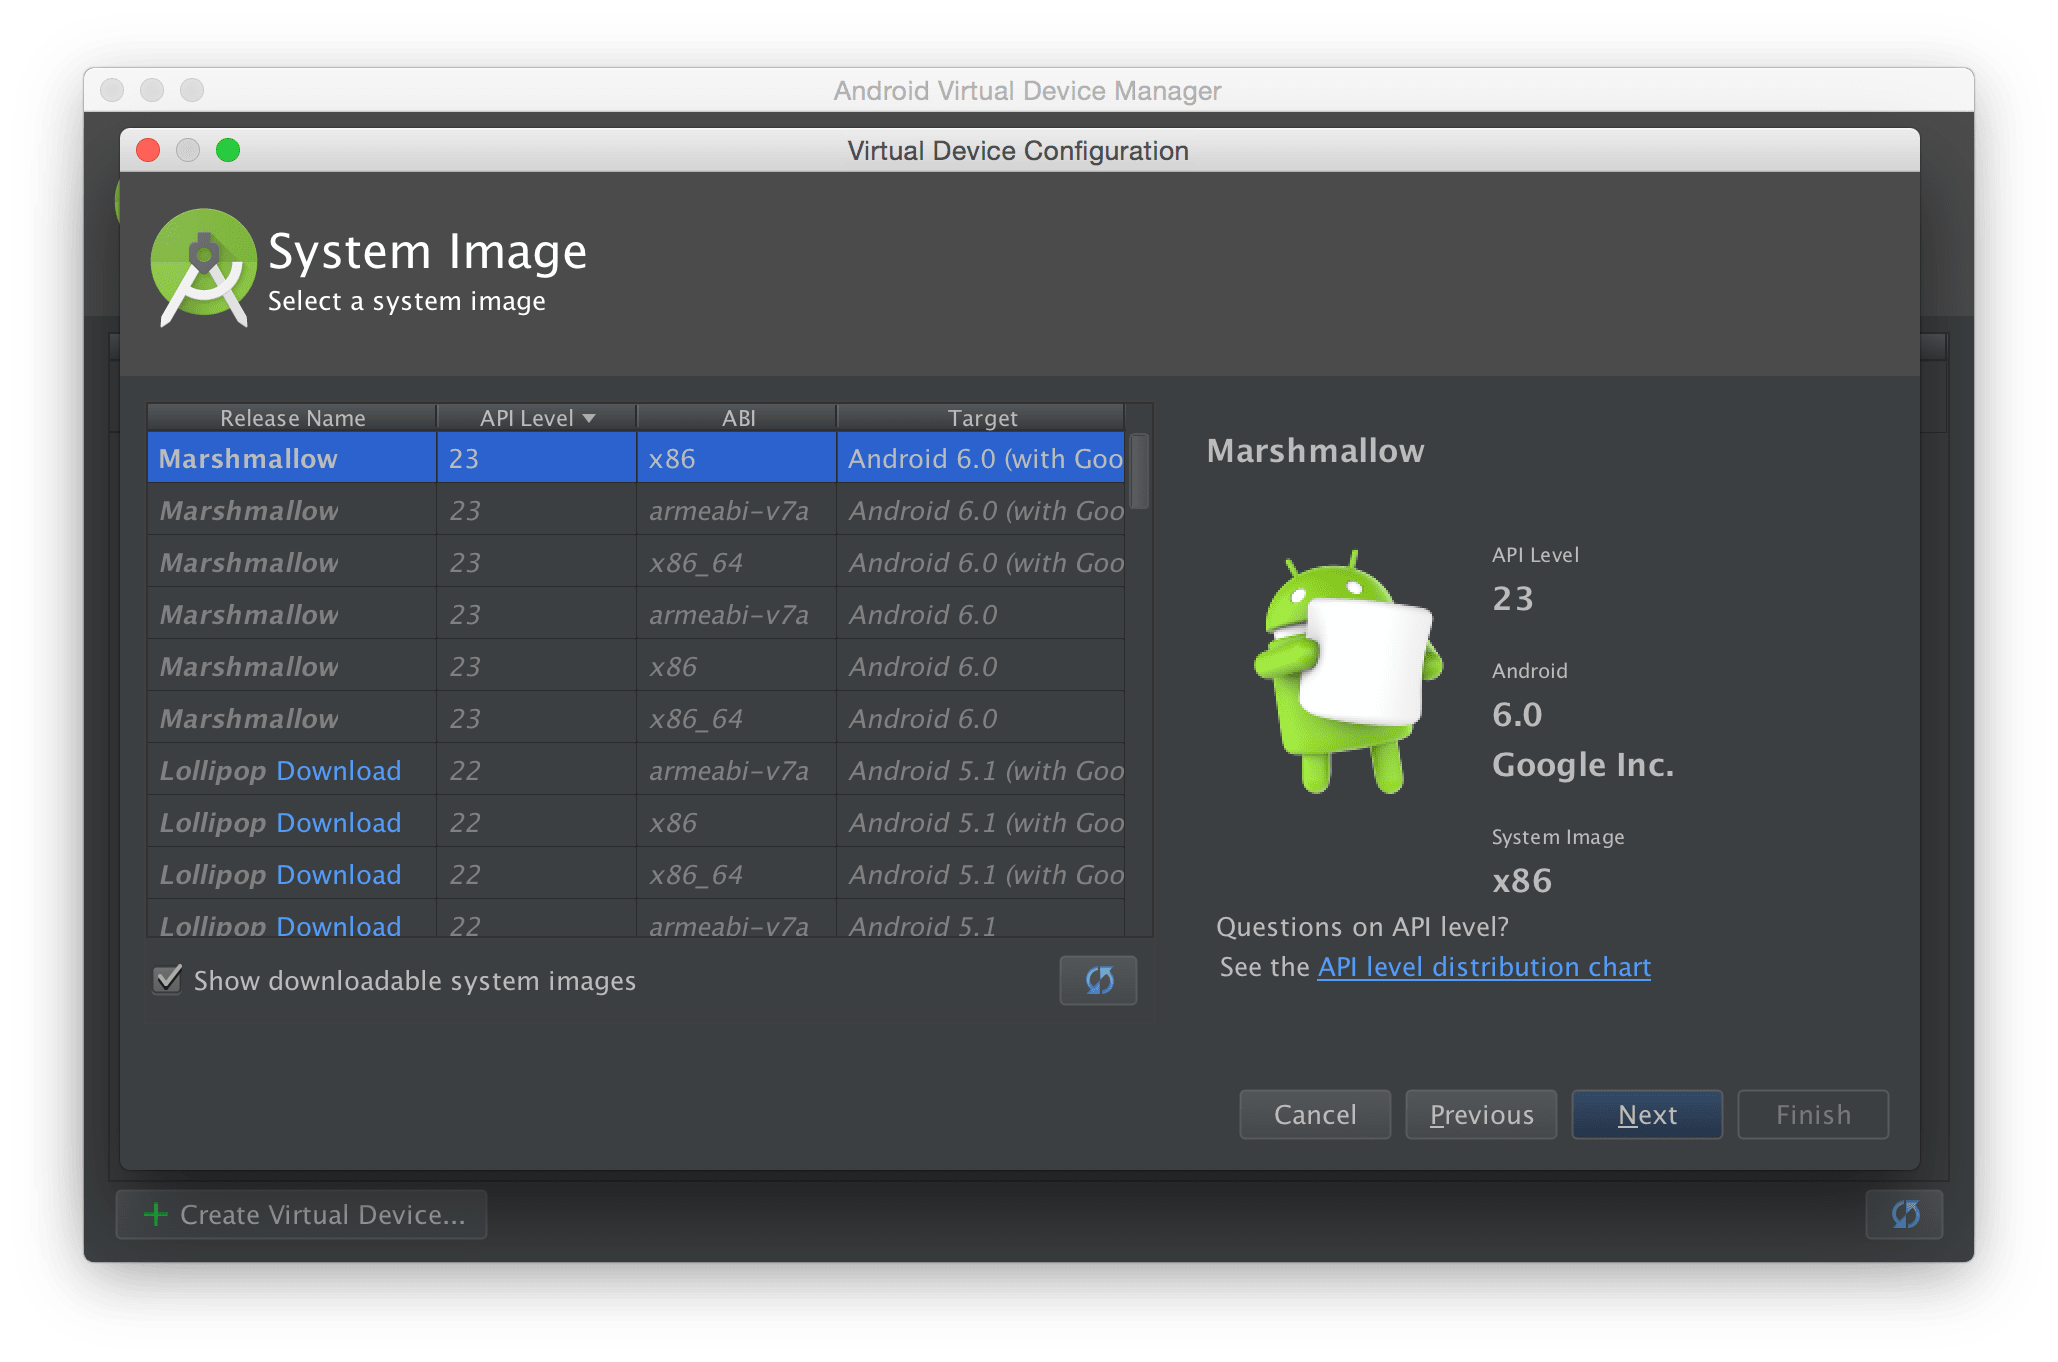
The last screen allows for further customization; defaults are okay.
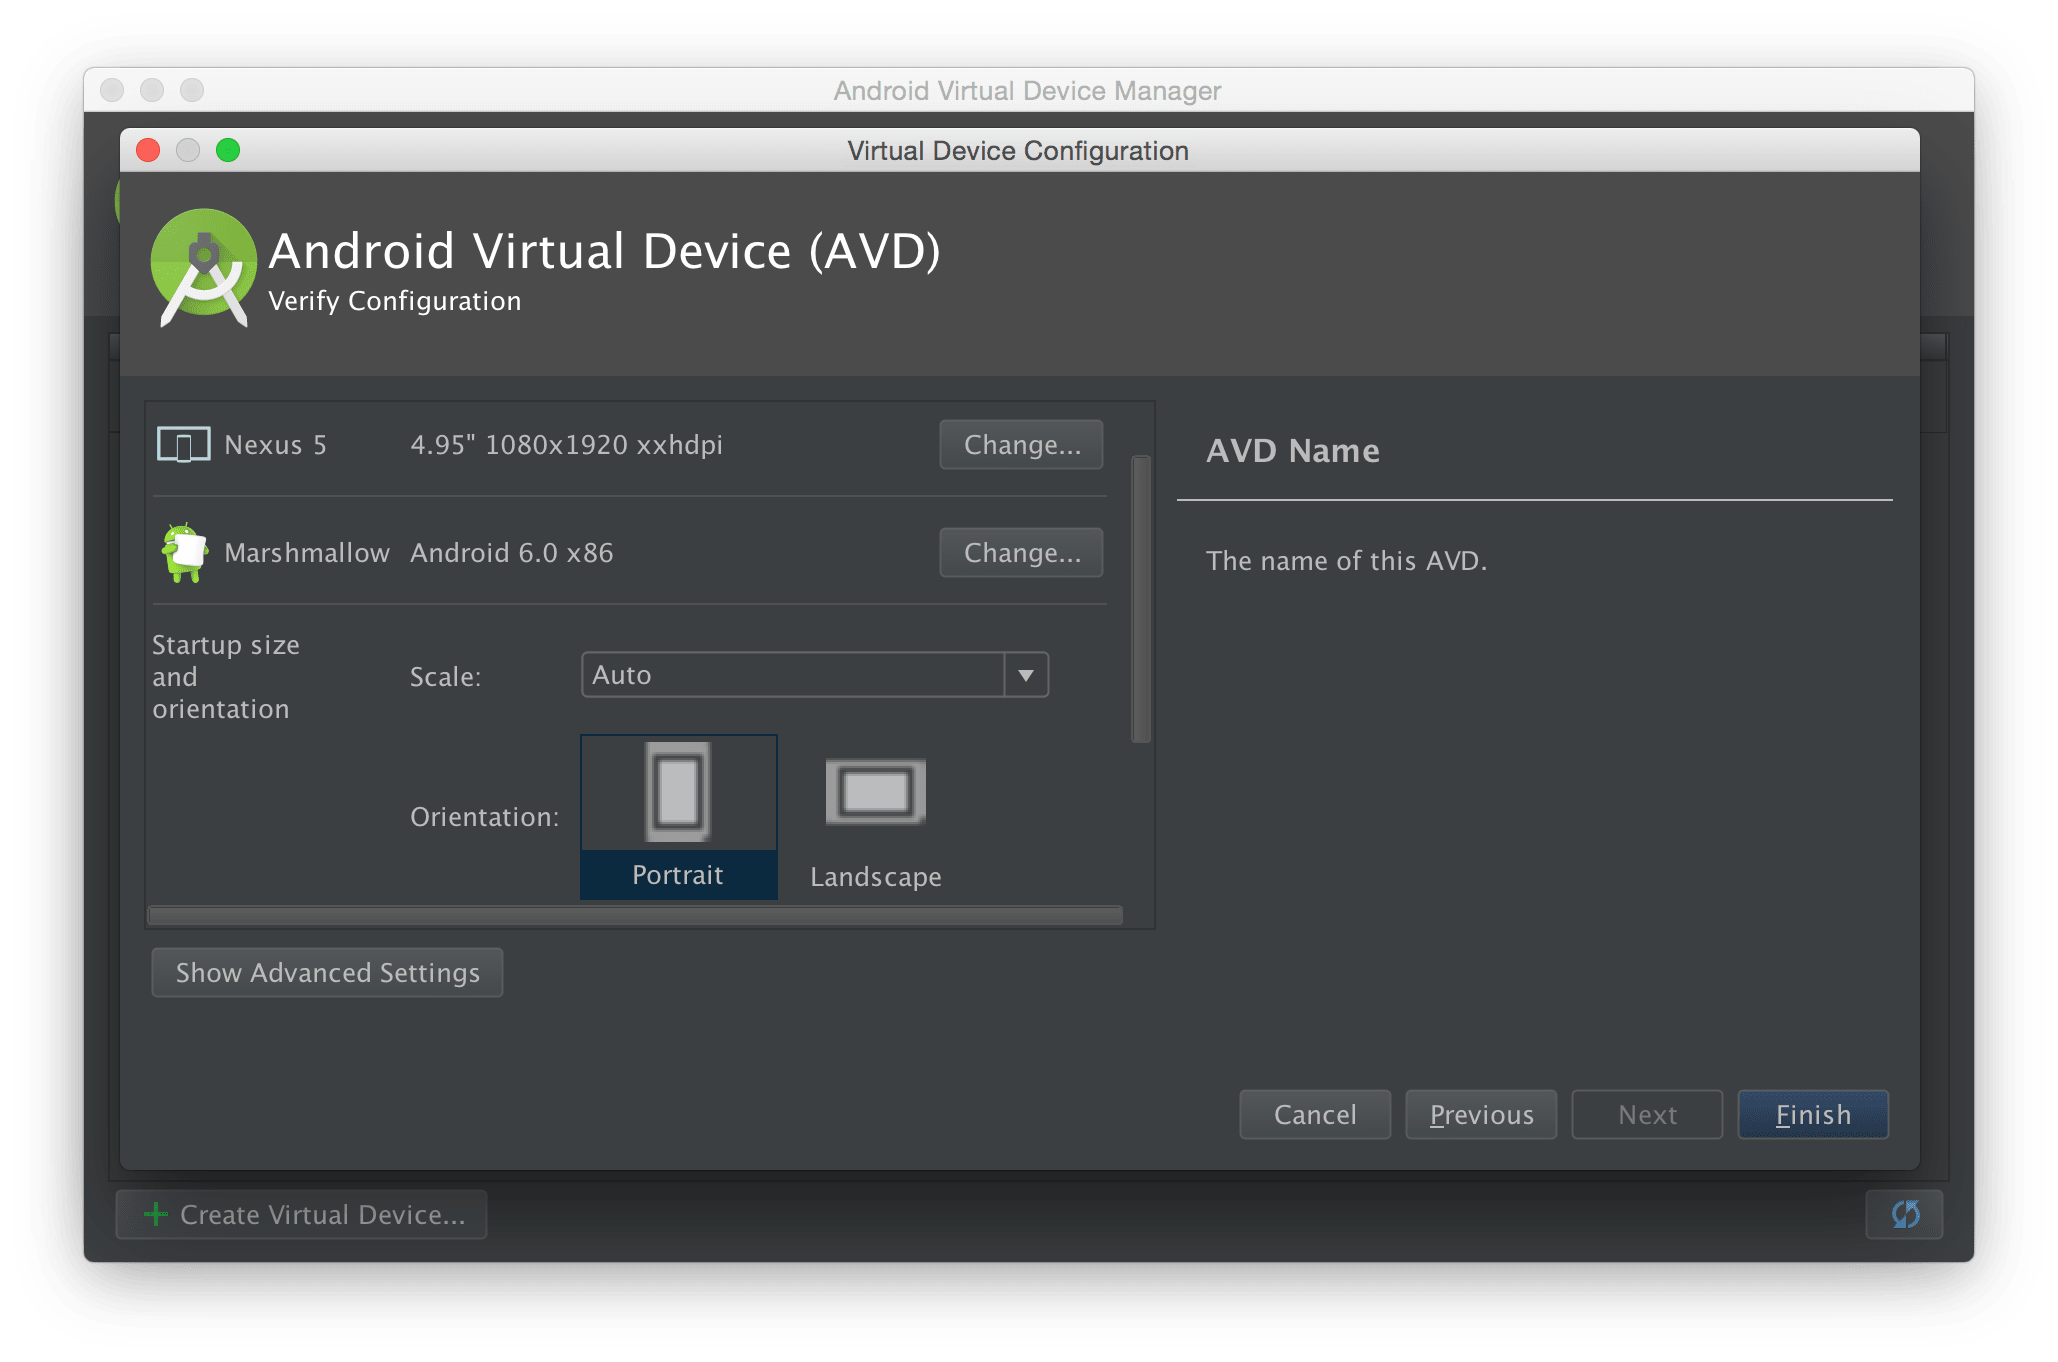
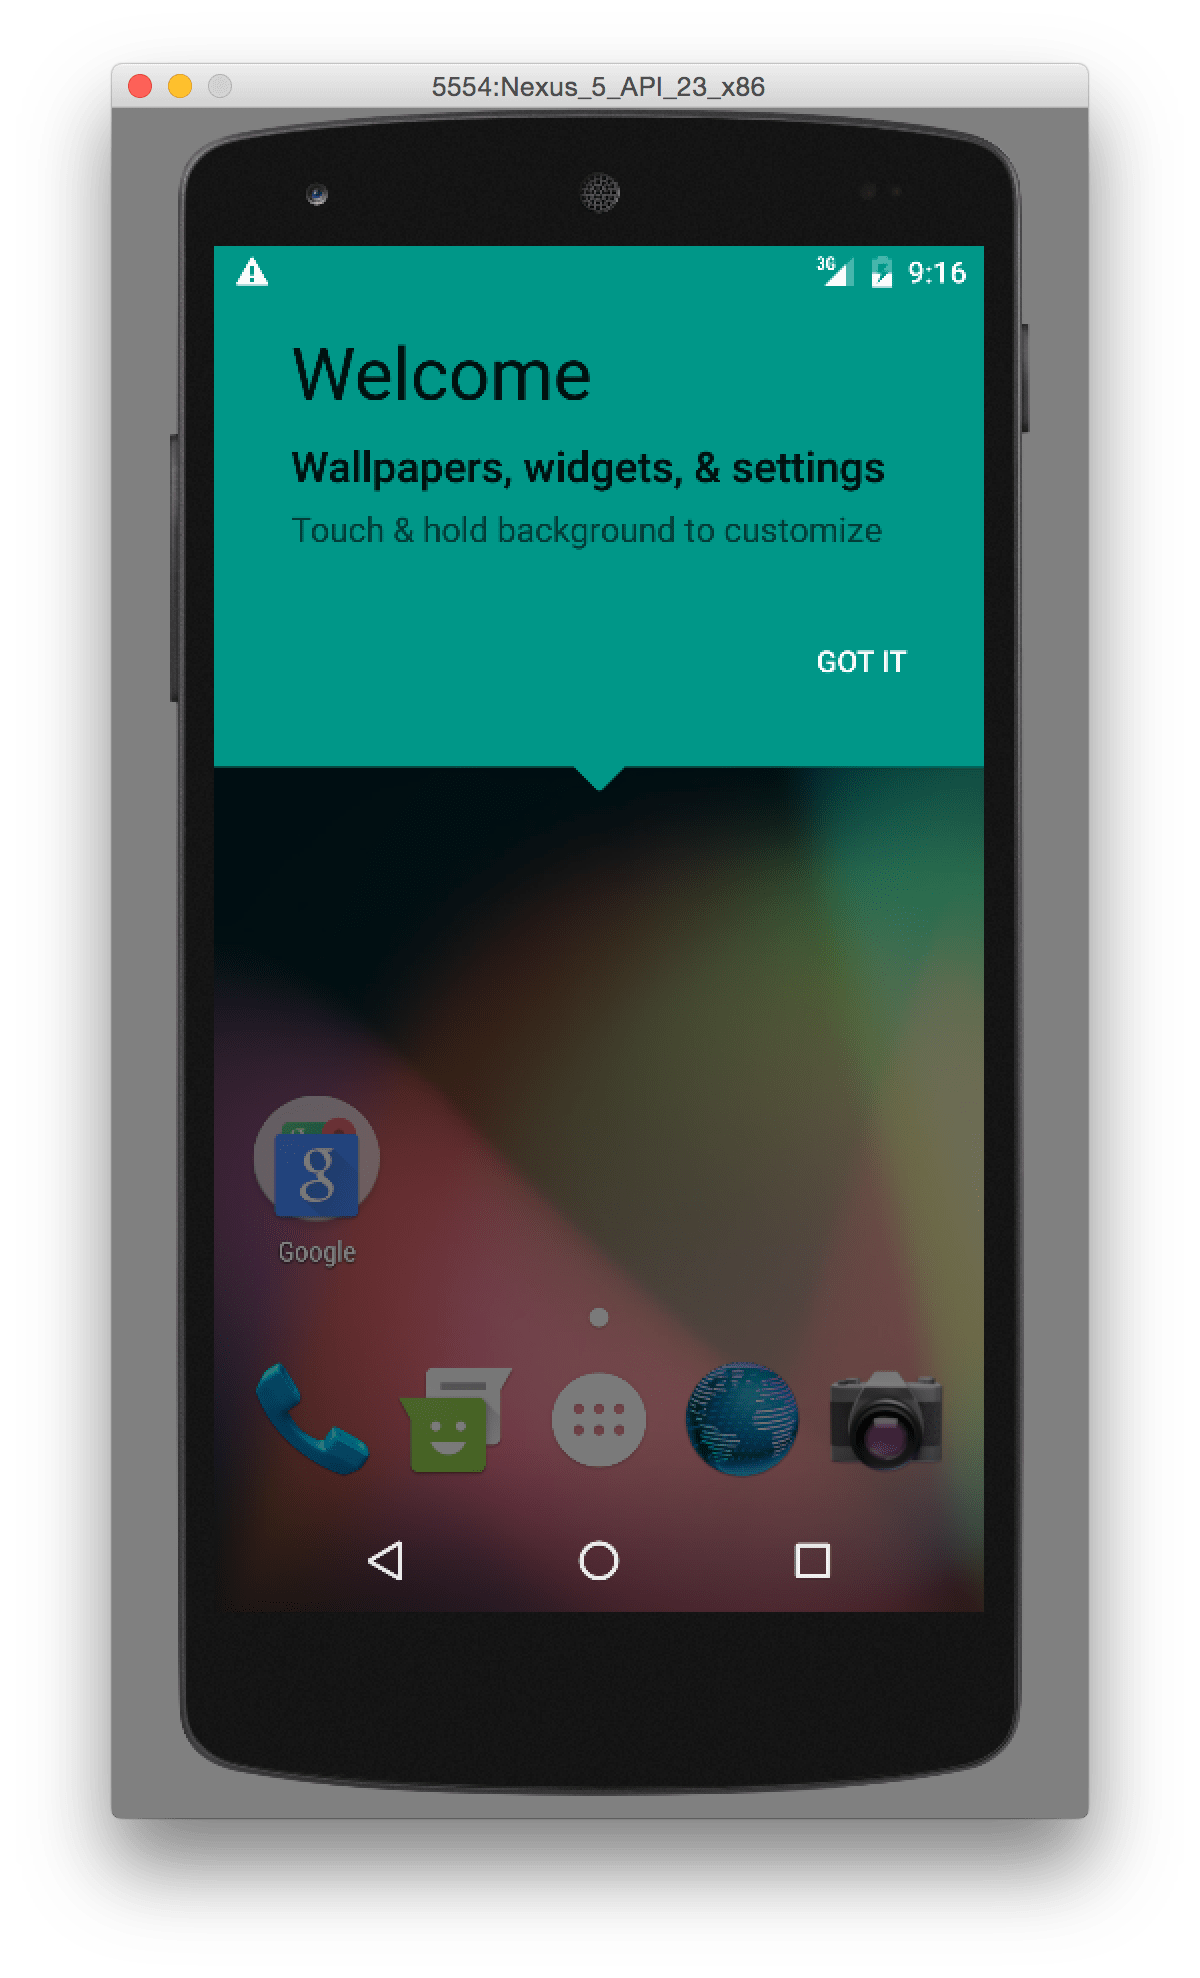
Create the AVD and rerun the application choosing the desired emulator from the dialog. A new window should appear, and after a quick moment of initialization, you should see the emulator window.
If you don't see your application, rerun it, so it pops up in the foreground. In case there are any problems with building or running, you'll see warnings or errors in Android Studio bottom section.
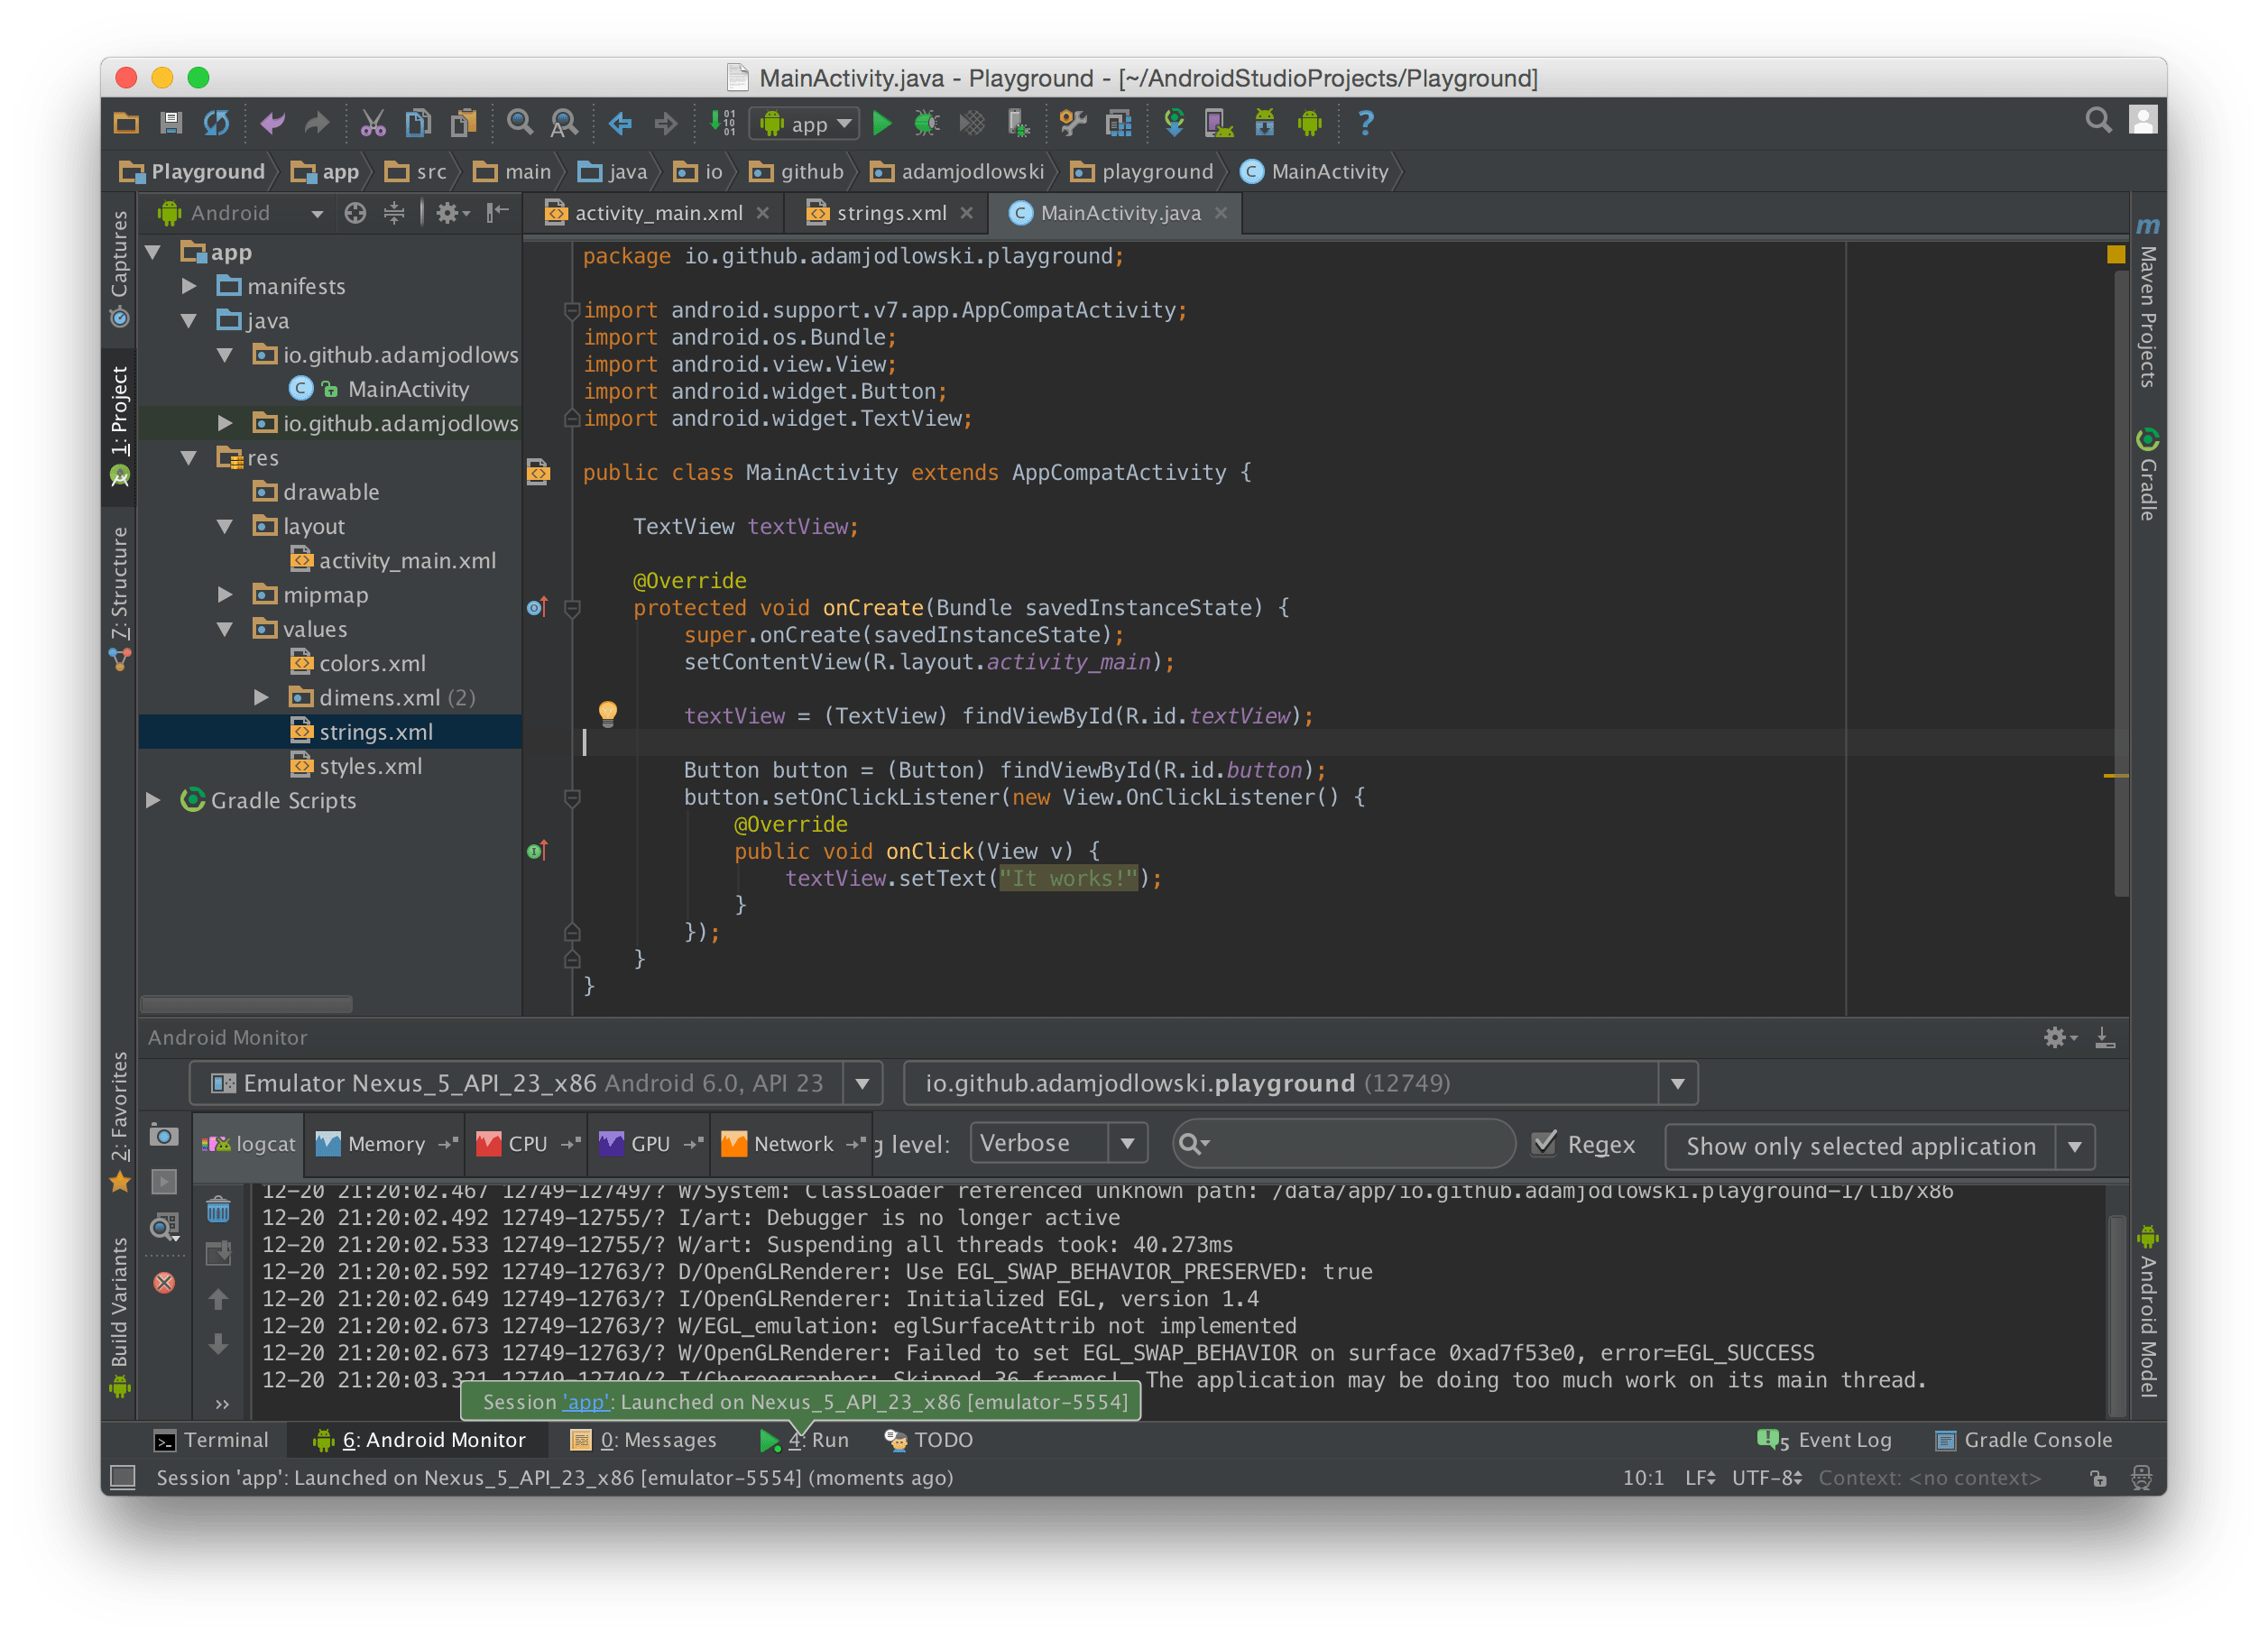
A green pop-up tells us the application has been successfully installed and launched on the emulator. The entire bottom section is an Android Monitor with the active tab Logcat which is the Android console logger window. Look for any potential problems there.
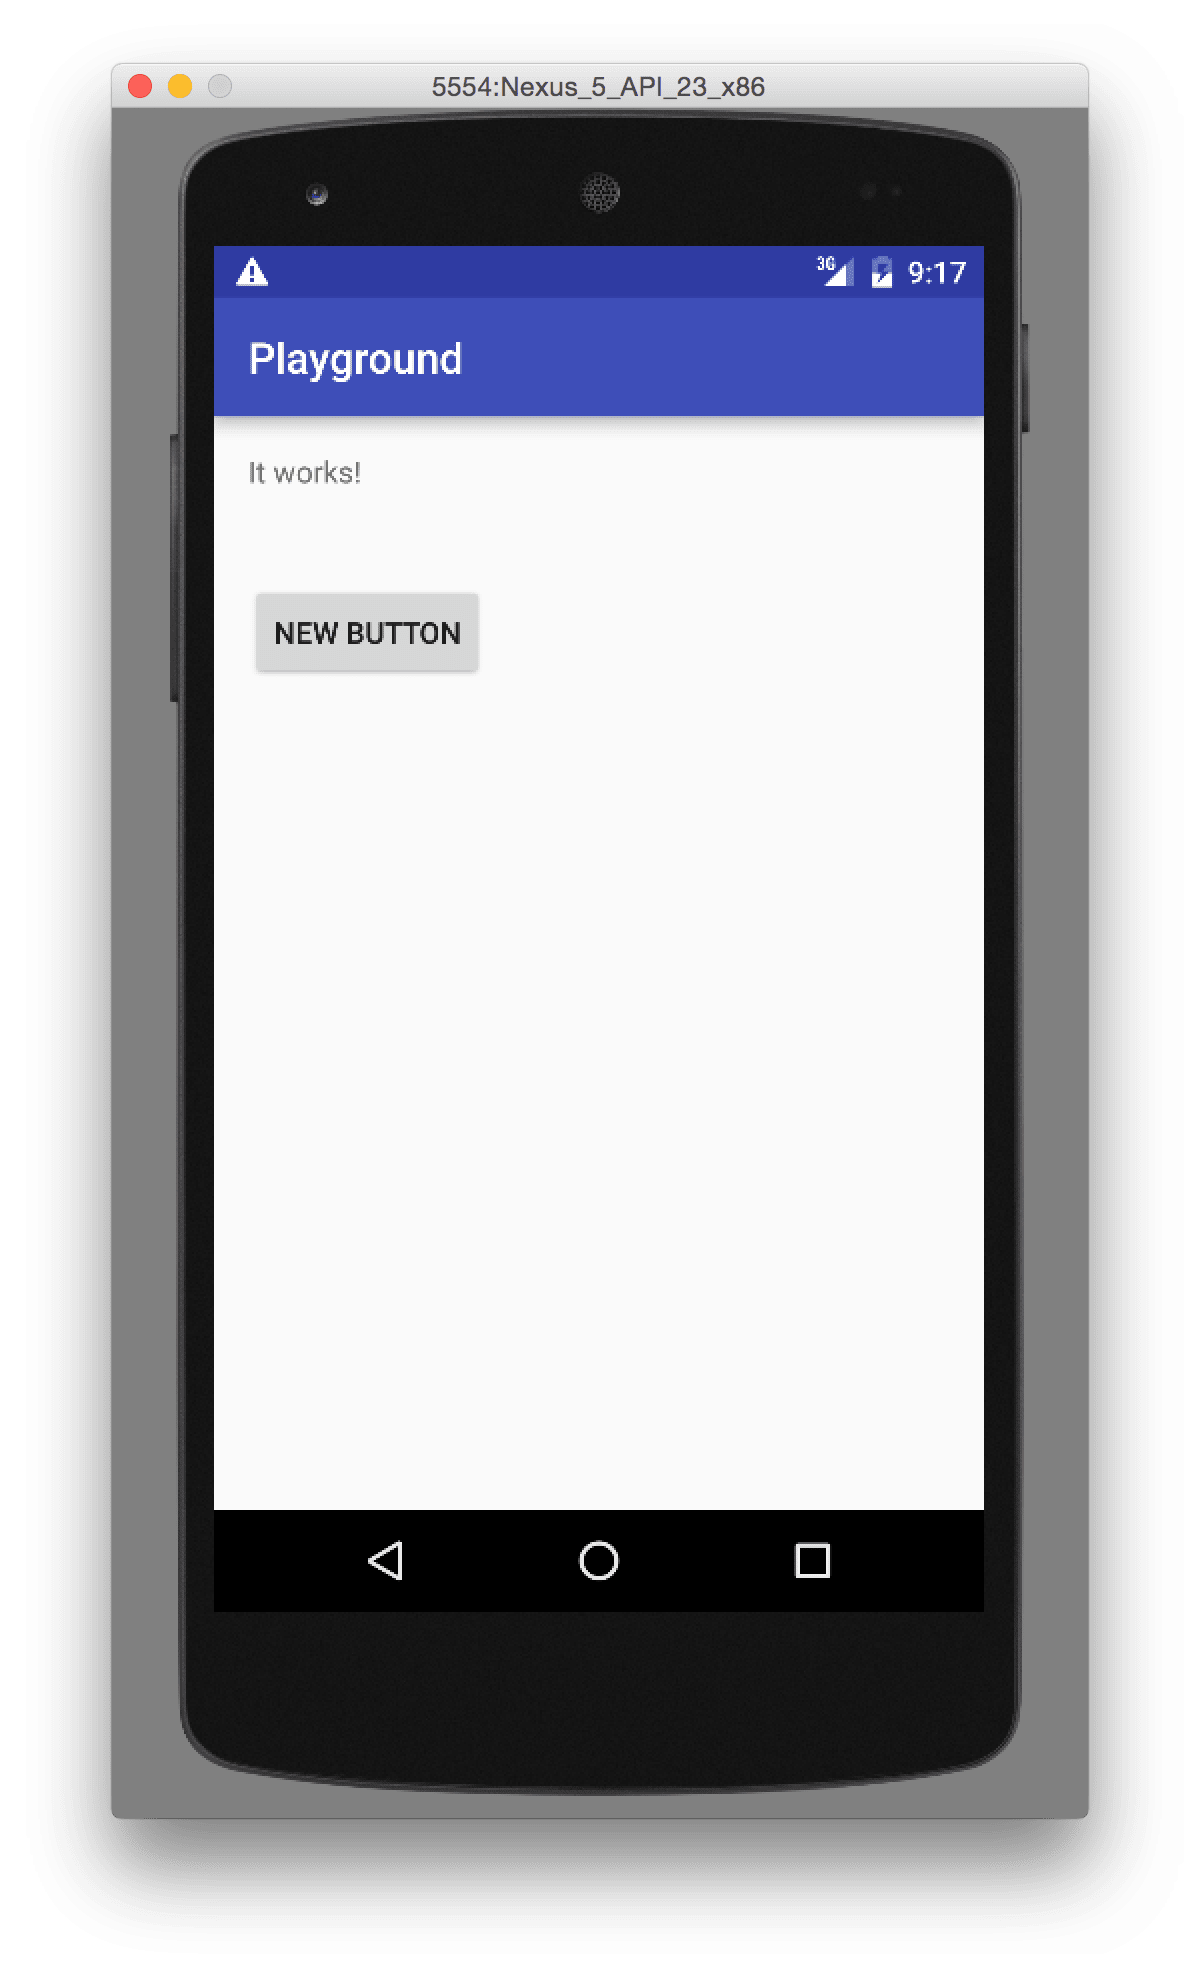
Click on the NEW BUTTON button, the text above should change to "It works!". If it does, congratulations on your first working Android Application.
5. Android Manifest & build.gradle
How is this all possible? How does the Android operating system know it should run your MainActivity when you open the app? Look for a file AndroidManifest.xml in the /app/src/main/ directory. It is the main Android configuration file, and it should look like this:
<?xml version="1.0" encoding="utf-8"?>
<manifest xmlns:android="http://schemas.android.com/apk/res/android" package="io.github.adamjodlowski.playground">

    <application android:allowBackup="true" android:icon="@mipmap/ic_launcher" android:label="@string/app_name" android:supportsRtl="true" android:theme="@style/AppTheme">
        <activity android:name=".MainActivity">
            <intent-filter>
                <action android:name="android.intent.action.MAIN" />
                <category android:name="android.intent.category.LAUNCHER" />
            </intent-filter>
        </activity>
    </application>

</manifest>
Here we declare all main building blocks of Android applications, such as Activities. You can have as many Activities in the .java files in your project as you like, but as long as you don't declare them here, they won't be usable. The example file says, that:
- the main application package is
io.github.adamjodlowski.playground - the application has one activity
- the Java class for that activity containing the application logic is
[io.github.adamjodlowski.playground].MainActivity[.java] - the
<intent-filter>section says, that this activity should be the entry point to the entire application and should be accessible through the system application launcher
The second configuration file responsible for the build process and managing third party dependencies is /app/build.gradle:
apply plugin: 'com.android.application'

android {
    compileSdkVersion 23
    buildToolsVersion "23.0.2"

    defaultConfig {
        applicationId "io.github.adamjodlowski.playground"
        minSdkVersion 15
        targetSdkVersion 23
        versionCode 1
        versionName "1.0"
    }
    buildTypes {
        release {
            minifyEnabled false
            proguardFiles getDefaultProguardFile('proguard-android.txt'), 'proguard-rules.pro'
        }
    }
}

dependencies {
    compile fileTree(dir: 'libs', include: ['*.jar'])
    testCompile 'junit:junit:4.12'
    compile 'com.android.support:appcompat-v7:23.1.1'
}
Hopefully, you can guess what those properties are. One thing we didn't mention is the targetSdkVersion 23 which means that although the minSdkVersion is equal to 15, new platforms running our application should not try to backport default behaviors to level 15. Instead, they should provide behaviors defined for level 23, for example, default visual styles of built-in system widgets (buttons, alert dialogs, etc.).
The Dependencies section contains third party libraries built using Gradle Build System; you'll need to add every custom library that your app depends on there. Our MainActivity can extend the AppCompatActivity because we include AppCompat library in our dependencies.
Summary
In this tutorial, you learned how to configure a fresh installation of the Android Studio, setup an example project, configure and run the emulator, make changes to source code and successfully run your application on the Android emulator.
The source code for this tutorial can be found on GitHub.
-
Android applications are sandboxed and usually don't interact directly with the underlying operating system or hardware. ↩︎
-
This is not true anymore, thanks to the Support Library and feature backporting. However, it is a default case if we don't use those additional tools. ↩︎
-
dp stands for Density Independent Pixels and is the default and only correct way of defining margins, sizes, etc. in Android. You can think of it as pixels relative to the density of a particular physical display which may vary. ↩︎
-
findViewById returns View which is a superclass to the TextView, Button, etc. We need to operate on a more concrete type, so we perform the typecasting. ↩︎
SHARE:


