
Recently Facebook launched Messenger Platform with support for developing our very own Bots. They can potentially create entirely new ways of interacting with businesses by providing automated ordering, notifications, helpdesk functionalities and so on. Rich API allows to efficiently process messages and respond with images, links, call-to-action buttons, even direct payments.
This tutorial will show you how to setup and deploy a simple Facebook Messenger Bot, using the Messenger Send/Receive API. We're going to write a Node application, host it on Heroku and set everything up using our Facebook account.
The Messenger Platform has just been published and not every feature advertised is generally available yet. Please refer to the documentation to stay up-to-date.
Bot App Setup
We're going to need a server application accessible from the Internet over HTTPS — the simplest way to do that is to use Node and Heroku, but you can set up your own server in any technology stack you like.
Install Node and create application
Install Node; this will provide node and npm commands in your terminal. Create the project directory and setup server application:
$ mkdir testbot
$ cd testbot/
$ npm init
The command npm init will display a wizard in order to configure the app. Install most useful Node packages by issuing the command:
$ npm install express body-parser request --save
This will include the dependencies in package.json, so Heroku can resolve them upon deploy. Open that file and add the start field in the scripts section that tells Heroku how to run our app:
{
  "name": "testbot",
  "version": "1.0.0",
  "description": "TestBot Server App",
  "main": "index.js",
  "scripts": {
    "test": "echo \"Error: no test specified\" && exit 1",
    "start": "node index.js"
  },
  "author": "Adam Jodlowski",
  "license": "ISC",
  "dependencies": {
    "body-parser": "^1.15.0",
    "express": "^4.13.4",
    "request": "^2.72.0"
  }
}
Create the index.js file in your project's root directory:
var express = require('express');
var bodyParser = require('body-parser');
var request = require('request');
var app = express();

app.use(bodyParser.urlencoded({extended: false}));
app.use(bodyParser.json());
app.listen((process.env.PORT || 3000));

// Server frontpage
app.get('/', function (req, res) {
    res.send('This is TestBot Server');
});

// Facebook Webhook
app.get('/webhook', function (req, res) {
    if (req.query['hub.verify_token'] === 'testbot_verify_token') {
        res.send(req.query['hub.challenge']);
    } else {
        res.send('Invalid verify token');
    }
});
The first GET handler is only there to make sure the server is up and running when you visit the app's web address.
The second GET handler is used by Facebook to verify our server app as the designated one to handle Messenger Bot integration. Please note that example code uses testbot_verify_token as a verify token which we'll need later.
Create git repository
Create a .gitignore file that ignores the local modules directory:
node_modules/
Initialize repository and commit files:
$ git init
$ git add .
$ git commit -m 'Register Facebook Webhook'
Setup Heroku
Create an account if you don't have one, install Heroku Toolbelt, log in to the tool, create the app and push the code to the server:
$ heroku login
$ heroku create
Creating app... done, stack is cedar-14
https://calm-plains-XXXXX.herokuapp.com/ | https://git.heroku.com/calm-plains-XXXXX.git
$ git push heroku master
https://calm-plains-XXXXX.herokuapp.com/ deployed to Heroku
Heroku creates our web app under given URL and deploys it to the server after a successful git push. Visit the provided link to verify, that your app actually works.

Facebook Setup
Create Facebook Page
This is used as the identity of our bot — for our users, chatting with the bot looks exactly like writing messages to an ordinary Page.
You can use an existing page or create a new one. Log in to Facebook and go to Create a Page website:
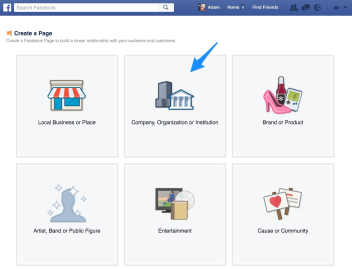
Click on one of the page types. An example setup could be:
- Company, Organization or Institution type
- Internet/Software category
- TestBot company name (this is official Page name)
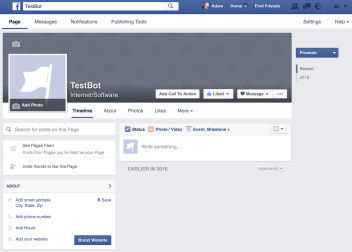
Next steps are optional, so you can skip them for the purpose of this tutorial.
Your test Page is now ready:
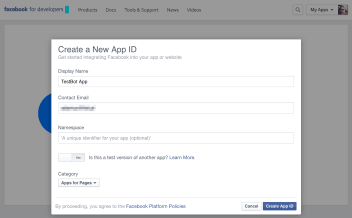
Create Facebook App
This is used for setting up your Facebook Application, registering callbacks and submitting for approval. Go to Add a New App page, click the basic setup link below the app icons and fill in the form, select Apps for Pages as a category.
Click Create App ID and you should be taken to the app dashboard. In the Product Settings, Add Product section, click on Get Started with Messenger.
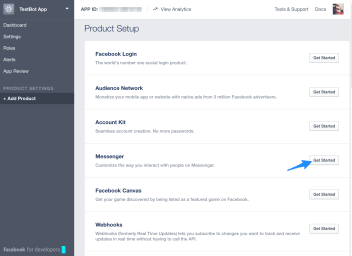
If your Facebook dashboard looks different from the screenshots, you will find these settings in the current App Dashboard under the Messenger Tab.
You can deploy bots in the test environment, but they need to be officially verified in order to be publicly accessible. You can do this in the App Review section of app dashboard.
Generate the Page Access Token and Setup a Webhook
A webhook is a callback interface from Facebook to your server that allows us to receive messages sent via Messenger to our Page, as well as metadata and lifecycle events.
In the Messenger tab of your Facebook application, choose your test page in Token Generation, authorize the app in order to generate the PAGE_ACCESS_TOKEN and save it somewhere — we'll need it soon.
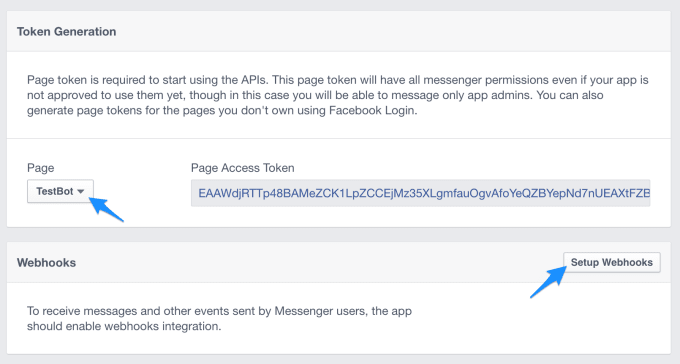
In the Webhooks section click on Setup Webhooks, paste your application's webhook URL (HTTPS is required), custom verify token (defined in server code) and select all the available checkboxes. Clicking Verify and Save will make a GET call to your server, so make sure it's working.
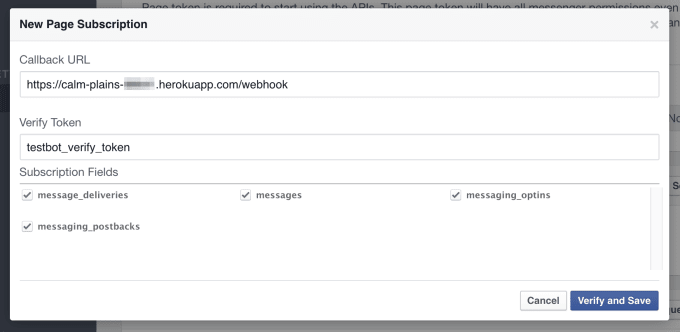
Webhook needs to be accessible via HTTPS, so you're going to need a certificate for your domain if you're deploying to your own server. It's easy to do with nginx and Let's Encrypt, but it's outside of the scope of this tutorial.
Subscribe your custom App to the Page
You need to subscribe your custom webhook to the Page events by issuing a POST request and providing the PAGE_ACCESS_TOKEN generated in the previous section. The simplest way to do it is to use curl from your terminal:
$ curl -X POST "https://graph.facebook.com/v2.6/me/subscribed_apps?access_token=PAGE_ACCESS_TOKEN"
You should get a success response:
{"success": true}
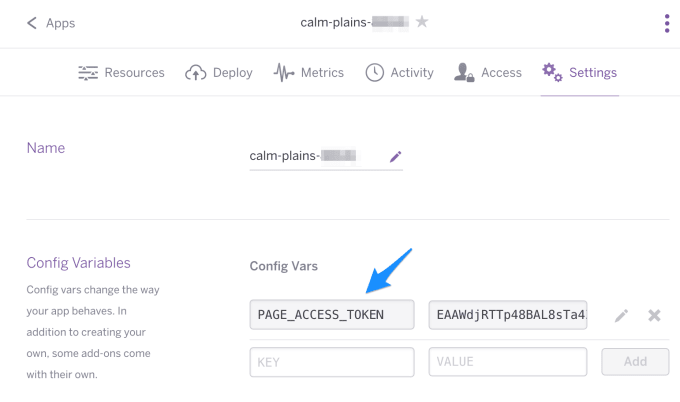
Set the page access token in Heroku
Go to you app's Settings and set the Config Variable PAGE_ACCESS_TOKEN to the value generated previously:
Create an echo bot
If all went well so far, we have a working bot server published and accessible over HTTPS, webhook is registered, and we're ready to make the bot do some actual work now.
In order to receive messages, we need to register a POST handler that loops over messages. Add this function call at the bottom of index.js file:
// handler receiving messages
app.post('/webhook', function (req, res) {
    var events = req.body.entry[0].messaging;
    for (i = 0; i < events.length; i++) {
        var event = events[i];
        if (event.message && event.message.text) {
            sendMessage(event.sender.id, {text: "Echo: " + event.message.text});
        }
    }
    res.sendStatus(200);
});
It goes over message objects found in messaging property (they can be batched in one webhook call), and if there's a message text available, it sends it back using the sendMessage function, which you should paste into code as well:
// generic function sending messages
function sendMessage(recipientId, message) {
    request({
        url: 'https://graph.facebook.com/v2.6/me/messages',
        qs: {access_token: process.env.PAGE_ACCESS_TOKEN},
        method: 'POST',
        json: {
            recipient: {id: recipientId},
            message: message,
        }
    }, function(error, response, body) {
        if (error) {
            console.log('Error sending message: ', error);
        } else if (response.body.error) {
            console.log('Error: ', response.body.error);
        }
    });
};
As you can see, we need the recipient ID, message object and the page access token to authorize every request.
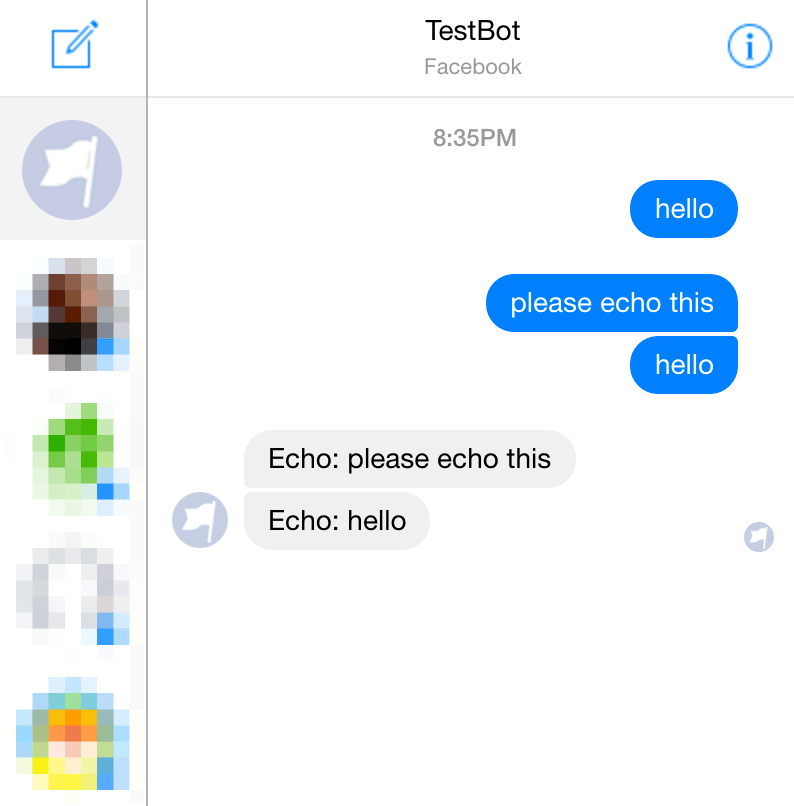
Save index.js, commit & deploy to Heroku and write the message to your Facebook Page. Then, see if it works:
$ git add .
$ git commit -m 'Create Echo Bot'
$ git push heroku master
If the bot is working properly, you should see your messages echoed back:
Reply with rich messages
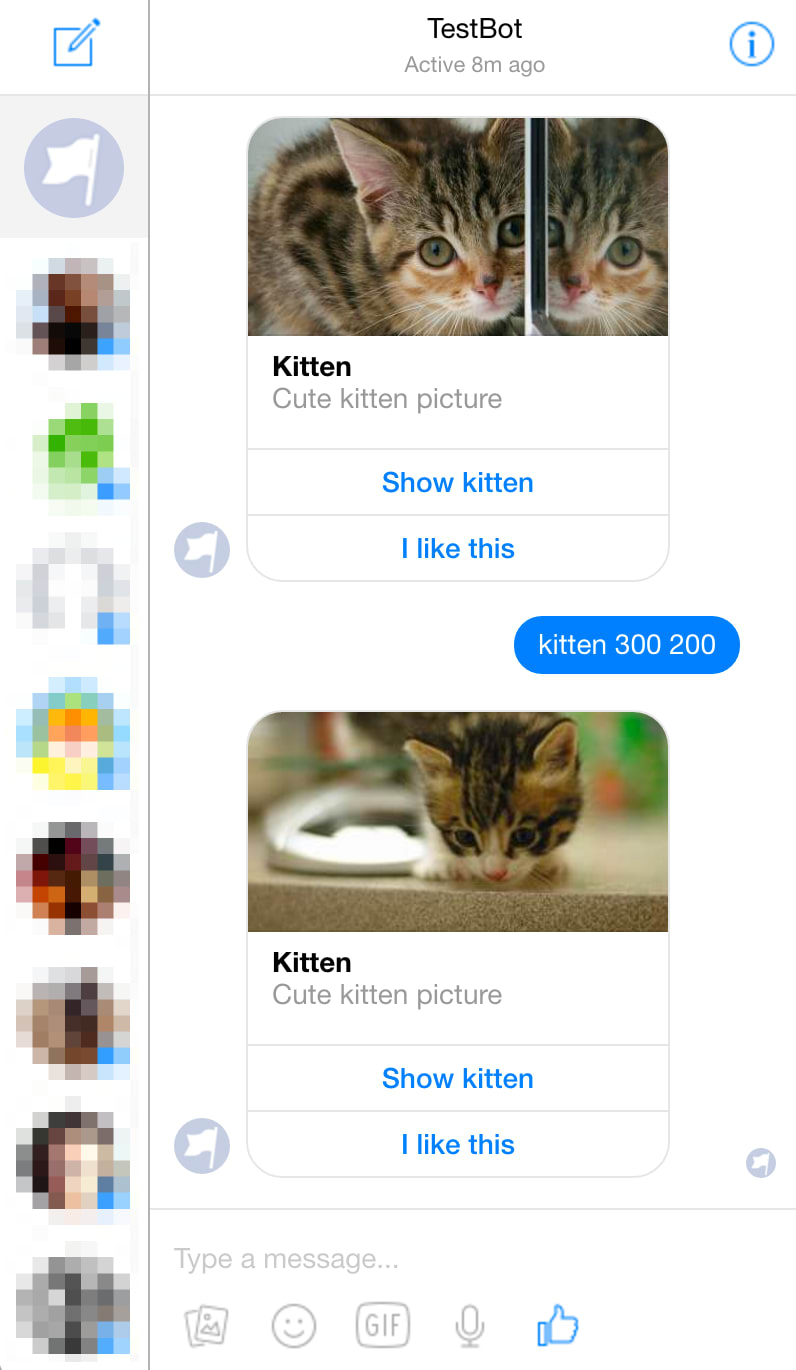
The Send/Receive API allows us to send (and receive) rich messages containing images and buttons with custom calls-to-action. Those are called Structured Messages, and the best way to explain how they work is to see them in action. Let's add a function that's going to send back pictures of kittens in response to user messages:
// send rich message with kitten
function kittenMessage(recipientId, text) {

    text = text || "";
    var values = text.split(' ');

    if (values.length === 3 && values[0] === 'kitten') {
        if (Number(values[1]) > 0 && Number(values[2]) > 0) {

            var imageUrl = "https://placekitten.com/" + Number(values[1]) + "/" + Number(values[2]);

            message = {
                "attachment": {
                    "type": "template",
                    "payload": {
                        "template_type": "generic",
                        "elements": [{
                            "title": "Kitten",
                            "subtitle": "Cute kitten picture",
                            "image_url": imageUrl ,
                            "buttons": [{
                                "type": "web_url",
                                "url": imageUrl,
                                "title": "Show kitten"
                                }, {
                                "type": "postback",
                                "title": "I like this",
                                "payload": "User " + recipientId + " likes kitten " + imageUrl,
                            }]
                        }]
                    }
                }
            };

            sendMessage(recipientId, message);

            return true;
        }
    }

    return false;

};
If the user's message has the structure of kitten size size, this function will respond with a card containing kitten picture of requested size, the link to the original image, and a call-to-action button (more on that in next section).
Modify the message-receiving loop to accommodate this new function; the incoming message will still be echoed if it doesn't request a kitten.
if (event.message && event.message.text) {
    if (!kittenMessage(event.sender.id, event.message.text)) {
        sendMessage(event.sender.id, {text: "Echo: " + event.message.text});
    }
}
Deploy code to Heroku and test.
Receive postback calls
Our rich kitten messages include a postback call-to-action. Clicking on the I like this button is going to call our server with custom data that we've included in the original message as a payload in the postback type. All we need to do now is handle that event in the server code — modify our main handler loop and deploy the code again:
if (event.message && event.message.text) {
    if (!kittenMessage(event.sender.id, event.message.text)) {
        sendMessage(event.sender.id, {text: "Echo: " + event.message.text});
    }
} else if (event.postback) {
    console.log("Postback received: " + JSON.stringify(event.postback));
}
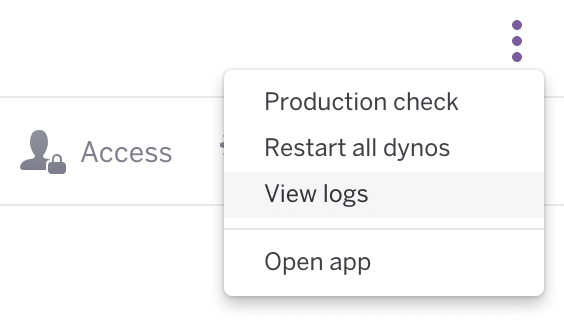
In a real-life application, you would react accordingly, but we're just printing the postback payload to the console. Go to your Heroku dashboard and then View logs:
Everything seems to work okay:

Summary
You have successfully created and deployed your very own Facebook Messenger Bot. It's certainly a lot of fun to play with natural language processing and automation, which are exciting fields of computer science. You can also try out bot engines which can speed up and simplify the process of creating real-life applications, such as Wit.ai or api.ai.
The source code for this tutorial can be found on GitHub.
SHARE:


